Guide
How to Add Fonts to Photoshop
The image-editing software tool Adobe Photoshop is one of the most popular in the world, and it is used by both beginners and pros alike. A popular feature of the programme is the ability to add text to images and photos, and it provides a large variety of fonts in addition to those already installed on your computer. Adding fonts to Photoshop is a simple process that requires just that the typefaces be saved to your computer’s hard drive; the application will take care of the rest of the work.
Read Also: 4 Photoshop Tricks to Make Design Process Faster
How To Add Fonts on Windows (All OS)
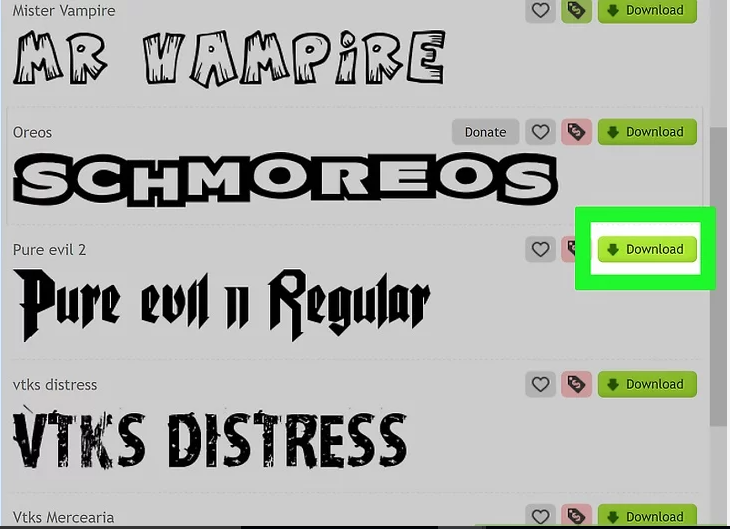
1. Downloading fonts from the internet is really simple. You may look for “free fonts” on the internet and then just click on “download” to obtain the fonts you desire. There are hundreds of websites that provide fonts for purchase on the internet, and the first page of your search results should generally contain safe and numerous selections.
Fonts are also available on CDs, which may be purchased at any computer store.
- It is normally simplest to store all of your typefaces into a single folder on your computer’s desktop, which makes them more easily accessible. The location of the fonts isn’t important, so long as you remember where you acquired them from.
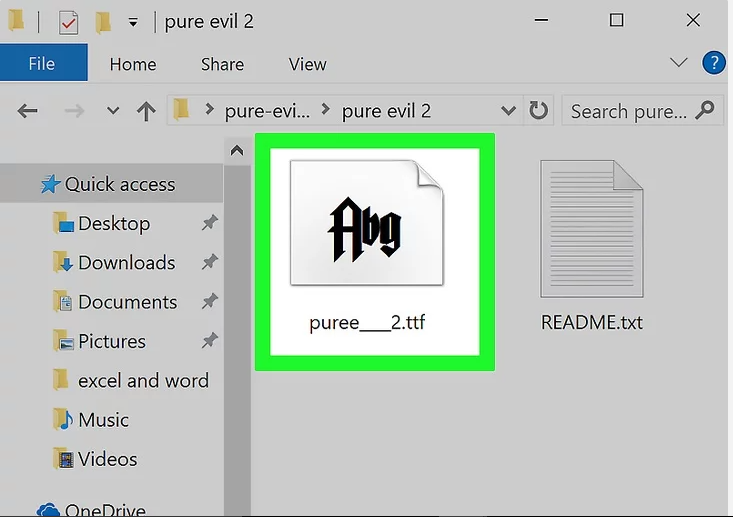
2. To view the typefaces, open a new window. It makes no difference which version you’re running. Even Windows XP, which is no longer maintained or gets updates, has the ability to install fonts if the appropriate drivers are installed. If they are contained within a.ZIP file, right-click on the file and select extract. Then, by looking at the extension, you may discover the typeface itself (the . after the file). .otf and.ttf are the file extensions for Photoshop typefaces, respectively.
- .pbf
- .pfm[1]
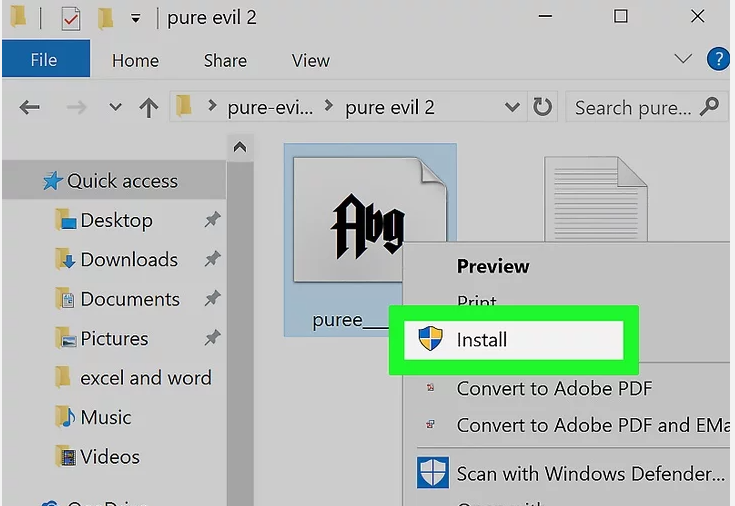
3. Install the font by selecting it with the right click of your mouse. In the event that this option is accessible, you’re in luck: everything has already been installed! You may even use the Ctrl-Click or Shift-Click keyboard shortcuts to choose and install multiple applications at the same time.
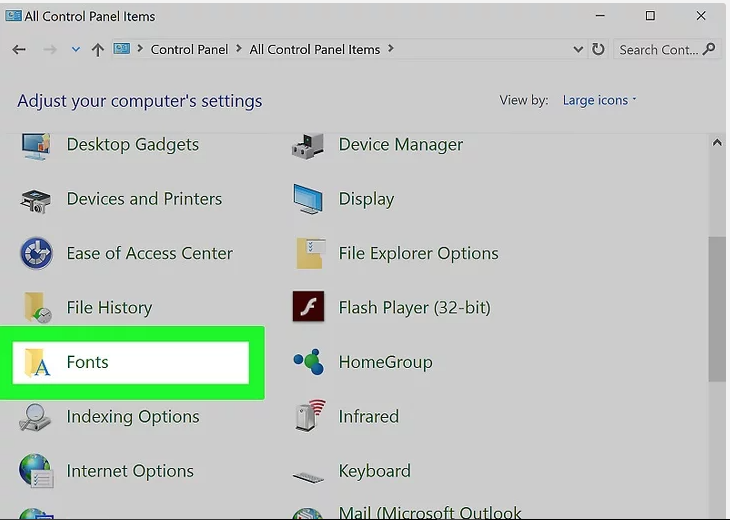
4. If you don’t have a “Install” option for fonts, you can add them using the Control Panel. Although certain machines would not allow for the basic installation, adding a different font is still a straightforward process. Control Panel may be accessed by selecting it from the Start Menu. From there, you may do the following:
- Select “Appearance and Personalization” from the drop-down menu (Note: You skip this step in Windows XP).
- Select “Fonts” from the drop-down menu.
- Install a new font by selecting “Install New Font” from the context menu of the fonts list. (Please note that on Windows XP, this option is found under “File”).
- When you’re finished, select the typefaces you want and click “OK.”
How To Add Fonts on Mac OS X
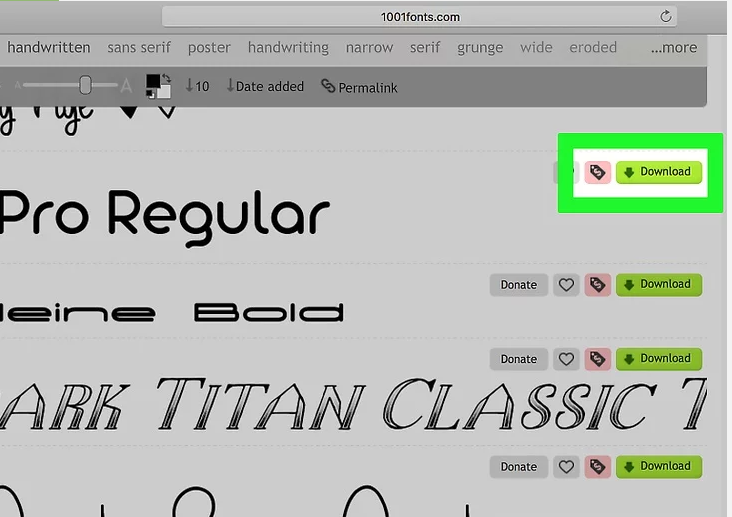
1. Locate and download the new typefaces you’ve chosen. Look for the phrase “Free Photoshop Fonts Mac” on the internet. When you do this, hundreds of alternatives will appear, all of which may be readily downloaded and added to your collection. Organize them in a new folder on your desktop, such as “Temporary Fonts,” to keep them safe until you need them.
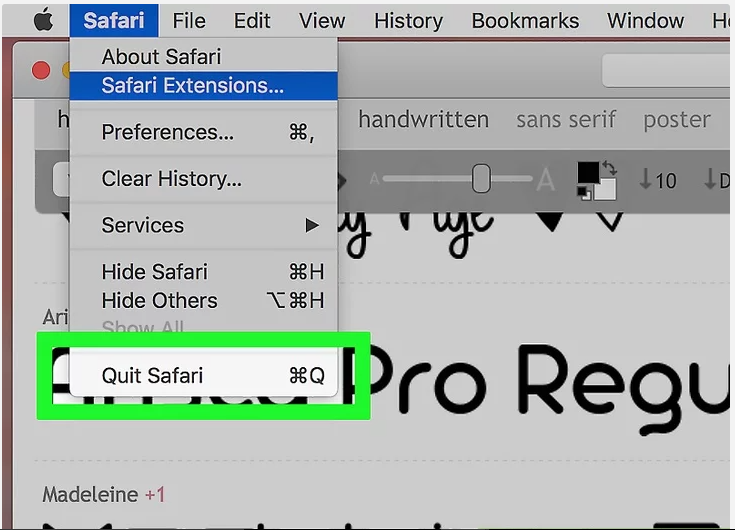
2. Close any open apps on your computer. Font support is available in the majority of programmes, which means they will search your Mac for fonts to utilize. As a result, be sure that everything is closed before you begin working since you want to install the fonts before the applications go seeking for them.
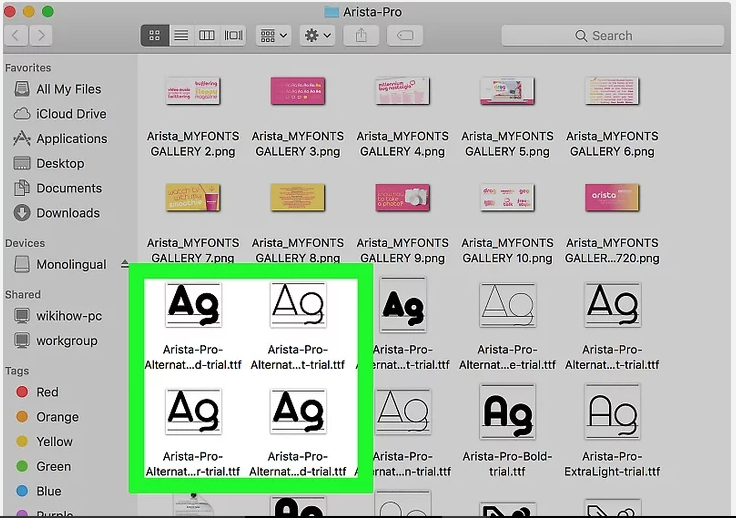
3. Typeface Book will appear when you double-click on the real font. The typefaces may be included within a ZIP folder, which you may access by double-clicking on it. From there, just double-click on the actual font to bring it up in your Font Book for further consideration. The following extensions are added at the end of fonts:
- .ttf
- .otf
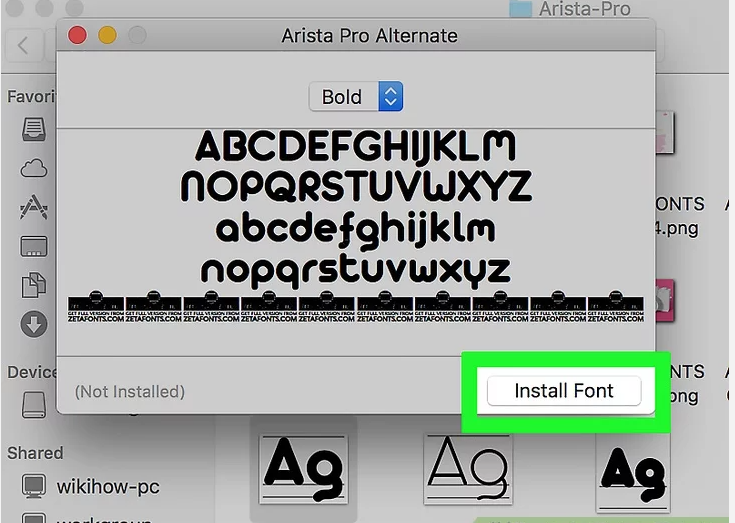
4. When the Font Book displays, select “Install Font” from the drop-down menu. Font Book should recognise your new.ttf or.otf file and open it. You may then install the font on your Mac by clicking on “Install Font” in the lower left corner of the screen. Photoshop will then locate it and handle the remainder of the process.
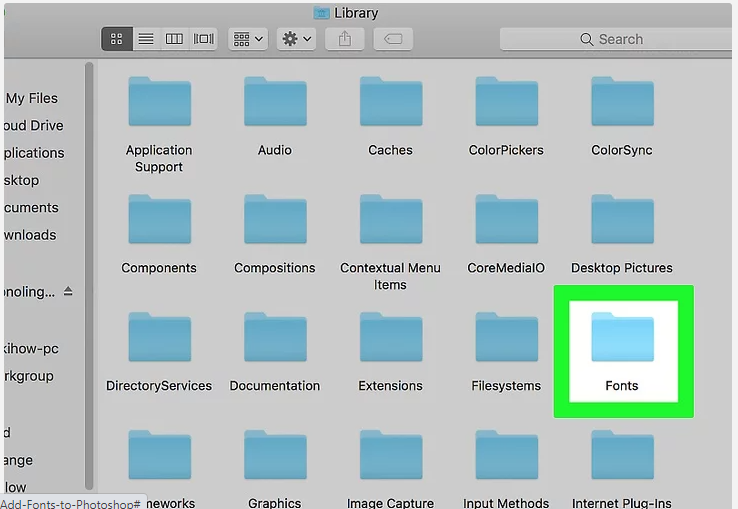
5. Alternatively, you may use the Finder to go to your font libraries and manually insert the fonts. There are two locations where you may save your typefaces, both of which are really simple to locate. You can even input the following string directly into the search bar substituting your own username for <username>, of course. If you have Administrative Privileges, go to the first of these two places; if you don’t, go to the second. Both, on the other hand, are effective.
- \s/Library/Fonts/
- \s/Users/<username>/Library/Fonts/
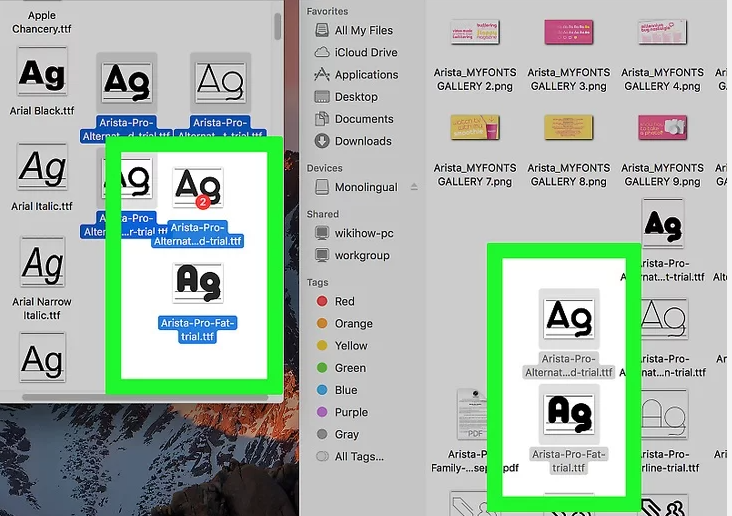
6. To make the new fonts active, simply click and drag them into the folder. You’re good to go as soon as they’re in the building. Reopen your apps so that you may begin working with your new typefaces in Photoshop.
video

Vampire Crawlers Coin Farming Guide

Forza Horizon 6 Performance: Why 60 FPS Is Still the Console Standard

Yoshi and the Mysterious Book (2026) – Full Completion Guide, Rewards & Secret Ending

How to Get Free Pets in Adopt Me: A Guide for Players

Roblox Username Generator – Create a Cool & Unique Username in Seconds
How to Get Free Pets in Adopt Me: A Guide for Players
Yoshi and the Mysterious Book (2026) – Full Completion Guide, Rewards & Secret Ending
Forza Horizon 6 Performance: Why 60 FPS Is Still the Console Standard


