Guide
How to Install a Second SSD
This article describes how to install a second solid-state drive (SSD) into a Windows computer. It describes how to obtain the necessary components, how to do a physical installation, and how to initialize the drive using Windows Disk Management. This information applies to Windows 10, 8.1, 8, and 7 operating systems.
Read Also: Is it Worth Upgrading? Best Internal SSD for PS4 & PS4 Pro
Preparation for Installing a Second SSD
Installing a second solid-state drive (SSD) in a Windows computer is a two-step procedure. The drive must first be physically installed inside the computer, and then it must be configured using the Windows Disk Management programme so that the operating system can detect and utilize it.
If you wish to install a second solid-state drive (SSD) in your computer, you’ll need the following components:
- In the computer, there is an open drive bay.
- On the motherboard, there is an open SATA data connector.
- A solid-state drive (SSD)
- A screwdriver is required to open the casing and secure the drive in its position within it.
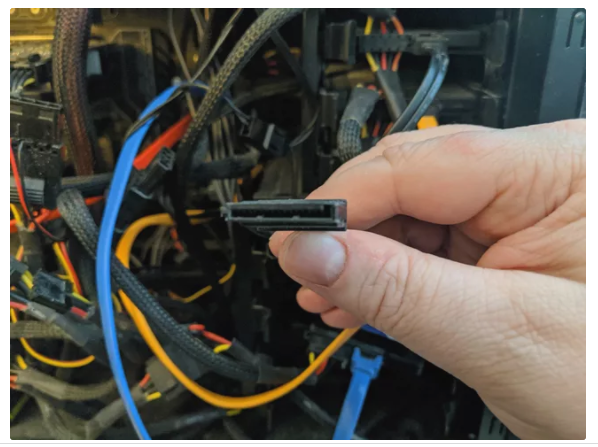
- A SATA data cable is what you need.
- There is a SATA power connection that is accessible.
- If the SSD will be put in a bay designed to accommodate a 5.25-inch drive, an adaptor will be required.
The most critical of these components are an open drive bay on your motherboard and an open SATA data connection on your motherboard. A large number of open bays are included with most computer cases, and the majority of motherboards include a large number of SATA connections for SSDs and peripherals such as Blu-ray drives, but you should double-check that you have enough space before purchasing a new SSD.
How to Install a Second SSD in Your Windows PC
Over time, files accumulate. Eventually, you’ll have to decide whether to delete outdated files or use a secondary storage device to keep your data safe. The quickest and most straightforward method of increasing storage on your PC is to simply connect an external drive to it. However, if your computer case has enough space and you have all of the essential components and equipment, you may add a second solid-state drive (SSD).
Here’s how to install a second solid-state drive (SSD) in a computer:
1. Remove the power cord from your computer and open the case.
2. Locate a drive bay that is not currently in use.
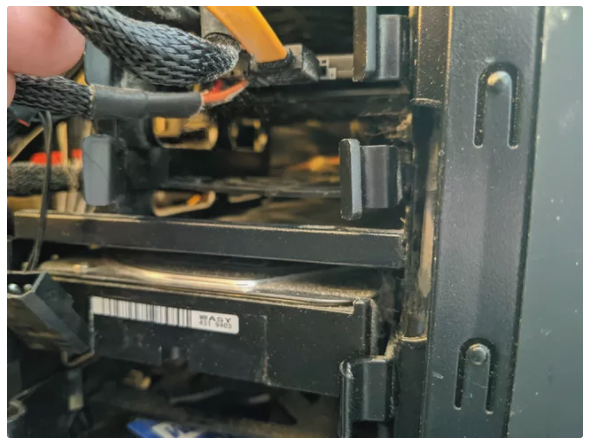
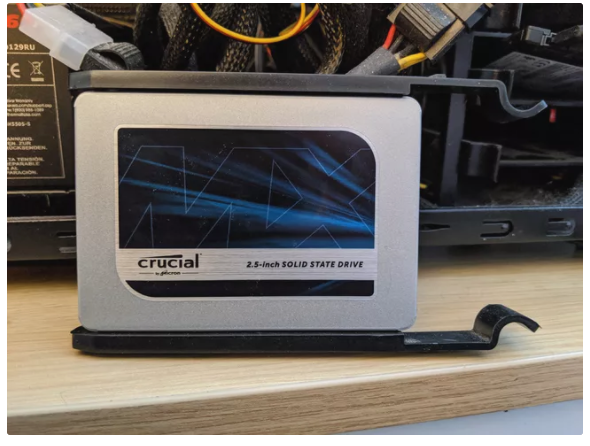
3. Remove the drive caddy, and install your new SSD into it.
4. Replacing the caddy in the drive bay is straightforward.
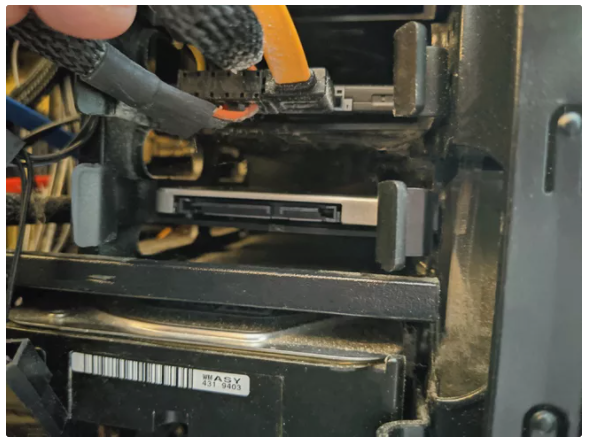
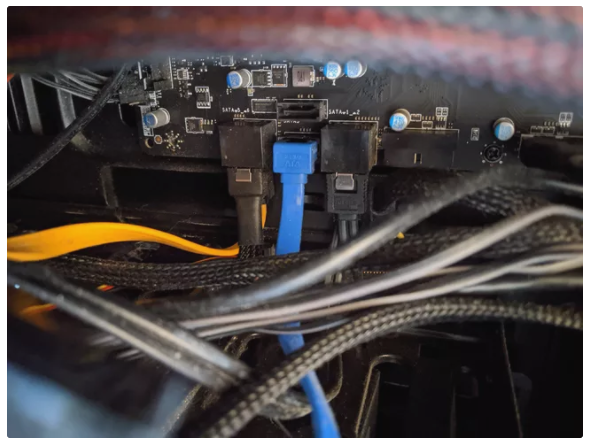
5. Locate a free SATA data cable port on your motherboard and connect a SATA data cable to it using the provided instructions.
6. Locate a free SATA power connector.
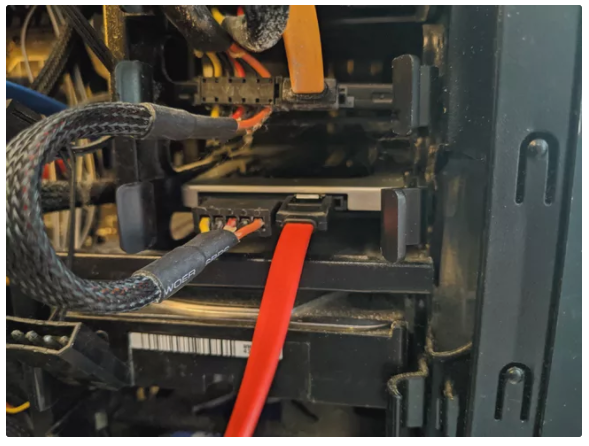
7. Connect your SSD drive’s power and data connections to the SATA power and data ports.
8. Make sure that all of the wires are properly positioned and that you haven’t accidently unplugged or knocked anything loose throughout the process.
9. Close your computer case and reconnect all of the cables before turning on your computer.
Video
FAQS
Can you just add SSD to PC?
If your computer currently has an SSD, it is possible to update it to a larger, faster SSD model by purchasing an SSD upgrade kit. As an alternative to SATA-based hard drive replacements, certain later-model PCs can be replaced with M. 2 SSDs, which are more like RAM chips than hard drives and are smaller in size.
Does SSD need power supply?
HDDs feature mechanical elements that require more power to operate than other types of storage devices. The memory cells on an SSD are stationary, and there are no moving elements in the device. So, sure, solid-state drives (SSDs) do require less electricity.

Vampire Crawlers Coin Farming Guide

Forza Horizon 6 Performance: Why 60 FPS Is Still the Console Standard

Yoshi and the Mysterious Book (2026) – Full Completion Guide, Rewards & Secret Ending

How to Get Free Pets in Adopt Me: A Guide for Players

Roblox Username Generator – Create a Cool & Unique Username in Seconds
How to Get Free Pets in Adopt Me: A Guide for Players

Grow a Garden Recipes in Roblox: Guide to Cook (Donuts, Sushi, Pie, Pizza & More!)
Roblox Username Generator – Create a Cool & Unique Username in Seconds
Yoshi and the Mysterious Book (2026) – Full Completion Guide, Rewards & Secret Ending


