Gaming
How to Install OptiFine And Use It in Minecraft
A flexible application, OptiFine is something that many “Minecraft” players can’t fathom not having, especially while playing on a machine with limited processing power. An “Minecraft: Java Edition” optimizer is included, which allows computers with less memory and graphics cards with lower performance to play more smoothly in “Minecraft: Java Edition.”
As an added bonus, OptiFine provides access to an abundance of additional texture packs and HD shaders to help you make your game appear as amazing as it possibly can, as well as a few handy new gameplay aspects, such as the well-known “OptiFine Zoom.”
It differs from modifications in terms of how it is installed and executed, but it is similar in that it alters the appearance and functionality of the game. OptiFine may be installed and used in two different ways, depending on whether or not you wish to use it in conjunction with other modifications.
Read Also: Boat in Minecraft – How to Make
How to Install and Run OptiFine in ‘Minecraft’ Without Mods
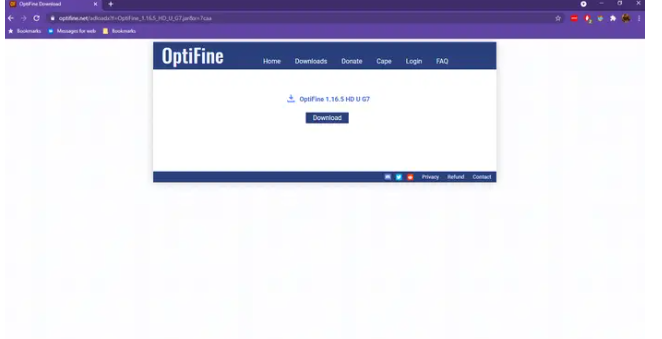
1. Open the OptiFine downloads page in a web browser of your choice and follow the instructions. If you aren’t running the most recent version of “Minecraft,” click “Show all versions” to locate and choose the most recent version of the game.
2. Select the desired version of OptiFine from the drop-down menu and click “Download.” If you are sent to an ad break page after a brief countdown, click “Skip” in the top-right corner of the screen.

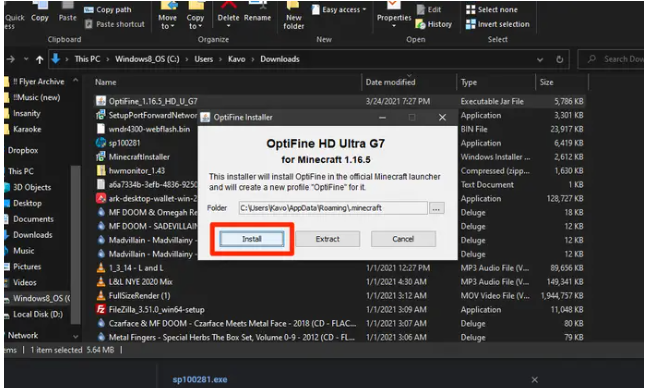
3. When you are brought to the OptiFine download page, click “Download” and store the file wherever you can find it. A warning regarding your download may be displayed by your browser and/or machine, which you may safely ignore if it appears.
4. Open the downloaded OptiFine file, which will be an executable.jar file, and run it to finish. Click “Install” once you have double-clicked the file to open the installer. A notification stating that OptiFine has been successfully installed should appear at this point.
5. Launch the Minecraft Launcher and make sure that “OptiFine” is chosen from the drop-down menu to the left of the “Play” button. Once it is, press the “Play” button.
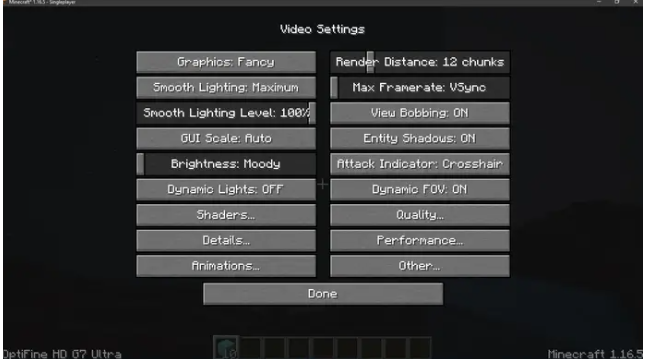
6. When “Minecraft” begins to load, go to the main menu and select “Options…”, followed by “Video Settings.” In order to determine if the OptiFine download was successful, look for additional menu items such as “Shaders,” “Details,” and “Animations.”
How to Install and Run OptiFine to work with ‘Minecraft’ Mods
1. Complete the first three steps outlined above in order to download OptiFine. If you haven’t done so before, make sure you download Minecraft Forge.
2. Launch the Minecraft Launcher application on your device.
3. To begin, pick “forge” from a drop-down option near the green start button, then click “Play” to commence the game.
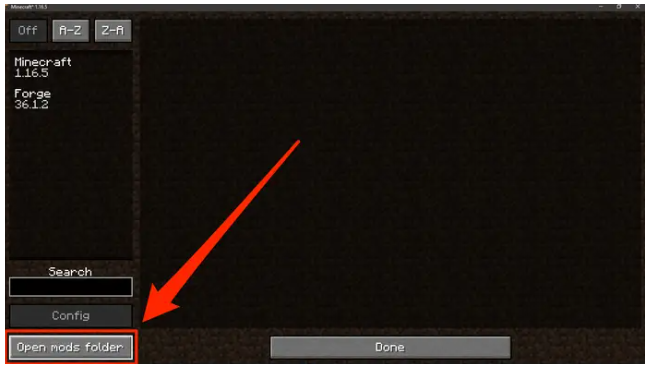
4. The “Mods” option will appear in the Minecraft main menu, which you should choose. Select “Open modifications folder” from the drop-down menu after clicking it. As soon as Java is launched, the modifications folder produced by Forge will be instantly opened.
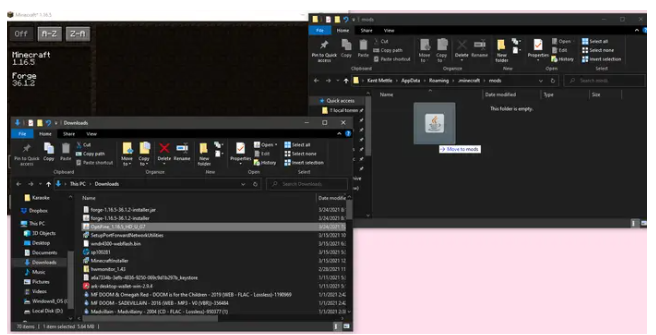
5. Drag and drop the OptiFine.jar file that you downloaded into the modifications folder where it should appear.
6. Exit “Minecraft” and relaunch it, this time with the Forge installation version running again. Now, when you open the game, you should see the notice “Found 2 modifies to load” pass by, indicating that the game has been updated to include OptiFine.
7. The same as previously, you may double-check that it was properly installed by following these steps: By navigating to the main menu and selecting “Options…”, then “Video Settings,” you may adjust the video settings. If you see extra choices such as “Shaders,” “Details,” and “Animations,” this indicates that OptiFine has been installed on your computer.
Video

Top Cloud Mining Platforms in 2025: How Smart Mining Can Help Users Cope with the Turbulent Crypto Market

My Singing Monsters Free Diamonds, Coins, Gems & Food Guide

Brotato Best Builds: Top Strategies and Synergies for Every Playstyle in 2025

Poppo Live Free Coins and Diamonds – How to Get Them Without Paying

Who is Ash Trevino? Unveiling the Life, Career, and Influence of a Rising Star

Supervive Tier List: Best Characters Ranked for 2025

Warframe Tier List 2025 – Best Warframes Ranked for Every Mission Type

Andrew Fillipponi Biography: The Voice Behind Pittsburgh Sports Radio

UK Online Casinos Accepting US Players With No Deposit Bonuses