Apple
How to Share Your iCloud Storage

It’s possible that the free 5 GB of storage space that Apple gives its consumers won’t even be enough for one person, but it’s also possible that upgrading to 200 GB will be excessively large of a storage capacity. In the event that this is the case, you might want to think about renting out part of the space that you have for storage to other individuals. Utilizing the Family Sharing feature of iCloud will allow you to successfully complete this specific objective. A Family Sharing group has the option of sharing either the 200 GB or the 2 TB storage plan, and they are able to do so while still protecting the privacy of all of their individual files and photographs.
The following instructions will walk you through the process of setting up storage sharing with iCloud on any device that is capable of connecting with iCloud.
Read Also: How To Cancel iCloud Storage
How to Set up iCloud Storage Sharing on an iPhone or iPad
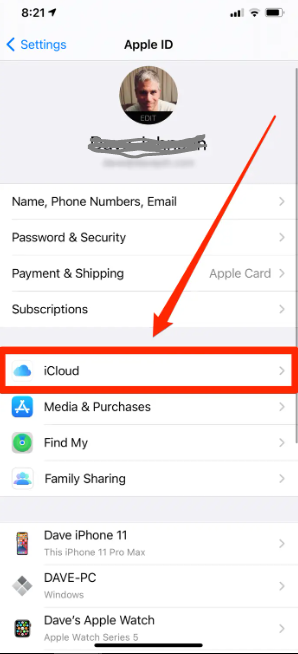
1. Launch the Settings app and select your account name from the menu that appears at the top of the screen.
2. Tap “Family Sharing.”
3. If you haven’t already done so, add yourself as the organizer of the Family Sharing account, and then hit the next button.
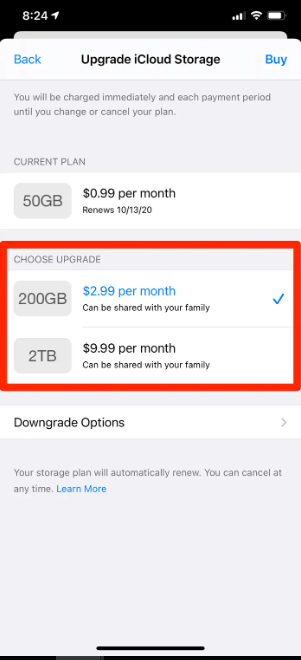
4. Select the “iCloud Storage” option, and then check to see whether you have a valid iCloud membership; you’ll need either 200 gigabytes or two terabytes of storage space.
5. Invite more family members by selecting the “Add Member” option and sending a text message invitation to each of the other family members. If they agree, their names will show below yours on this page once you have accepted the invitation.
6. Once you have this set up and added your family members, you will be able to add the other features of Family Sharing, such as making group purchases from the App Store.
How to Set up iCloud storage sharing on a Mac
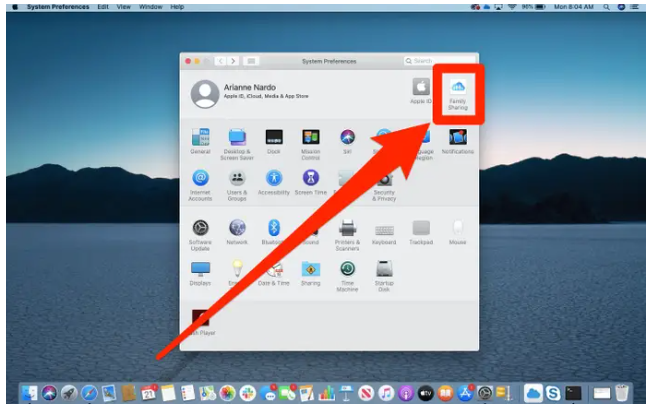
1. Navigate to the “System Preferences” menu by clicking the Apple icon located in the upper-left corner of the screen.
2. Navigate to the top-right corner of the screen and click “Family Sharing.”
3. If you haven’t already done so, add yourself as the organizer of the Family Sharing account, and then click the next button.
4. After reading the instructions, indicate whether or not you want other members of the family to be able to view your purchases and whereabouts.
5. Invite more family members to join your tree by selecting the “Add Family Member…” option and then typing in their email addresses in the respective boxes. If they agree, their names will show below yours on this page once you have accepted the invitation.
6. When this occurs, navigate to the iCloud sidebar, choose “iCloud Storage,” and check to see that you are subscribing to either the 200 GB or the 2 TB storage plan. If you are not, select “Upgrade” and choose a new plan from the drop-down menu.
How to Manage your family’s iCloud storage
After you have iCloud Family Sharing set up, you will always have the ability to monitor, alter, and improve the storage that is being shared.
1. Launch the Settings app on your iPhone or iPad, and then hit your account name at the top of the screen. If you are using a Mac, you may access the system preferences by clicking the Apple icon in the upper left corner of the screen and selecting “System Preferences…”
2. Tap “Family Sharing.”
3. Select “iCloud Storage” from the menu.
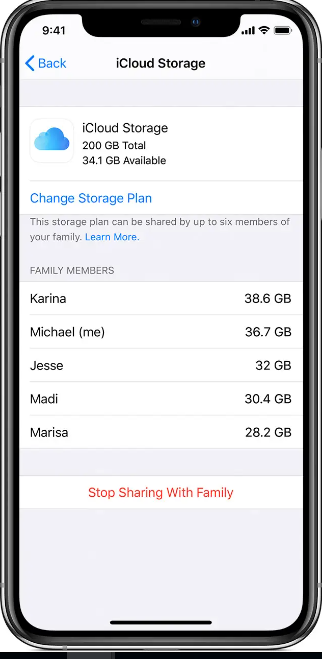
You are now able to view a list of all the members of your family along with the amount of iCloud storage that each of them is consuming. From this location, you are also able to adjust your plan or stop sharing.
Video

Roblox Username Generator – Create a Cool & Unique Username in Seconds

Grow a Garden Recipes in Roblox: Guide to Cook (Donuts, Sushi, Pie, Pizza & More!)

Job Opportunities in Dubai – 2026

Mr Bit at the SBC Awards Europe 2025: The Bulgarian Brand Setting New Standards in the European Gaming Industry

Dennis Rodman Net Worth 2026 – Everything You Need to Know

Bloxburg Neighborhood Codes 2026
Grow a Garden Recipes in Roblox: Guide to Cook (Donuts, Sushi, Pie, Pizza & More!)
Job Opportunities in Dubai – 2026
Dennis Rodman Net Worth 2026 – Everything You Need to Know


