Gaming
House Flipper 2 – How to Paint

House Flipper 2 demonstrates the transformative power of a fresh coat of paint, and your clients will undoubtedly value your hard work. In House Flipper 2, you can paint designated mission walls with a roller, obtain paint from quests, and improve your tools to paint more smoothly. In House Flipper 2, painting walls is an essential decorating ability. You can learn how to paint in House Flipper 2 by reading this article:
Read Also: House Flipper 2 – How to Make Money
What are the best Painting Practices?
Early on in the House Flipper 2 campaign, you will encounter clients who want you to paint certain walls a different color. This technique might not feel very natural at first. The right paint must be purchased, the area to be painted must be determined, and the paint must be put inside those lines. Your first job is to purchase the appropriate paint.

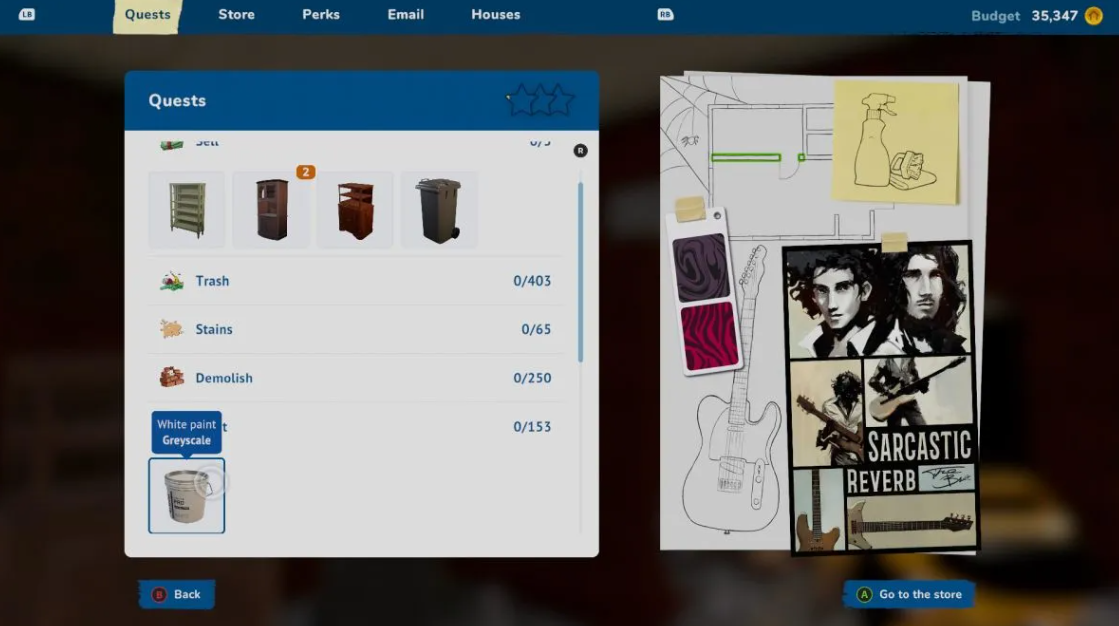
Most homes have a pail of paint for display, usually next to the wall the client wants painted. It might not be the ideal hue, though. Usually, I merely buy some paint of my own and sell that paint. All you have to do is select the pause menu to view your quests for the current space. The Paint assignment can be found by scrolling down; a number will show you the area that has to be painted.
Beneath it, there ought to be a paint bucket. Move the mouse pointer over that paint and click to bring up a larger bucket image. Next, buy the paint and place it on a clear surface nearby. Choose your brush or roller and dip it into the pail of paint after buying it. Usually, I begin with just one brush. As you get closer to the region that needs painting, an in-game signal in the form of a yellow grid should become visible.
Place your brush in one of the grid’s corners and click the corresponding button or key to set paint borders. Starting in one corner of the target region, you should go to the other diagonal corner. As you establish the paint borders, be careful to stay close to the wall you are painting. You will have to start over if you try to indicate an edge that is too far away from where you are standing.

Clearing the space is a good idea before attempting to paint a wall. Additionally, confirm that you have constructed any required extra walls inside the given area. Often, the game will ask you to paint a wall, but in the way is either furniture (such a cabinet) or a poster. Sometimes you can paint the appropriate area with a wide brush without having to move anything. Still, it’s better to err on the side of caution. I prefer to tidy a space before beginning any painting.
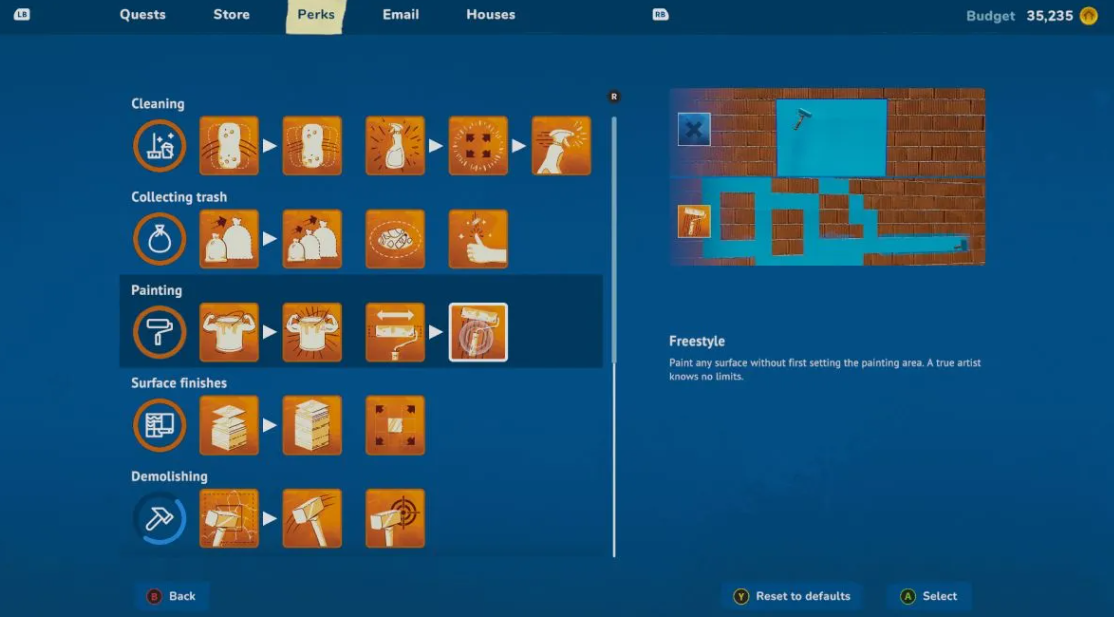
Never purchase furnishings for a space that hasn’t been painted yet. You receive benefits when you paint at different professions. You can paint more with less paint because to the first two advantages. The benefit of the Roller of Tomorrow is a considerably wider brush. In this manner, you may quickly fill the area. The benefit of Freestyle lets you paint without previously marking out your workspace. Still, I like to lay out my space with a little brush to begin.
How to Paint Walls
First things first, paint needs to be purchased. When you open your quest guide while on a mission, you’ll notice one or two paint options for purchase. Select the paint bucket of your choice and set it wherever on the floor of your painting room. After that, remove your paint roller. You must apply paint on the roller before you can begin painting.
To do this, click the bucket while holding the roller. Proceed to the wall that needs painting after that. These walls will be indicated in yellow on missions. It’s time for you to decide which area to paint. You can begin drawing a grid once you click anywhere on the wall. You won’t have to worry about going outside the lines since anything outside of the area you drag the grid across the wall to pick will not be painted.

To capture as much space as possible, starting at one corner and dragging the grid to the distant corner is advisable. To paint the wall while the grid is selected, just press the left mouse button over the chosen region. Paint the wall square by square by dragging the roller across it.
You will eventually run out of paint, so all you have to do is click the paint bucket once more to get more and resume painting. Use your improvements as soon as you receive them because as you advance, you’ll obtain benefits that will aid in painting, including a longer paint roller or longer-lasting paint.
FAQs
How do you build walls in House Flipper 2?
To create walls, simply utilize the bricks tool found in the pie menu. If the bricks aren’t visible for usage in the pie menu, you’ll need to finish more tasks before the tool to build walls becomes available.
Can you decorate outside in House Flipper?
Every house in the game may be fully customized on the inside and outside after you own one (that is, if you’re not just working on a job from an email). I just went and brought the DLC. Thank you. Wall panels and tiles are options for embellishing exterior walls. The Workshop has a ton of stuff that will improve the outside as well.
Is House Flipper 2 multiplayer?
No. In contrast to certain publications and rumors, House Flipper 2 does not have a multiplayer feature. More specifically, this implies that there is no method to link through a cooperative game mode or for two players to reside in the same game environment at the same time.
Is there an end to House Flipper?
You can only purchase each house that is offered when you first start the game. There is a game over and end credits scene that plays before the game returns to the main menu after you have purchased, flipped, and sold every house—aside from the one that serves as your office at that point.


