Guide
How to Add Voice Over to Google Slides: A Step-By-Step Guide
Over time, Google Slides has established itself as a legitimate competitor to PowerPoint. In addition to being straightforward to use, it facilitates seamless collaboration and provides a diverse range of templates, add-ons, and extensions. Even though Google Slides is a strong tool that is utilized by a wide range of individuals, it is lacking one important feature: a voice recorder. There will be instances when you choose to provide a recorded presentation rather than giving a live presentation, and in order to do so, you must be able to add audio to Google Slides in order to do so.
Furthermore, using a voice over in your presentation might be a terrific method to turn your presentation into a video for use in an online training session or workshop. As a result, we’ve put together this step-by-step guide to teach you how to include voice over into Google Slides. We’ll go through two distinct ways in this section, and you may pick and choose which one works best for your situation. At the end of the presentation, we’ll give some expert advice on how to improve the quality of your voice over and make your video presentation more interesting.
Let’s get this started.
Read Also: How to Draw on Google Docs
How to add voice-over to Google Slides
Google Slides is one of our favourite tools because it is completely free. Voice-overs, on the other hand, are not included in the app. Here’s a step-by-step tutorial on adding voice-over to Google Slides that can help you get started.
1. Develop your script and slides
Create a script for your performance. Then you’ll need to develop slides to go along with your script. Keep in mind that Google Slides requires a different audio file for each slide, so be sure to indicate the copy that you want to show on each slide.
Note: Using the “speaker notes” box at the bottom of the screen, you may place your script. However, whatever you write in the notes part of the file will be available to anybody who reads it once it has been shared with them.
2. Record your script for each slide
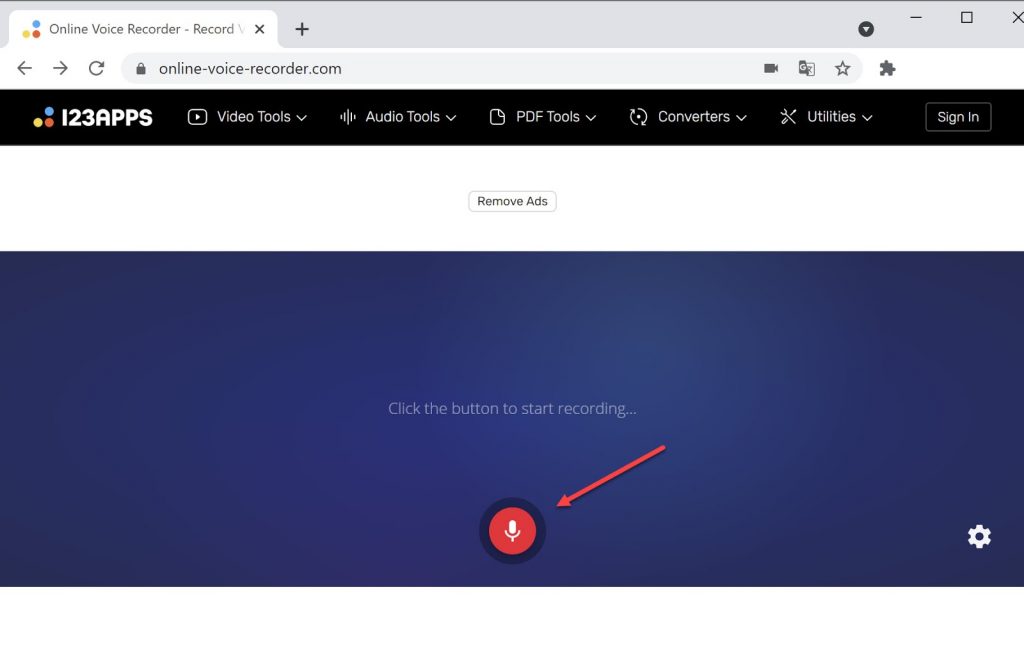
When recording audio, you can use Voice Recorder on a PC or Voice Memos on a Mac to accomplish your goal. We also propose Online Voice Recorder as an alternative.
Press the red record button to begin recording your script, one slide at a time. As you record, you’ll be able to view the audio wave in real time.
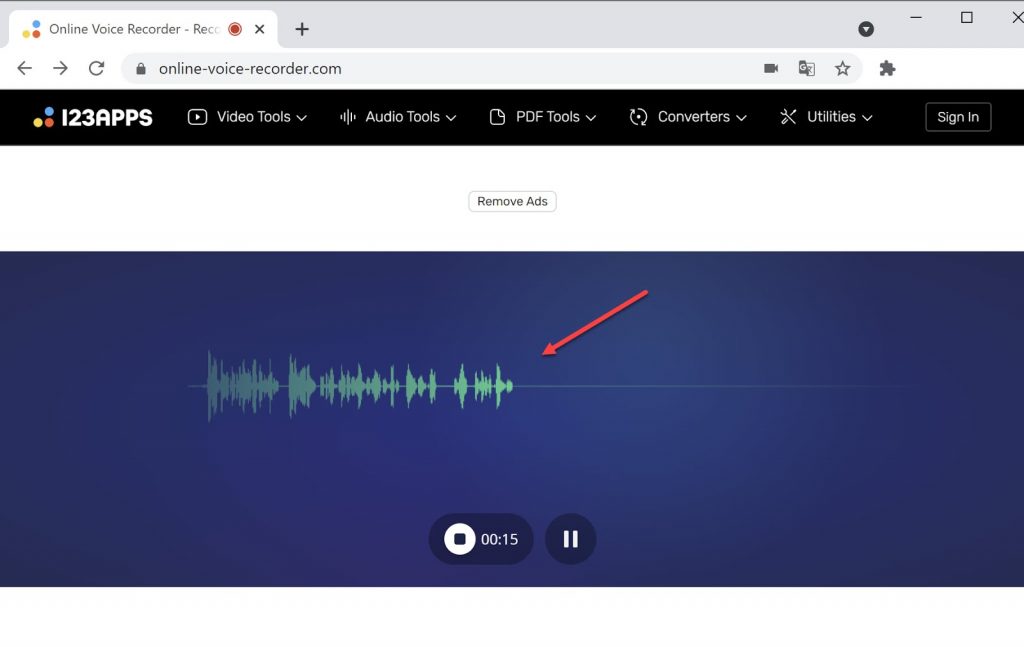
When you’re finished, press the stop button. You’ll be brought to a screen where you may make changes. Remove any dead air from the audio by trimming it. After that, click on the Save button.
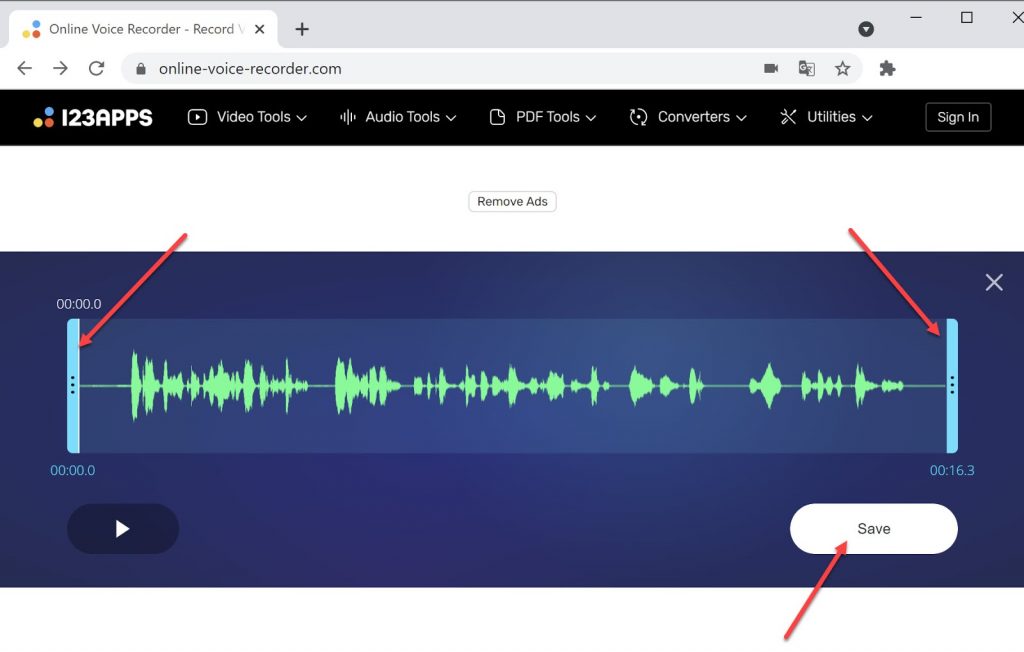
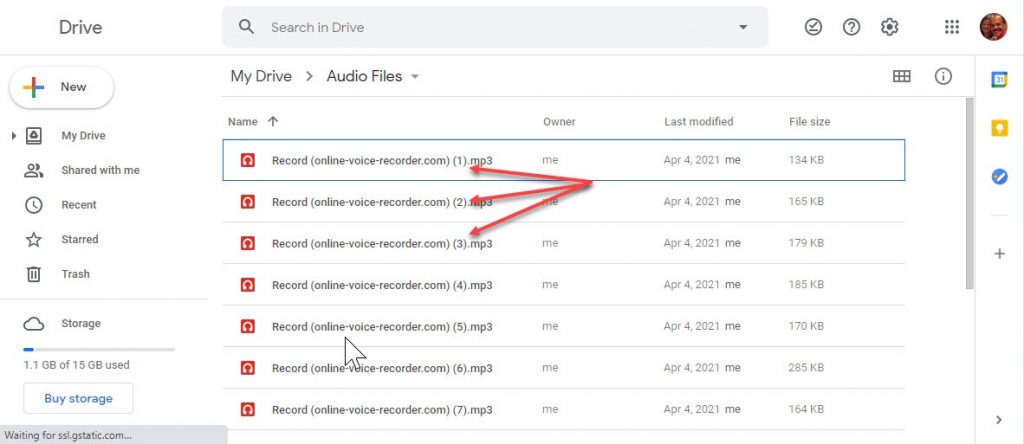
Create a recording for each slide. The saved files will be in your download folder, numbered sequentially.
3. Upload audio files to Google Slides
First, create a new folder for your audio clips in Google Drive.
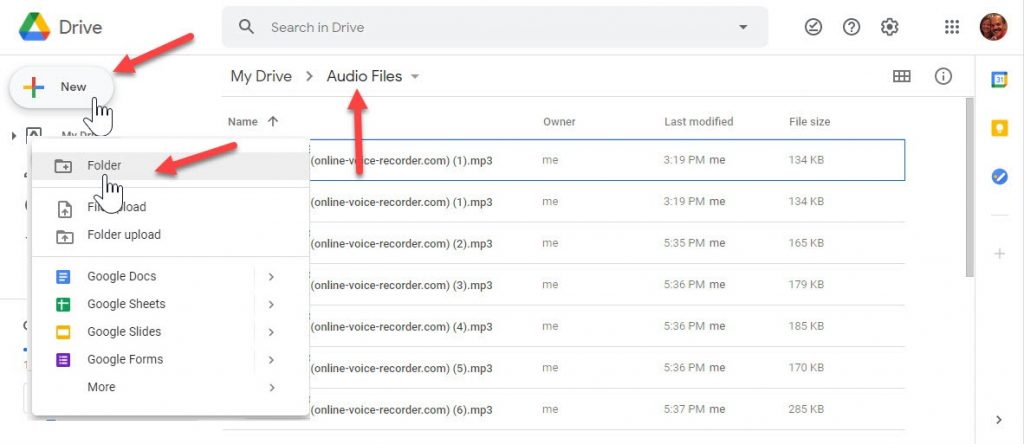
Upload the audio files you just created to this Google folder.
4. Add audio clips to your Google Slides presentation
Open the slide on which you wish to include audio in Google Slides and click on it. Insert > Audio is the next step. Choose the audio file that corresponds to the slide you’re working on.
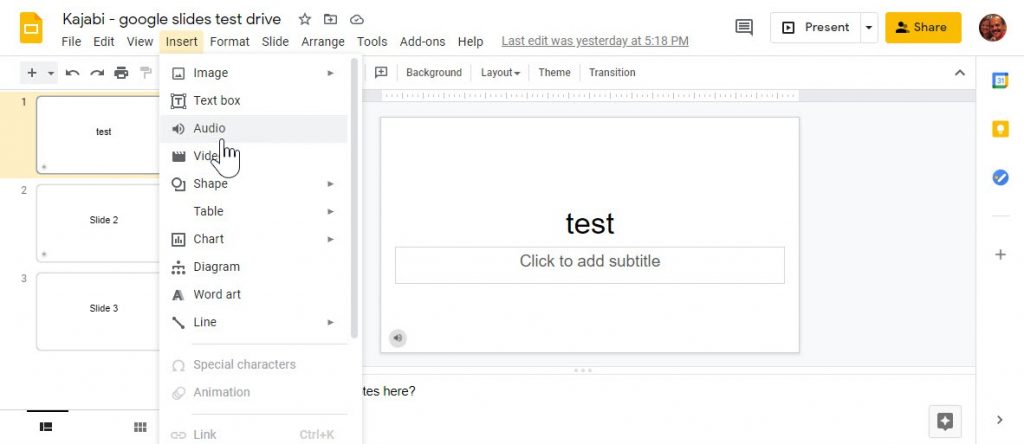
Immediately after inserting the audio clip, two things will occur:
1. A speaker symbol with a mini-player will appear on your slide, allowing you to listen to a preview of the audio. You have the ability to move the symbol wherever on the screen.
2. The format choices tab will be shown.
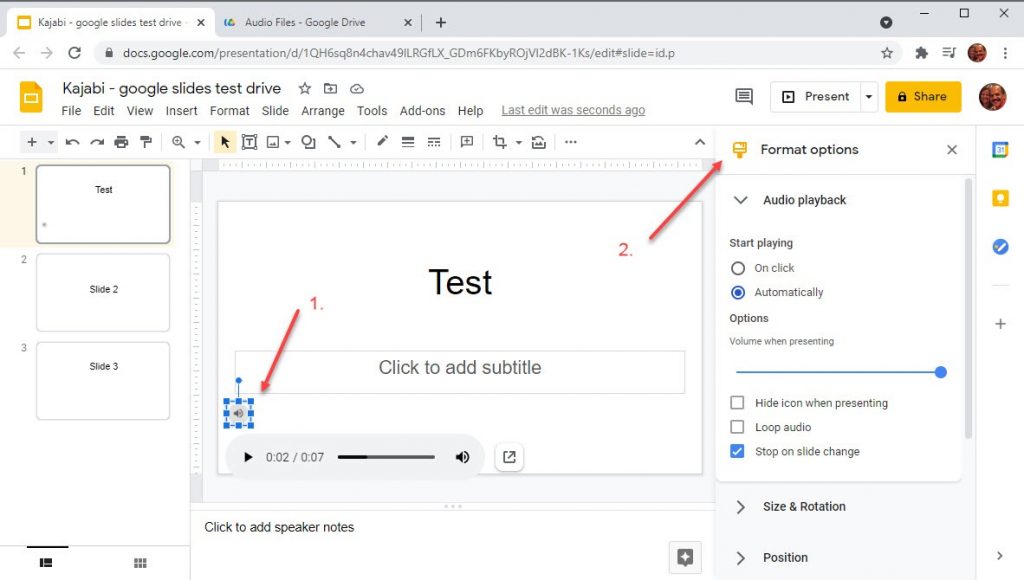
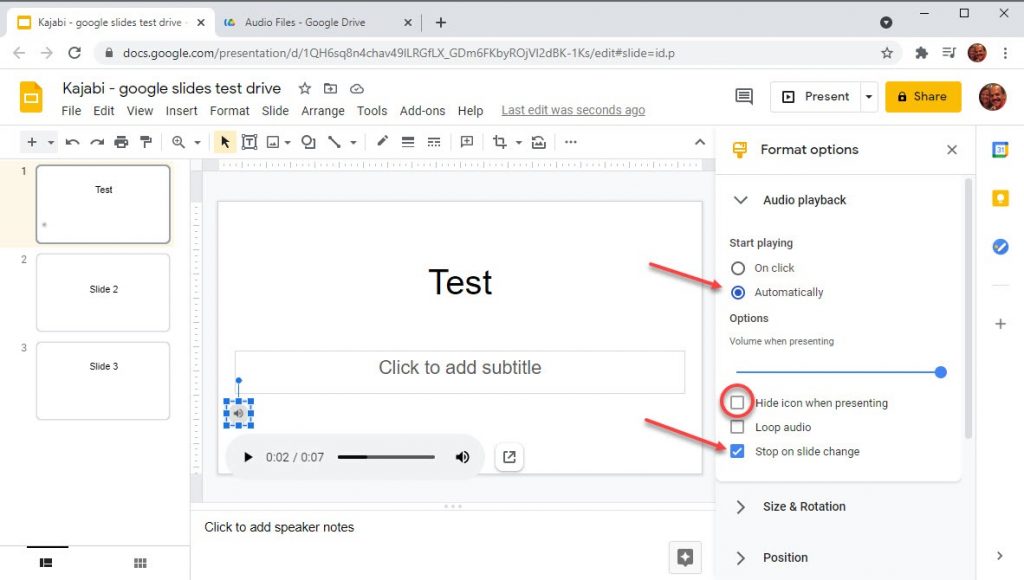
If you’re taking an online course, you can select to have the clip begin automatically. This will allow your students to go through the presentation without having to manually choose the audio icon at the bottom of the screen.
Select “Stop on slide change” from the drop-down menu. If this is not done, the audio will continue to play over the following slide.
Video

Roblox Username Generator – Create a Cool & Unique Username in Seconds

Grow a Garden Recipes in Roblox: Guide to Cook (Donuts, Sushi, Pie, Pizza & More!)

Job Opportunities in Dubai – 2026

Mr Bit at the SBC Awards Europe 2025: The Bulgarian Brand Setting New Standards in the European Gaming Industry

Dennis Rodman Net Worth 2026 – Everything You Need to Know

Bloxburg Neighborhood Codes 2026
Grow a Garden Recipes in Roblox: Guide to Cook (Donuts, Sushi, Pie, Pizza & More!)
Job Opportunities in Dubai – 2026
Dennis Rodman Net Worth 2026 – Everything You Need to Know


