Gaming
How to Record Gameplay on PC

For PC games, Windows 10 has a built-in facility for recording gameplay videos. YouTube or any other video-sharing site is a good place to post gaming footage. Alternatively, you may store the film on your computer and share it with your pals.
This is possible through the “Game Bar,” which is a component of the “Game DVR” function available through the Xbox app. Also included are customizable keyboard shortcuts for recording movies and taking screenshots on Windows 10.
Read Also: How to Use the PS5 DualSense Controller on a PC
Open the Game Bar
When you’re playing a game, hit the Windows Key + G to bring up the Game Bar. It will appear above the game you are now playing. After pressing Windows Key + G when Windows believes you are not playing a game, Windows will prompt you to confirm your decision before opening the game bar.
The game bar may only be shown if you are playing the PC game in windowed mode, so if you aren’t seeing it, try switching to windowed mode in the game’s settings.
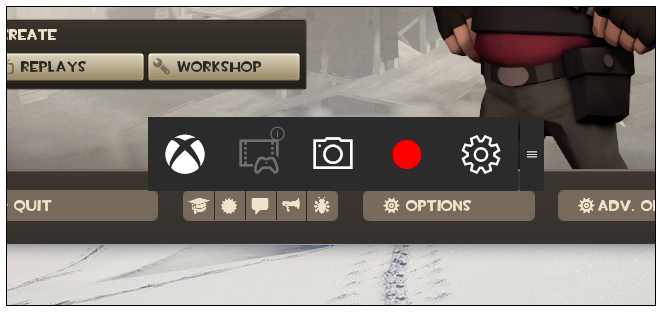
An icon for fast launching the Xbox software, enabling background recording, taking a screenshot, creating a gameplay video, and accessing settings may all be found on the Game bar.
Record a Gameplay Video
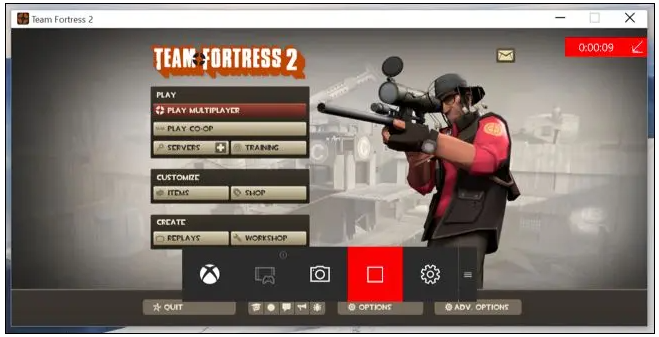
Start by opening the Game Bar with Windows Key + G and then clicking the red record icon to begin recording a video. While the recording is taking place, a timer will show in the upper-right corner of your game window.
In order to terminate the recording of the window, bring up the Game Bar once more and press the red stop button.
You may also start and stop recordings by pressing the Windows Key + Alt + R at the same time. If you want to hide or reveal the timer, press the Windows Key + Alt + T at the same time. In the Xbox app, you may customise your keyboard shortcuts. The following are the default keyboard shortcuts.
Take a Game Screenshot
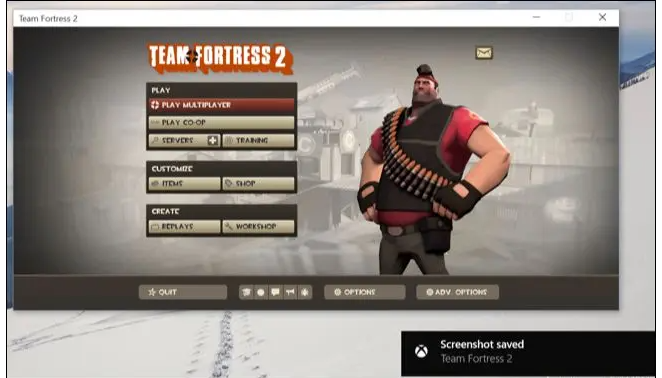
By pressing the snapshot icon in the centre of the game bar, you may rapidly capture a screenshot of your current location. Alternatively, use the Windows Key + Alt + Print Screen keys to capture a snapshot of the current game screen.
Find Your Videos and Screenshots
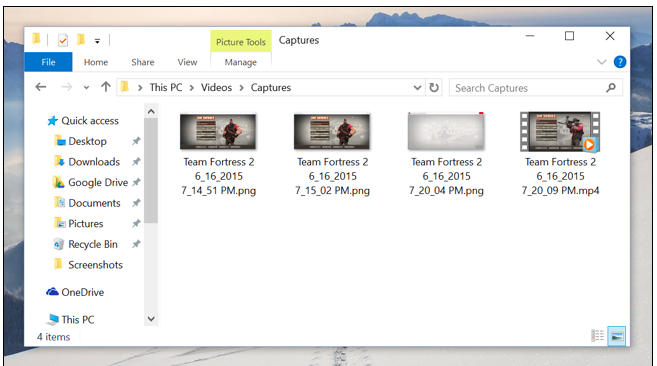
Windows stores all videos you record and screenshots you capture to the VideosCaptures folder in your user account’s Documents folder. Screenshots are stored as.png files, while videos are saved as.mp4 files. Both types of files are labelled with the game’s name, as well as the date and time they were taken.
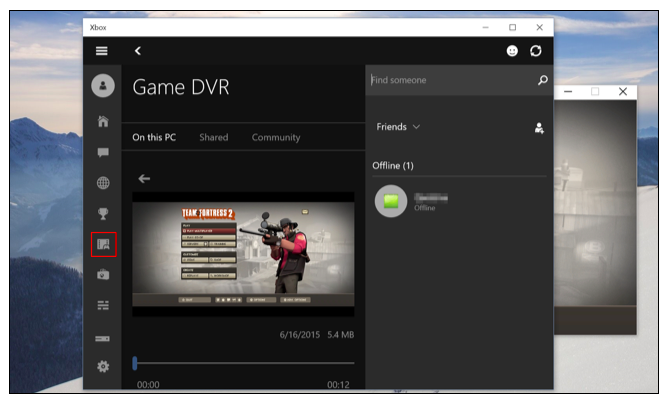
Alternatively, you may access them using the Xbox app. To access the Game DVR area, launch the Xbox app from your Start menu and choose the “Game DVR” icon on the left-hand side of the app to the left of the screen. Under “On this PC,” you’ll see a categorized list of all of your screen grabs, screenshots, and videos. Within the Xbox app, you have the ability to see and watch them.
Configure Game DVR Settings
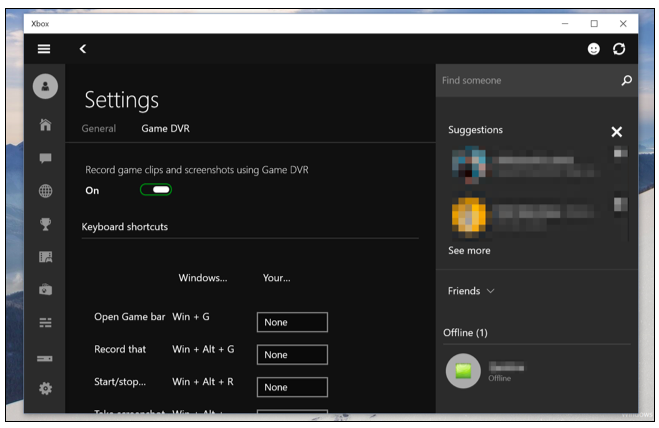
The settings for the Game Bar and Game DVR are accessible from within the Xbox app itself. To personalize them, open the Xbox app, pick the Settings icon, and then select Game DVR from the drop-down menu.
You can turn off the Game DVR completely from this menu, or you can assign different keyboard shortcuts to different actions, such as opening the game bar, recording videos, taking screenshots, toggling the timer, and using the “Record that” feature, to different actions.
There are also options for selecting the folders where game clips and screenshots will be saved by Windows 10, as well as for selecting different video quality and resolution settings. By default, audio is recorded when you record gameplay; however, you may instruct the Game Bar not to record audio or to alter the audio quality level from this menu.
Use Background Recording
When you play a game on the Xbox One or PlayStation 4, your gameplay is automatically recorded in the background. This allows you to save fascinating gameplay clips as soon as they occur.
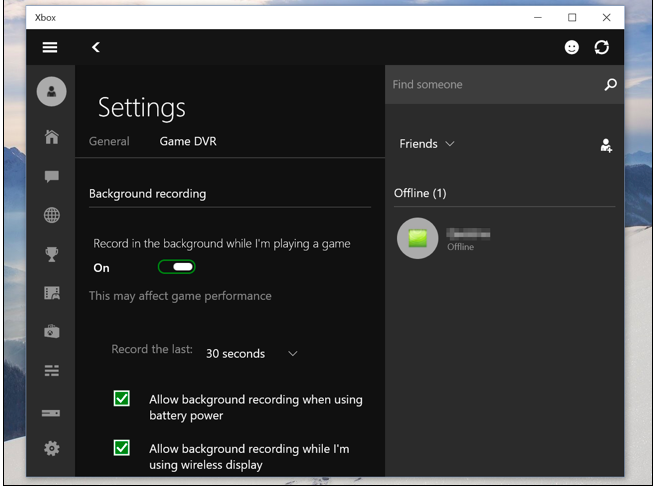
Game DVR on Windows 10 can perform in a similar manner. If you want to take use of this function, you must first enable the “Record in the background while I’m playing a game” option in the Game DVR Settings section of the Xbox application. According to the Xbox app, “this may have an impact on game performance.” When this feature is enabled, system resources will be continually required for recording when you are playing games, therefore you should leave it enabled unless you really want to record gameplay or you have a really powerful PC with plenty of free resources.
Default settings are for it to always capture and save the final 30 seconds of the video. To preserve the previous 30 seconds, you may either open the Game Bar and click the second icon from the left, or press Windows + Alt + G on a computer’s keyboard. That’s the “Record that” option, and it’ll automatically preserve the last recorded segment of gameplay for future reference. It functions in a similar way to the same functionality on the Xbox One.
For the time being, it appears that the Game DVR feature is only intended for recording movies and sharing them afterwards. You won’t be able to live-stream gaming to a service like Twitch.tv because there is no such feature, thus you’ll have to rely on third-party game recording software to do this task.
Video
Uma Musume Support Card Tier List 2026
Deadlock Tier List 2026

Resident Evil Requiem Unlockables Guide

How to Make Rope in Terraria: The Complete Guide


