Apple
How to Access Shared Windows Folders on iPhone and iPad
The Files app on iOS13 is more capable than ever before; you can compress files, share folders via iCloud, scan documents, and, of course, access Samba servers through the Files application. This is essential not just when you need to connect to a NAS, but also when you merely want to transfer data between your Windows computer and your iPhone or iPod touch. In this post, I’ll demonstrate a simple method for transferring data from a Windows computer to an iPhone by utilizing the Samba server. All that is required is that both your Windows PC and iPhone be connected to the same Wi-Fi network and that Windows File Sharing be enabled. Let’s get this party started.
Read Also: How to Change Your AirDrop Name on iPhone and iPad
How to Access Shared Windows Folder on an iPhone
1. Turn on Network Sharing on Windows
The first step is to allow File Sharing on your Windows computer; if it has already been enabled, you may go to the next step without having to go through the entire procedure again.
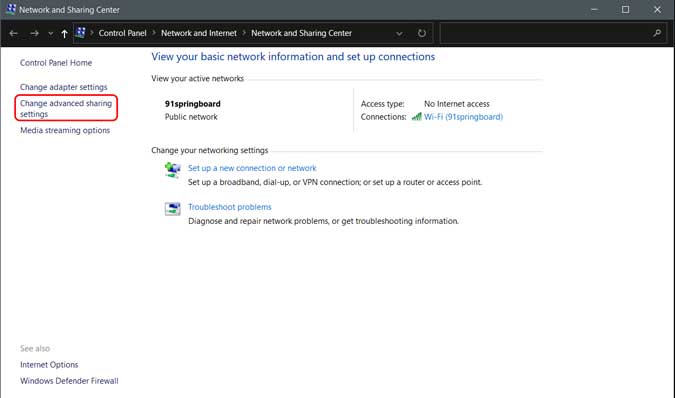
Select ‘Network and Sharing Center’ from the drop-down menu in the Settings section to accomplish this.

In a new window, navigate to the left pane and choose ‘Advanced Sharing Settings’ to access the Sharing Settings window, as seen in the screenshot below.
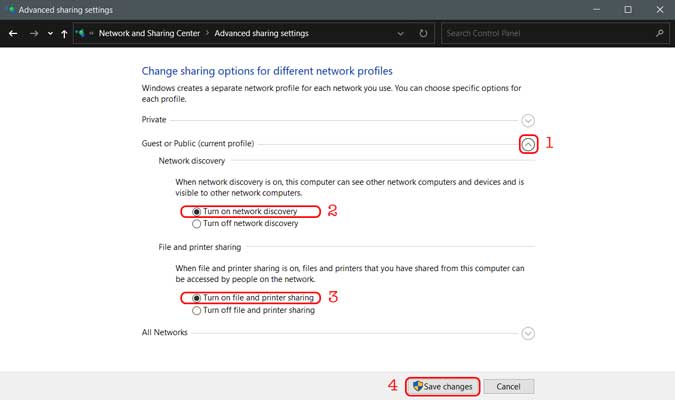
On this page, you’ll find three separate Network Profiles: Private, Public, and All Networks. Each of these profiles has its own set of settings. Network Discovery and File Sharing should be enabled for all three profiles. If you’re concerned about your privacy, you may do this on your current profile, and it should still be effective. Select ‘Save Changes’ from the drop-down menu.
2. Share a Folder on Windows
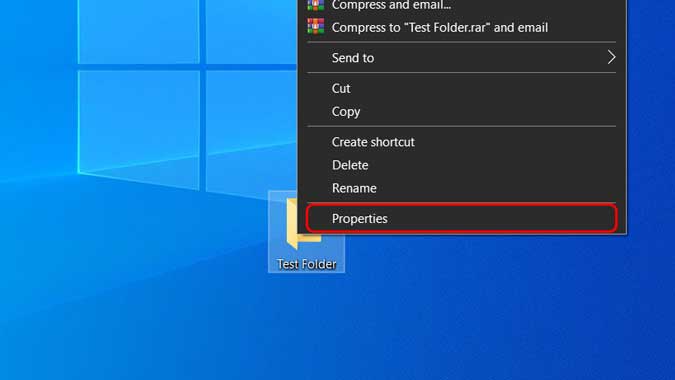
Share a folder by starting your computer and going to the directory you wish to share with other people. Because I’m going to show this using a folder from my C drive, but you could use any other folder of your choice instead.
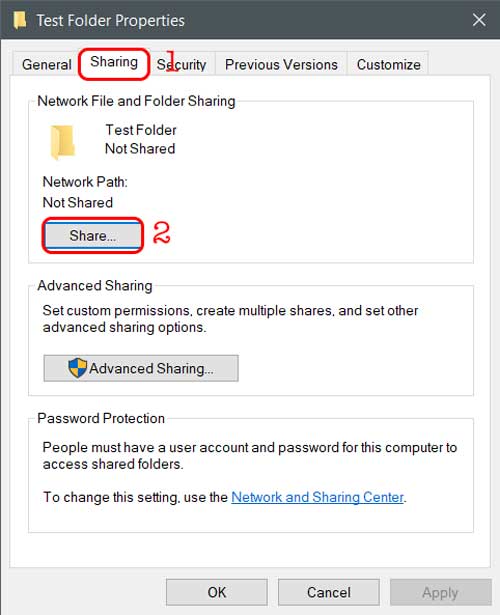
Right-click on the folder and select properties from the context menu.
Navigate to the Sharing tab and choose the Share button from the Network File and Folder Sharing drop-down menu.
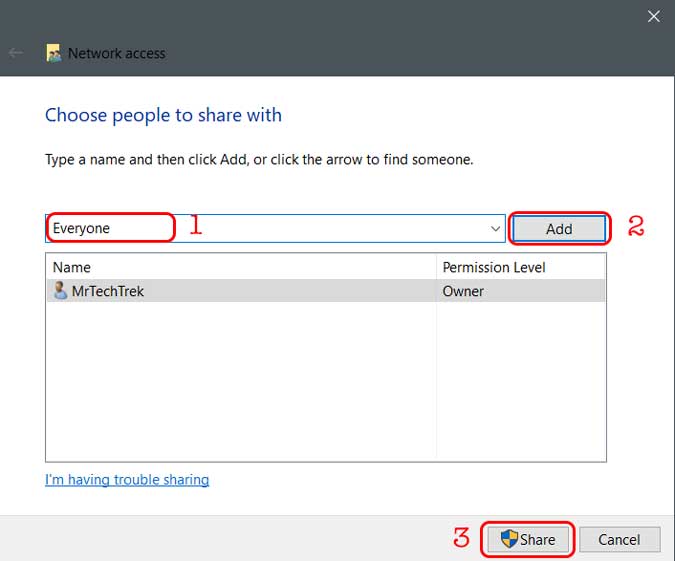
You may create a list of persons who will have access to the shared folder from this page. Fill in the blanks with “Everyone,” then click “Add” and then “Share.” Your folder has now been shared with others.
3. Find the Hostname of your Windows Computer
First, we’ll need to figure out what the IP address of your Windows PC is in order to gain access to the shared folder on the iPhone.
In a normal home network, your devices are assigned dynamic IP addresses, which means that every time you restart your computer, it receives a new IP address. This makes file sharing a little more difficult because the IP addresses are always changing. The good news is that you may avoid this by utilizing the Workgroup name instead of the IP address, which remains the same regardless of the IP address.
To locate your Windows workgroup, open Command Prompt on your Windows computer and input “hostname” into the address bar. Press enter to complete the search.
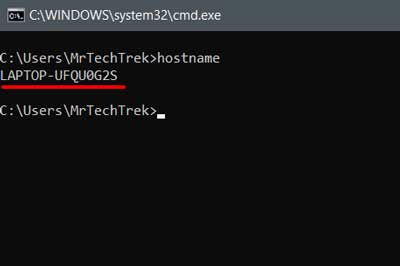
Note down the hostname of your computer, we’ll need it to access the shared folder on the Files app.
4. Access the Shared folder on iPhone
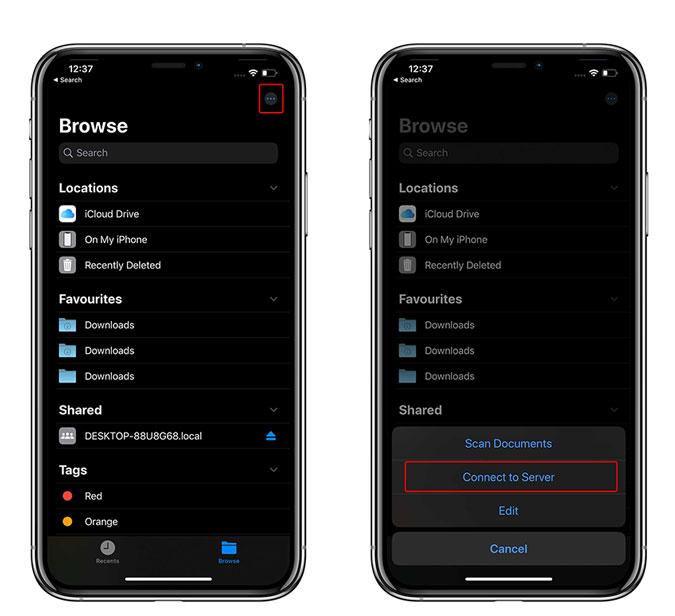
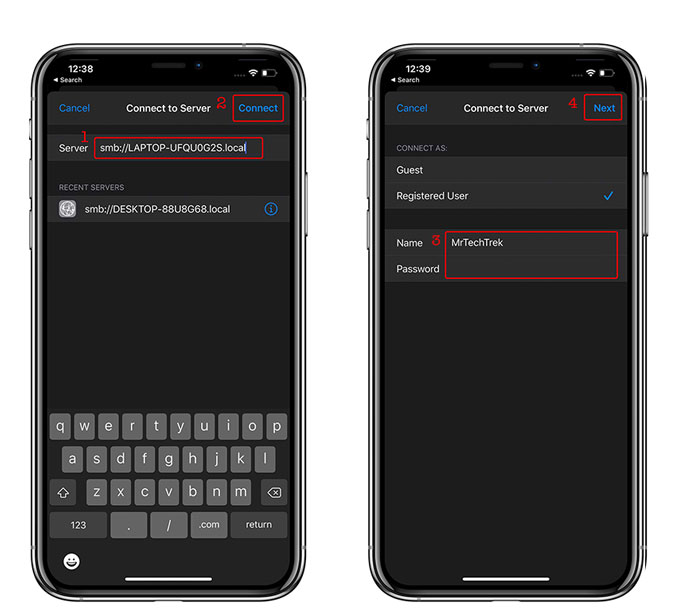
Open the Files application and choose the three-dot menu button in the upper right corner of the screen. Select ‘Connect to a Server’ and follow the on-screen instructions.
The server address would be shown, and you would input “smb:/YOUR-HOSTNAME.local” into the prompt box. Replace ‘YOUR-HOSTNAME’ with the hostname of your machine and press the ‘Connect’ button. If you use the same credentials to unlock your Windows computer, the username and password you provide for this step will be the same credentials you used to unlock your Windows machine. Select ‘Next’ from the drop-down menu.
It would take a few seconds before a new page containing the shared folder would be shown. Any file in the shared folder may be accessed and copied to your iPhone using a web browser.
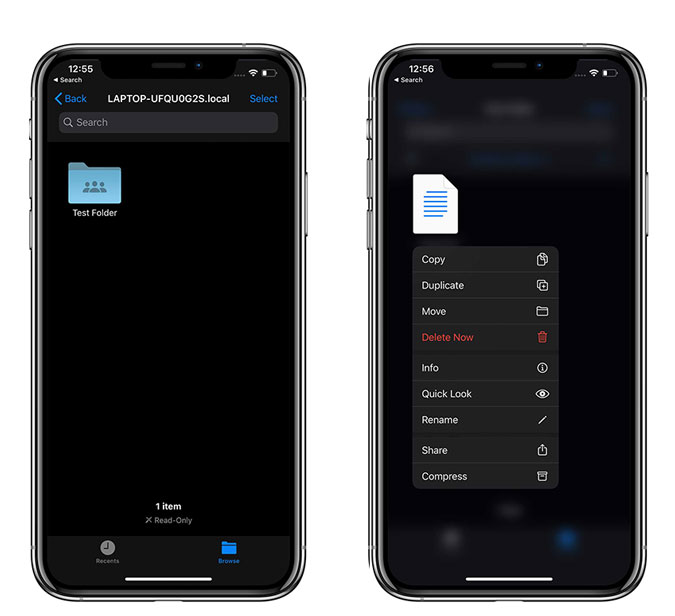
That’s all there is to it when it comes to getting to the Shared folder on your iPhone. It is compatible with any type of Samba Server, which means you may use it to access your NAS from your iPhone as well as other mobile devices. However, the approach is not without its flaws. When I attempted to copy huge files from my computer to the iPhone’s local storage, the software repeatedly crashed and refused to work. It works with little files, such as photos and text files, with no difficulty.
Video

Roblox Username Generator – Create a Cool & Unique Username in Seconds

Grow a Garden Recipes in Roblox: Guide to Cook (Donuts, Sushi, Pie, Pizza & More!)

Job Opportunities in Dubai – 2026

Mr Bit at the SBC Awards Europe 2025: The Bulgarian Brand Setting New Standards in the European Gaming Industry

Dennis Rodman Net Worth 2026 – Everything You Need to Know

Bloxburg Neighborhood Codes 2026
Grow a Garden Recipes in Roblox: Guide to Cook (Donuts, Sushi, Pie, Pizza & More!)
Job Opportunities in Dubai – 2026
Dennis Rodman Net Worth 2026 – Everything You Need to Know


