Gaming
How to Create a Nintendo Account
Want to play online games on the Nintendo Switch or purchase titles from the eShop? Creating a Nintendo account online and linking it to your Nintendo Switch user account will be all that is required on your part. We’ll walk you through the process of creating a Nintendo account, as well as how to configure the account so that it works with your Switch.
Read also: How to Charge a Nintendo Switch Controller
1.Creating A Nintendo Account
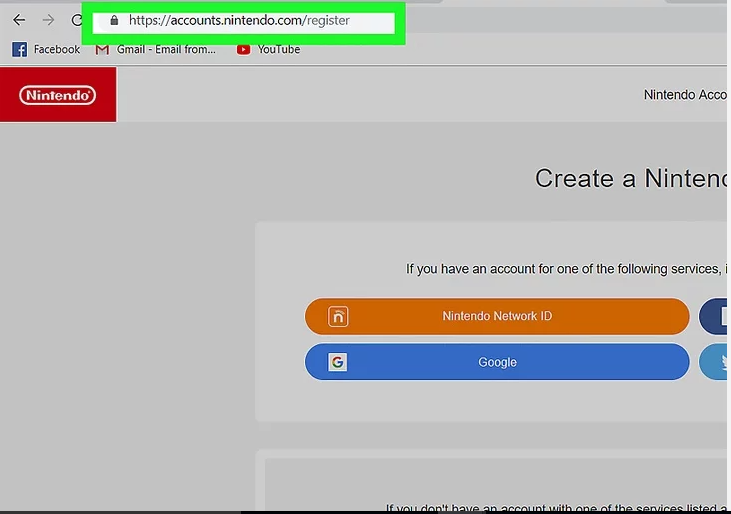
1.Open a web browser and navigate to https://accounts.nintendo.com/register. You may use any web browser on your computer or mobile device to access the site in question.

2.Fill out the application form. On all, there are eight lines in the form that must be completed. The text is written in the following lines:
- Nickname: Type a unique nickname or username that will be used to identify your account with. It must be a nickname that no other user has.
- E-mail address: Type an email address that is not associated with any other Nintendo account on this line.
- Password: Type a password you want to use to log in to your account.
- Confirm Password: To confirm the password, type it again in this line. Make sure it matches the password you typed in the first line.
- Date of Birth: Use the drop-down menus to select the month, day, and year of your birthday.
- Gender: Use the drop-down menu to select your gender. You can also select “Choose not to answer”.
- County/region of residence: Use the drop-down menu to select the country you live in.
- Time zone: Use the drop-down menu to select a city within your time zone.
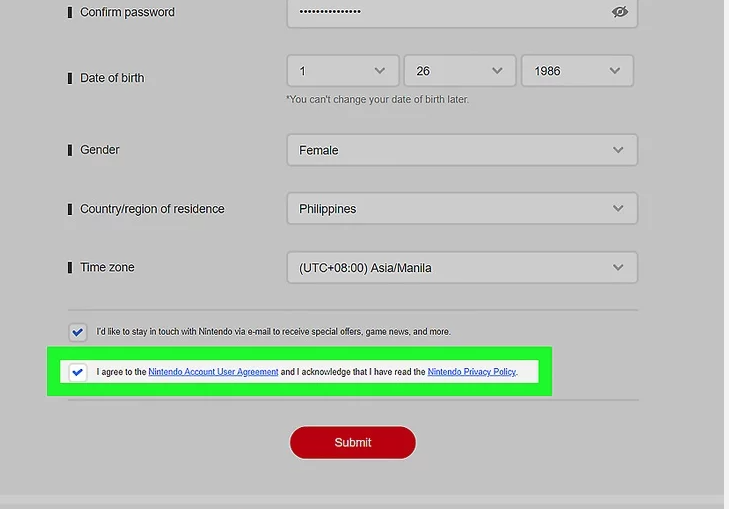
3.Accept the terms of the Nintendo Account User Agreement as well as the Nintendo Privacy Statement. To agree to the Nintendo Account User Agreement and Nintendo Privacy Policy, tick the appropriate box at the bottom of the form. To view the Nintendo Account User Agreement and Nintendo Privacy Policy, please click on the blue text in the final line of the preceding paragraph.
- The checkbox to the right of this line is automatically selected. If you check this box, Nintendo will send you email notifications when new content is released. If you do not want to receive email alerts from Nintendo, uncheck this box.
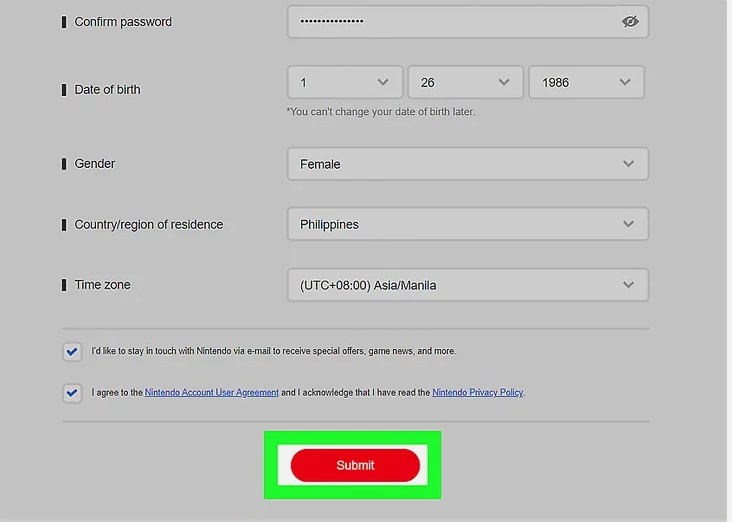
4.Submit the form by clicking on the Submit button. It’s the red button at the bottom of the screen on the left side of the screen. Once the form has been completed in its entirety and you have agreed to the terms of the Nintendo Account User Agreement and Nintendo Privacy Policy, you will be able to use this button. An email with a code for verification will be sent to you.
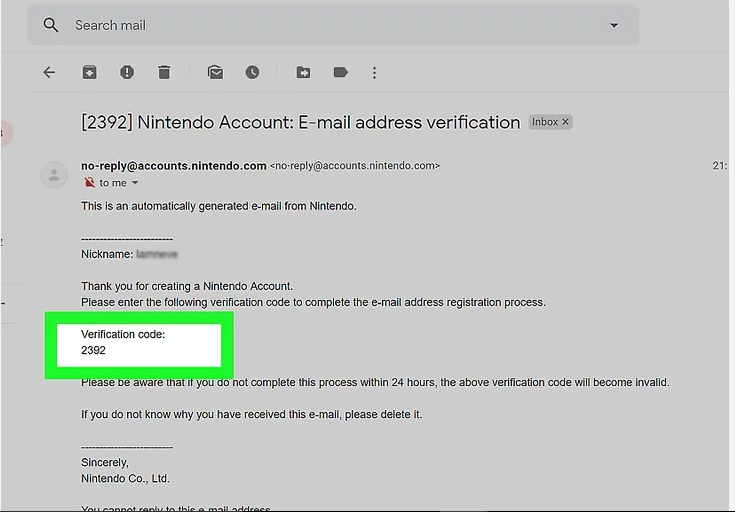
5.Check your email to see if anything has arrived. After you have completed and submitted the form, an email with a verification code will be sent to you. Check your email inbox to see whether you have received the verification code.

6.Fill in the verification code and click the Verify button. When you have received the four-digit verification code in your email, go back to the Nintendo Registration page in your web browser and input the code in the box labelled “Verification Code.” When you are finished, click the red button that reads “Verify.” This action must be carried out within 24 hours of submitting the form to be considered successful. Your Nintendo account is created as a result of this.
2.Create an User Account and Linking it to a Nintendo Account
1.Switch on the Nintendo Switch console. To turn on the Nintendo Switch, press and hold the Power button located on the top-left side of the Nintendo Switch for three seconds. It’s the button with an icon that looks like a circle with a line running through the centre. It’s located right next to the volume controls.
2.Go to the Home screen by pressing the Home button. When you’re on the Nintendo Switch’s Home screen, you may access it by pressing the button on the right joy-con controller that has a symbol that looks like a home.
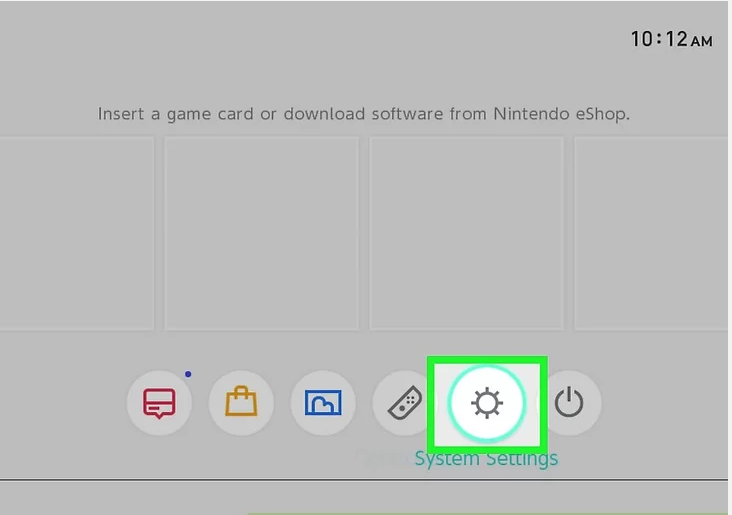
3.Choose the gear-shaped icon from the drop-down menu. The System Settings menu may be accessed using an icon that looks like a gear on the Nintendo Switch home screen.
- You may either double-tap an item on the screen or travel to it using the left joy-con controller and then press A to choose it on the right joy-con controller to select it on the Nintendo Switch.
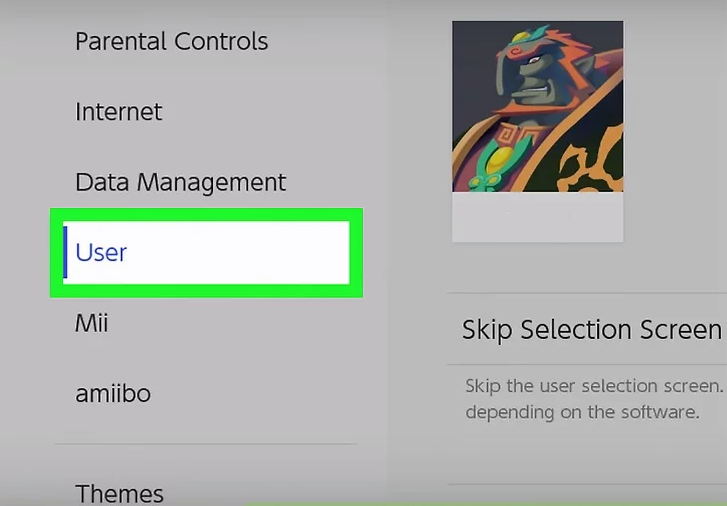
4.Users should be chosen. It may be found in the System Settings menu on the Nintendo Switch as the eighth option. All of the settings available in the System Settings menu are presented in the sidebar to the left of the interface.
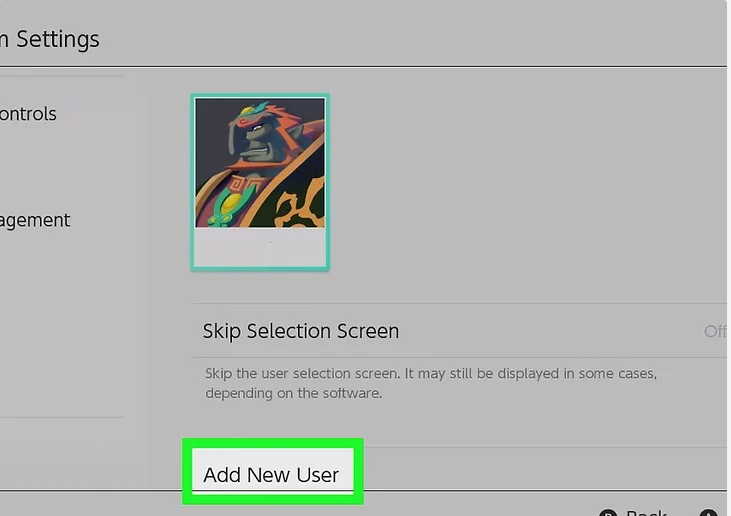
5.Add a new user by clicking on the Add User button. On the Nintendo Switch, it’s the second option down from the top of the screen, below all of the user icons, in the Users menu of System Settings.
- During the initial setup of the Nintendo Switch, user accounts are also generated for the system. Read “How to Set Up the Nintendo Switch” to discover more about the Nintendo Switch’s initial setup procedure, which includes a video tutorial.
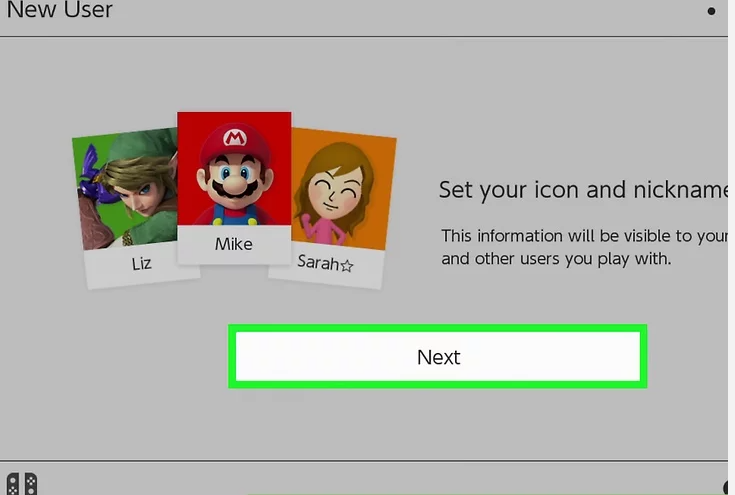
6.Next should be selected. A message appears on this screen informing you that you will choose an icon and a nickname for your user. To proceed, use the Next button.
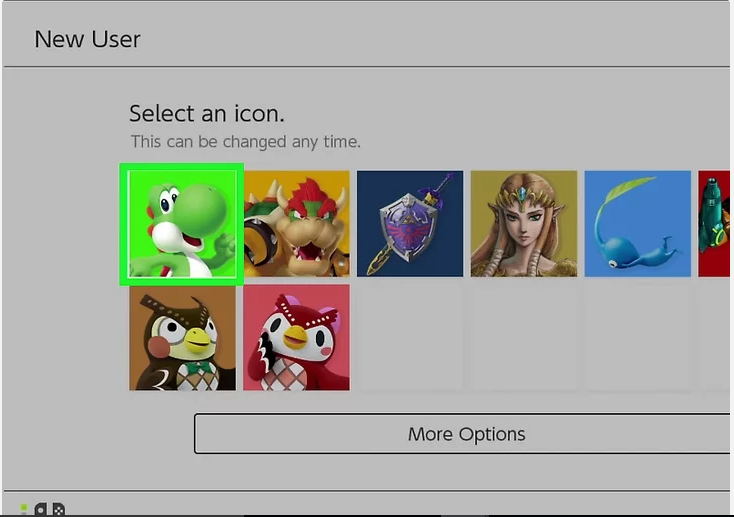
7.Choose an icon from the drop-down menu. There are a range of Nintendo-themed symbols displayed on the screen at the same time. You have the option of choosing one of the symbols to represent your user account. You may also choose Mii if you want to utilize a Mii as a character in the game. More options may be found at the bottom of the screen by selecting More Options.
- More information on how to make a Mii character on the Nintendo Switch can be found in the article “How To Create A Mii on Nintendo Switch.”
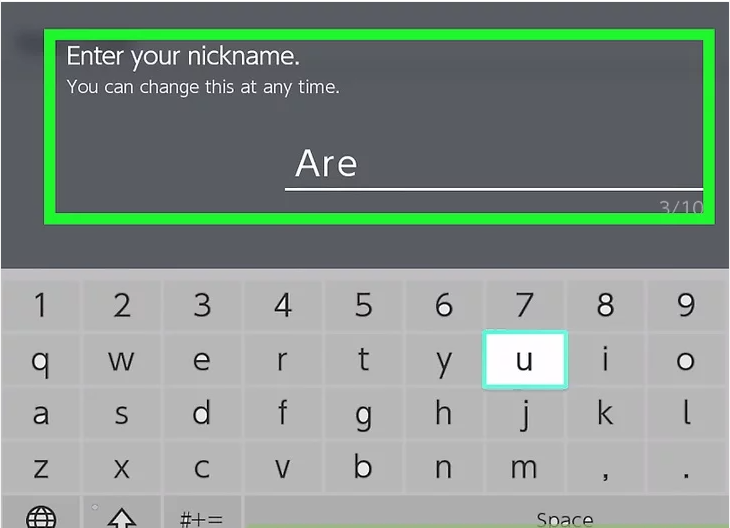
8. Type a Nickname for the User. This can be any name you want to give to the user account of the Nintendo Switch.
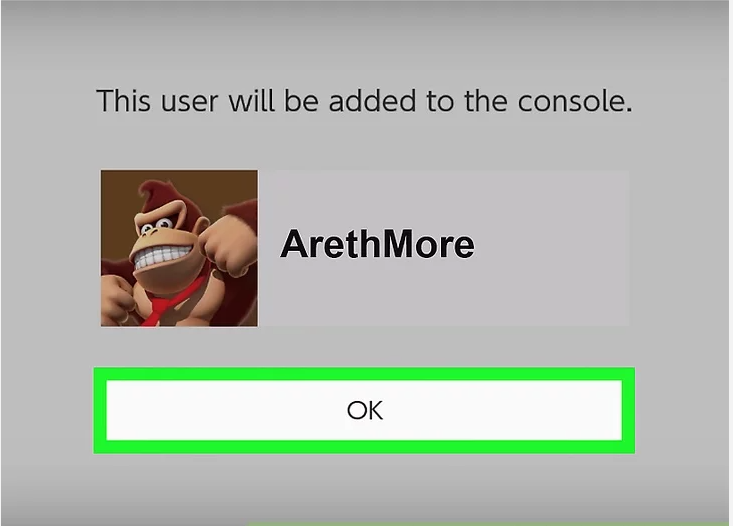
9. Click on the Ok button. This verifies that you wish to set up a new User account on our website.
10. Select Sign In and Link from the drop-down menu. Your Nintendo Account and your User Account are linked together in this section.
- If you haven’t already done so, click on Create Account and follow the on-screen steps to set up a new Nintendo Account.
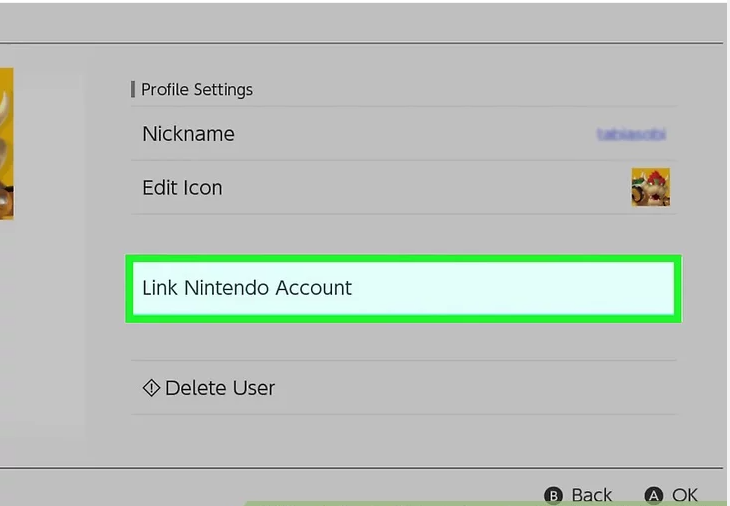
- If you wish to link a new Nintendo account to an existing one, go to the User menu in System Settings, pick the user’s icon, and then select Link Nintendo Account. Then select Sign In and Link from the drop-down menu.
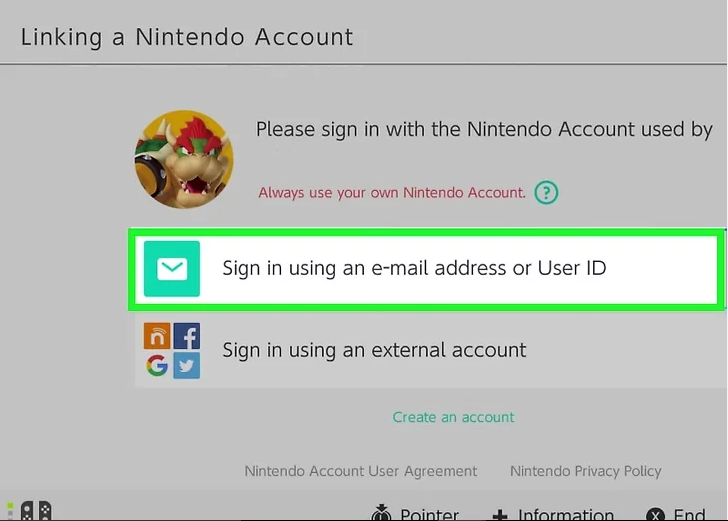
11. Select Sign in using an email address or a sign-in ID from the drop-down menu. When you go to the “Link a Nintendo Account” menu, it’s the first choice you see.
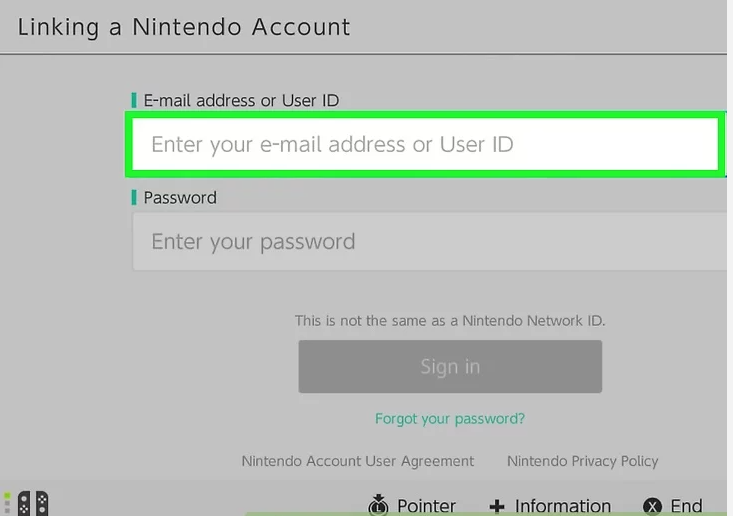
12. Sign in by entering your email address and password and clicking Sign In. Sign in with your Nintendo account by entering your email address and password in the appropriate fields and clicking Sign In.

13. Click on the Ok button. If the link is successful, a pop-up window appears stating that the Nintendo account has been successfully linked. To proceed, press the OK button.
Video
FAQs
Can a 12 year old have a Nintendo Account?
Nintendo Accounts for children may be created for individuals between the ages of 0 and 17 years old. … General Nintendo Accounts may only be established by individuals who are 13 years old or older and who have an email address. All Nintendo Accounts created for children aged 12 and under are automatically set up as supervised accounts in the Nintendo Account family group, regardless of whether they are used for gaming.
Is getting a Nintendo Account free?
It’s entertaining, free, and rewarding!
You may earn points and use them to redeem for benefits such as in-game content and discounts on digital games, among other things. My Nintendo is completely free to use for everyone who has a Nintendo Account!

Roblox Username Generator – Create a Cool & Unique Username in Seconds

Grow a Garden Recipes in Roblox: Guide to Cook (Donuts, Sushi, Pie, Pizza & More!)

Job Opportunities in Dubai – 2026

Mr Bit at the SBC Awards Europe 2025: The Bulgarian Brand Setting New Standards in the European Gaming Industry

Dennis Rodman Net Worth 2026 – Everything You Need to Know

Bloxburg Neighborhood Codes 2026
Grow a Garden Recipes in Roblox: Guide to Cook (Donuts, Sushi, Pie, Pizza & More!)
Job Opportunities in Dubai – 2026
Dennis Rodman Net Worth 2026 – Everything You Need to Know


