Guide
How to Add a Featured Channel to Your YouTube Channel

Featured channels on YouTube allow you to promote one or more channels on your channel while maintaining control over your channel. Their location on your channel’s homepage will be at the bottom of the page. If you have a secondary channel, you may promote it to your primary channel by including a “Featured channels” section on your main channel.
In a similar vein, if you wish to assist a buddy in increasing their subscriber base, you may feature their channel on your own channel as well. Visitors to your main channel’s homepage will see a list of your highlighted channels as they scroll down the page. Some viewers will be drawn in by the featured channels and will decide to subscribe to them as a result.
In this post, you’ll discover how to add a featured channel to your YouTube channel in only 4 simple steps, so keep reading.
Read Also: How to Record on YouTube TV
How to Add a Featured channel to your YouTube Channel
To add a featured channel to your YouTube channel, you must first access the YouTube website on your computer’s desktop.
Navigate to your YouTube channel and select “Customize Channel” from the drop-down menu. By selecting “Add section” from the channel customization drop-down menu, you’ll be able to include a “Featured channels” section. Apart from the “Featured channel” area, there are several more parts that you may incorporate into your website. This includes “Popular uploads,” “Past live broadcasts,” “Single playlist,” and a variety of other options.
It is possible to include one or more channels on your channel’s homepage by using the “Featured channel” option. For this, you must first search for and pick the channels that you wish to add to your subscription list. By clicking and dragging the double line symbol, you may rearrange the channels in whatever way you desire as well. Once you’re finished, make sure to save your changes by clicking on the “Publish” button at the bottom of the page.
The following are the five steps to include a featured channel on your YouTube channel:
1. Customize your channel

The first step is to go to the YouTube website on your desktop computer. It is not recommended that you use the YouTube mobile app for this since you will not be able to customise your channel. If you insist on viewing YouTube videos on your mobile device, you must do it using a web browser.
In the first instance, navigate to the YouTube website at: https://www.youtube.com/. You’ll need to browse to your YouTube channel at this point. Once you’ve arrived at the site, navigate to the top navigation bar and select your channel icon. To access your YouTube channel, go to “Your channel” and click on “Your channel.”
There are a few of buttons on your YouTube channel that you may use. “Customize channel” and “Manage videos” are examples of such options. You must first configure your YouTube channel before you can add featured channels to your channel. To personalize your YouTube channel, select “Customize channel” from the drop-down menu.
2. Add a “Featured channels” section
After you’ve clicked on “Customize channel”, you’ll land on the “Channel customization” page. If you’re not on the page, click on “Customization” on the left sidebar to open it. On the “Channel customization” tab, you’ll find a few of areas like “Video spotlight” and “Featured sections”. The “Video spotlight” area allows you to post a channel trailer or a highlighted video.
On the other hand, the “Featured sections” area allows you to create a new part to your YouTube channel. Click on “Create section” next to the “Featured sections” heading to add a new section. After you’ve clicked on “Add section”, you’ll see a list of parts that you may add to your YouTube channel. This includes “Popular uploads”, “Past live streams”, “Featured channels”, and more. Click on “Featured channels” to add a “Featured channels” section to your YouTube channel.
3. Save your changes
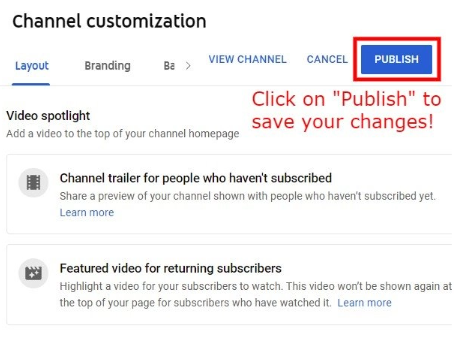
Immediately following your selection of the “Done” button, you’ll notice the “Featured channel” section under the “Featured sections” heading. Before you depart, you must save any changes you have made. Your modifications will be lost if you do not do so. To save your changes, click on the “Publish” button.
4. View the featured channels
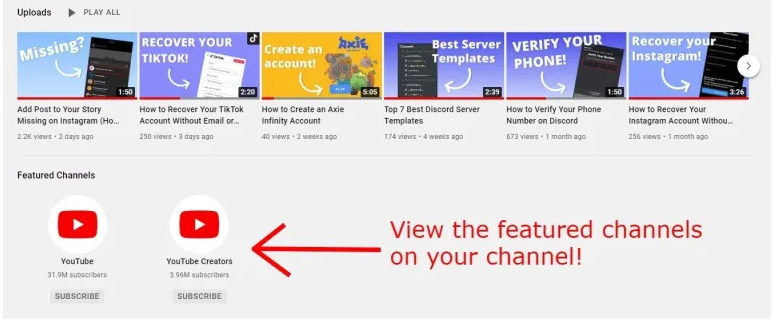
The next step is to verify that the highlighted channels have been added to your channel once you’ve saved your edits. Begin by locating and visiting your YouTube channel by clicking on the channel symbol, which is followed by the words “Your channel.” To accomplish this, scroll all the way down to the bottom of your channel. You’ll find a list of the featured channels that you’ve added to your channel at the bottom of your channel page.
Your subscribers will be able to see and subscribe to your highlighted channels much more simply now that they can scroll to the bottom of your channel and see them. If you wish to change the highlighted channels, you may do so by going back to the “Channel customization” page and making the changes. In order to make changes to your featured channels, click on the three dots followed by “Edit section contents.”
The highlighted channels feature has been successfully added to your YouTube channel!
Video

Vampire Crawlers Coin Farming Guide

Forza Horizon 6 Performance: Why 60 FPS Is Still the Console Standard

Yoshi and the Mysterious Book (2026) – Full Completion Guide, Rewards & Secret Ending

How to Get Free Pets in Adopt Me: A Guide for Players

Roblox Username Generator – Create a Cool & Unique Username in Seconds
How to Get Free Pets in Adopt Me: A Guide for Players
Yoshi and the Mysterious Book (2026) – Full Completion Guide, Rewards & Secret Ending
Vampire Crawlers Coin Farming Guide


