Apple
How to Blur the Background on iPhone Photos
Learn how to blur the backdrop in your iPhone images while using Portrait mode and the After Focus app, as well as by relocating your shot in this tutorial.
Read Also: How to Use Google Lens on iPhone
How to Blur the Background on iPhone Photos Using Portrait Mode
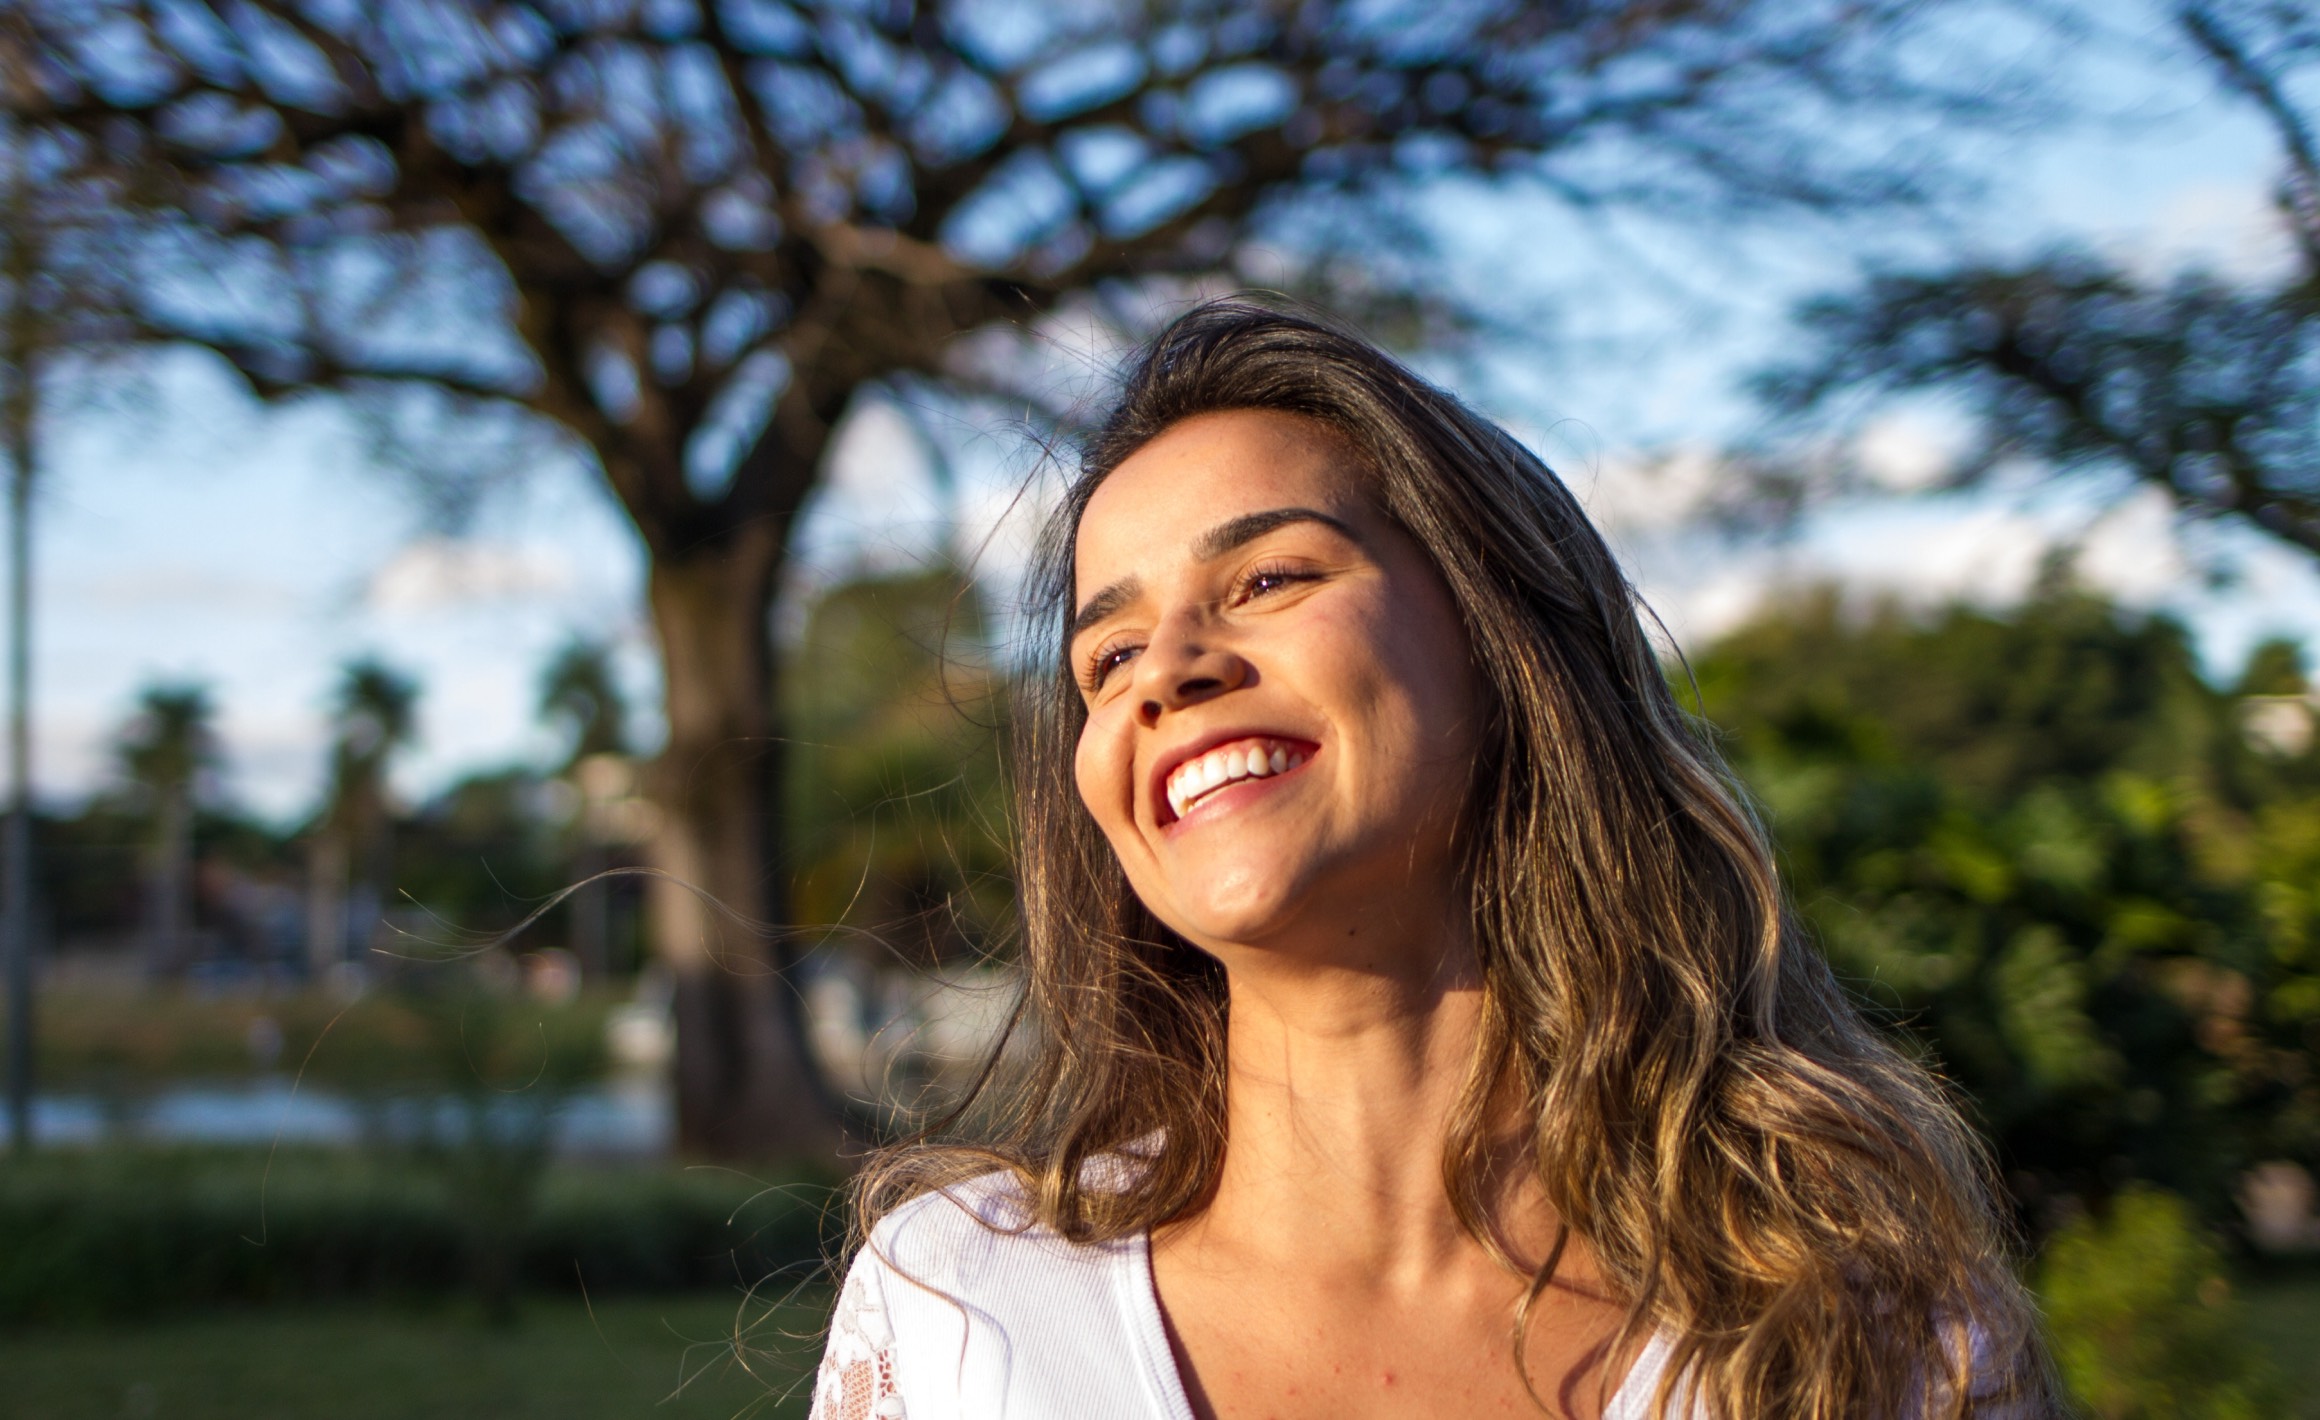
Portrait mode on your iPhone is a simple and efficient technique to blur the backgrounds of your images. Find out how to utilize portrait background effects to guarantee that the backdrop is softened and that the attention remains firmly on the subject in this tutorial.
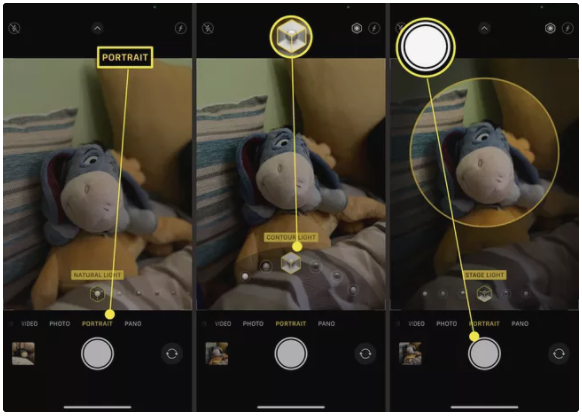
1. Open the Camera app on your iPhone and take a photo.
2. Swipe to the right to choose Portrait mode from the drop-down menu underneath the image.
3. Toggling between the many lighting settings, such as Natural Light, Studio Light, Contour Light, Stage Light, Stage Light Mono, and High-Key Light Mono, is as simple as swiping left or right.
4. Take the shot as you normally would, and you’ll see the results in your Photos album.
How to Blur the Background on iPhone Photos After Taking a Photo in Portrait Mode
If you’ve already taken a photo in Portrait Mode, it’s straightforward to make changes to the effect after the shot has been taken. Here’s how you go about it.
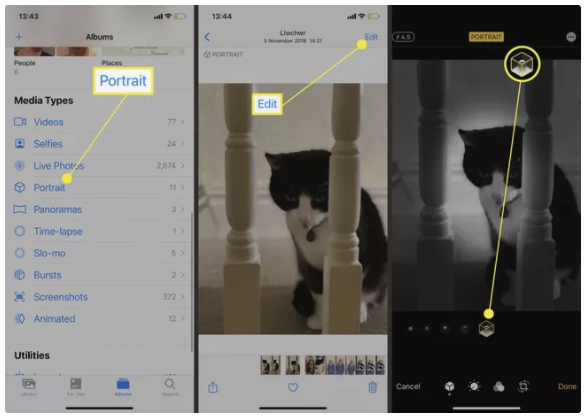
1. In your Photos Album, look for the shot that was taken in Portrait Mode.
2. Select Edit from the drop-down menu.
3. Natural Light, Studio Light, Contour Light, Stage Light, Stage Light Mono, and High-Key Light Mono are all selectable through sliders on the right side of the screen.
4. To save the new picture, select Done from the drop-down menu.
How to Blur the Background on iPhone Photos by Moving
Whether you’re taking photos of people, landscapes, or black and white abstract art, you can achieve a blurred photo background effect by adjusting your position and angle. If your iPhone doesn’t support Portrait Mode, or if you prefer not to use third-party apps, this is a simple and free solution that can produce great results with a bit of practice. By experimenting with different angles and distances from your subject, you can create unique and visually interesting photos without spending a dime.
1. Launch the Camera application.
2. Getting closer to your subject will help you line up your shot. The closer you approach to the subject, the more hazy the backdrop becomes.
3. Choose a location on the screen where you’d want the focus of the photograph to be by tapping on it. The focus is indicated by the appearance of a yellow box.
4. To snap a picture, press the shutter button on your camera.
What Does Each Portrait Mode Lighting Effect Mean?
With so many lighting effect options available in Portrait Mode, it might be difficult to figure out what each one represents. Here’s a basic rundown of the situation.
- Lighting provided by the sun. The subject’s face is in crisp focus against a hazy backdrop in this photograph.
- It’s a dark room, yet there’s a lot of light in here. As a result, it brightens up the face and gives the photograph a crisp, clean appearance.
- A contour light that follows your body’s contours. The face is characterized by dramatic shadows, as well as highlights and lowlights.
- Lights on the stage. On a deep dark backdrop, the face is highlighted with a flashlight.
- Monochrome lighting for the stage. The shot is similar to Stage Light, however it is in black and white.
- Monochrome lighting in a high-key setting. It generates a grayscale subject on a white backdrop by blending two colours together.
Video

Vampire Crawlers Coin Farming Guide

Forza Horizon 6 Performance: Why 60 FPS Is Still the Console Standard

Yoshi and the Mysterious Book (2026) – Full Completion Guide, Rewards & Secret Ending

How to Get Free Pets in Adopt Me: A Guide for Players

Roblox Username Generator – Create a Cool & Unique Username in Seconds
How to Get Free Pets in Adopt Me: A Guide for Players
Yoshi and the Mysterious Book (2026) – Full Completion Guide, Rewards & Secret Ending
Forza Horizon 6 Performance: Why 60 FPS Is Still the Console Standard


