Guide
How to Change Line Spacing in Microsoft Word

If you have previously used Office, you may already know how to change the line spacing in Word, at least on a very fundamental level. The “Styles” box on the Home tab can act as a very prominent switch between standard and zero spacing. If you have previously used Office, you may already know how to change the line spacing in PowerPoint. But were you aware that you can also modify the distance between the lines to a far more granular degree?
In this tutorial, we will demonstrate how to exercise complete control over the line spacing options in Word. This will allow you to either make your papers more easily accessible by adding additional whitespace, or accommodate more content on each page by eliminating the spaces between the lines.
Read Also: How to Remove a Password From a Word Document
How to Change Line Spacing in Microsoft Word
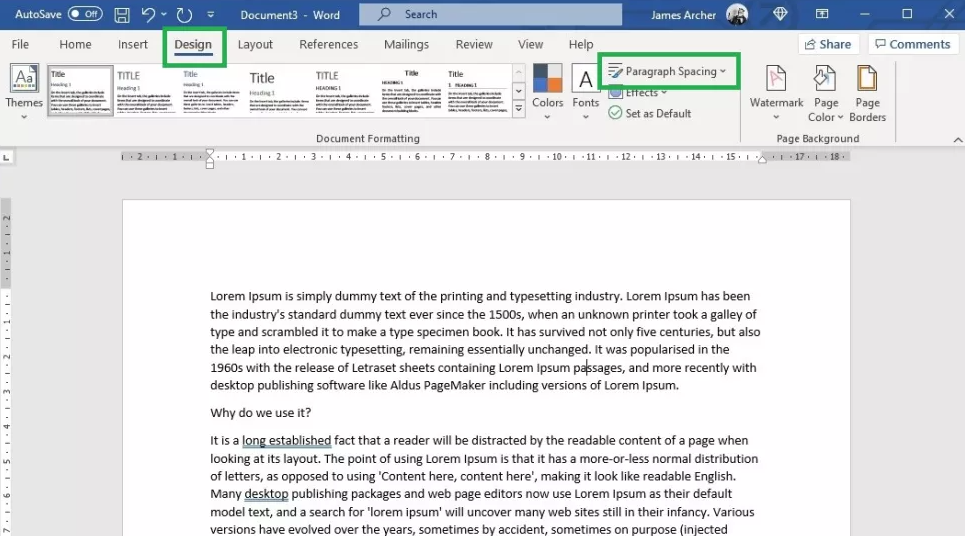
1. Launch Microsoft Word and navigate to the “Design” menu. From there, select “Paragraph Spacing.”
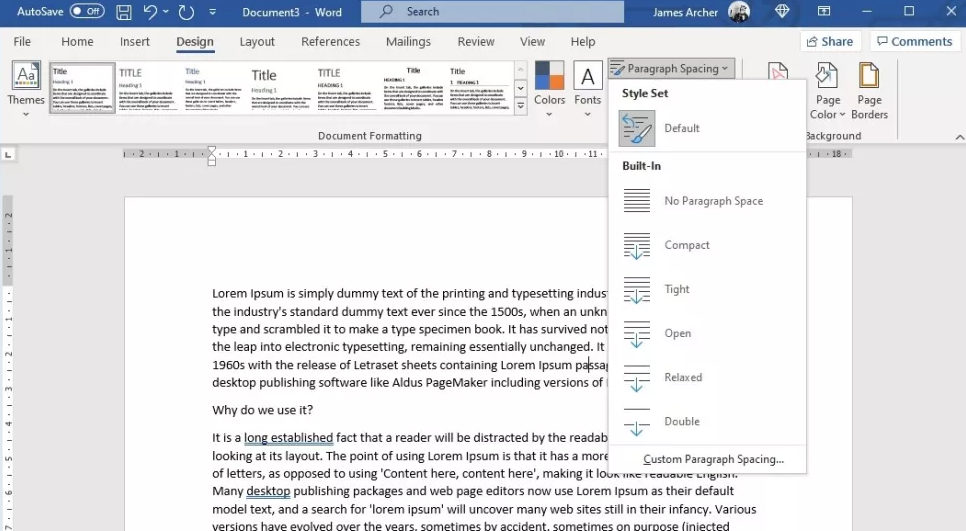
2. To make a speedy adjustment to the line spacing used across the entire page, simply select one of the six “Built-In” spacing options and click it.
The “No Paragraph Space” choice represents zero spacing, the “Double” option represents double spacing, and the “Compact” option represents single spacing. These options are listed from most prominent to least prominent.
If there is already content in the page, it will dynamically alter as you move your mouse over each option; therefore, before you click on one of them, you should decide which one you like the most first.
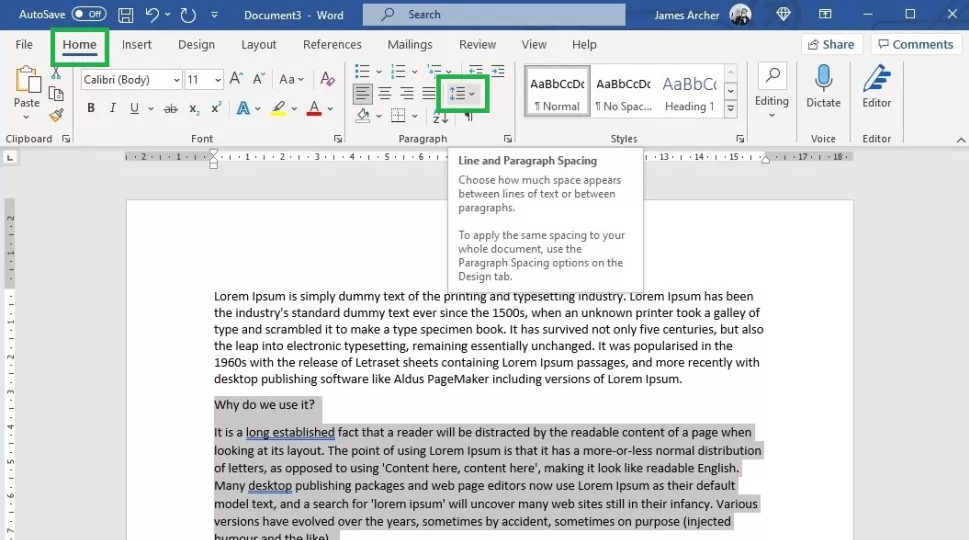
3. You also have the ability to adjust the spacing for particular paragraphs or sections. To accomplish this, first choose the portion of the text that needs to be changed, then click the “Home” tab. After that, navigate to the section labelled “Paragraph,” and then click the icon labelled “Line and Paragraph Spacing.”
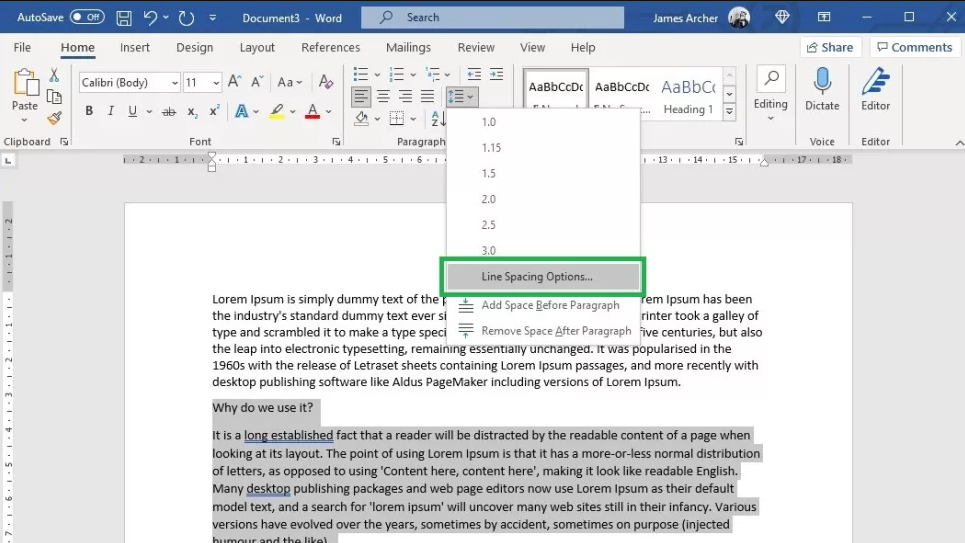
4. Select “Line Spacing Options” from the menu.
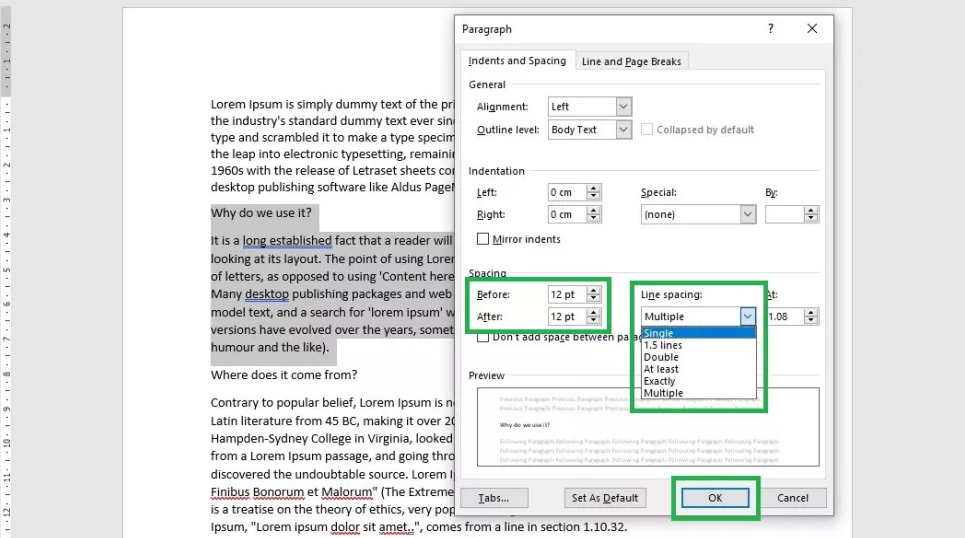
5. In the “Spacing” section, adjust the “Before” value to select the size of the spacing that will appear immediately before your highlighted text, and adjust the “After” value to select the size of the spacing that will appear immediately after it. This can be done by clicking the “Before” and “After” buttons, respectively.
You may also modify the general line spacing for the section that has been highlighted by using the drop-down option that is labelled “Line spacing.” This will take precedence over the choice you made in the second stage. In the end, select the “OK” button.
FAQs
Is 1.5 single line spacing?
The equivalent of 1.5 spaces is one single space plus half of a single space. So, picture yourself writing in a notepad with lines. If there were a single space between each of those lines. If you were to extend the gap between those lines by half the amount of the gap that was there before, then you would have 1.5 spacing.
Is 1.5 single spacing in Word?
In the “Line spacing” section of the Paragraph dialogue box, choose one of the available options from the dropdown menu. You have the option of selecting single, 1.5, or double line spacing; alternatively, you can choose “Multiple” and define your own individualised line spacing. Simply clicking “OK” will apply the line spacing that you’ve chosen.
Is 1.5 or 2.0 double spaced?
Single spacing (1.0), double spacing (2.0), and one-and-a-half line spacing are the three types of line spacing that are utilised the most frequently in Microsoft Word (1.5).
What do you mean by 1.5 line spacing?
Participant. In all seriousness, the standard leading in Word is equal to 120% of the font size. This results in a leading of 14.4 points for a font size of 12 points. In Word, this is referred to as the single spacing setting. Therefore, a 1.5 line spacing results in a leading of 1.5 times 14.4 points, which is 21.6 points for a font size of 12 points.


