Guide
How to Clean a Floppy Disk Drive
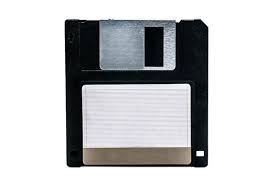
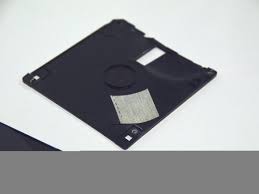
The floppy disc was the most common form of removable storage media in the early days of computer technology, before optical media storage (CD and DVD) and USB Flash drives came into play. When it came to recording and archiving data on computers, floppy discs remained the most feasible and cost-effective method for some time, from their 360Kb capacity up to their 1.44Mb capacity. In contrast to CD and DVD optical drives, the floppy disc cannot be cleaned and is housed inside a protective shell, making it impossible to clean. This increases the risk of dust and debris getting onto the read and write heads of the floppy drive. This issue frequently leads to read and write failures and the unpleasant warning “Please insert disc when using a dirty floppy drive.”
Read Also: What Is a Floppy Disk Drive?
Materials Needed:
- Cotton swab
- Floppy disk cleaner
- Pure alcohol
- Screwdriver
How to Clean a Floppy Disk Drive
Step 1
The simplest and most obvious step you can take to maintain the cleanliness of your floppy disc drive is to maintain the cleanliness of the floppy discs themselves. This indicates that there should be no scratches on them, and they should be placed inside plastic casings so that they are protected from dust and grime.
Step 2
Additionally, the floppy disc needs to be guarded against being exposed to high or low temperatures. This will have a negative impact on the quality of the disc and will force the read and write drives of the floppy drive to work more diligently in order to access the data on the disc.
Step 3
Investing in a dedicated floppy disc cleaner is the method that is most frequently suggested for effectively cleaning the floppy disc drive. Aside from maintaining the cleanliness of your floppies, this is actually considered to be the safest method because you do not have to physically touch the read and write heads.
Step 4
In order to use the floppy disc cleaner, you must first place the cleaning disc, which is composed of some form of absorbent substance, into the floppy disc drive and then squeeze some of the contents of the container onto the disc.
Step 5
Launch the Windows Explorer utility, and navigate to the location of the floppy disc drive. Because of this, the drive will proceed to read the data of the disc as if it were a typical floppy disc. The movement of the read and write heads against the cleaning surface will remove any light dust and grime that may be stuck on the heads. This is because the read and write heads are moving against the cleaning surface.
Step 6
In the event that the cleaning fluid runs out, you should make sure to purchase the exact same kind of cleaning fluid that was included with the initial shipment in order to prevent any damage to the heads of the floppy disc drive.
Step 7
In more serious situations, the actual floppy disc drive might have to be opened up. Take the drive out of the computer’s main case.
Step 8
Remove the locking screws from the side and bottom halves of the floppy drive using a screwdriver in a steady and careful manner. Because of this, you will be able to slide open the cover on the drive’s top.
Step 9
You should slowly and carefully wipe the read and write heads using a cotton swab that has been dipped in pure alcohol. Use extreme caution to prevent the heads from becoming locked out of alignment. Make use of a dabbing motion that is gradual and light by continuously contacting the head with the cotton swab and then raising it away from the head.
Video

Vampire Crawlers Coin Farming Guide

Forza Horizon 6 Performance: Why 60 FPS Is Still the Console Standard

Yoshi and the Mysterious Book (2026) – Full Completion Guide, Rewards & Secret Ending

How to Get Free Pets in Adopt Me: A Guide for Players

Roblox Username Generator – Create a Cool & Unique Username in Seconds
How to Get Free Pets in Adopt Me: A Guide for Players
Yoshi and the Mysterious Book (2026) – Full Completion Guide, Rewards & Secret Ending
Forza Horizon 6 Performance: Why 60 FPS Is Still the Console Standard


