Guide
How to Format Floppy Disk without Losing Data In Windows
A floppy disc is a removable storage device that can save data on your computer. This data can be accessed later. As was the case previously, there were no CD-ROM or USB drives available, so this was the only medium available for storing information. It is not extensively utilized currently due to the fact that it has a low capacity. But some people use floppy diskettes to store little files.
A floppy disc is susceptible to data corruption in the same way that other types of external storage devices are. As soon as it begins to acquire certain problems, it begins flashing error messages that instruct you to format a disc in order to make it useful.
Read this article to learn how to recover and read files off of your floppy disc rather than following the instructions in the message. We will walk you through the various procedures for formatting discs on Windows operating systems as well as how to use the Recoverit data recovery programme to retrieve lost information.
Read Also: How to Destroy Floppy Disks
How to Format Floppy Disk in Windows 10/8/7
You can use the built-in formatting tools or the Command Prompt to format the floppy disc, regardless of whether you are working on Windows 10 or Windows 8 or Windows 7. However, keep in mind that formatting will delete all of the information that has been recorded, so make sure you have a backup or that the data has been saved on a secure drive. Get familiar with the many methods for erasing data from a floppy disc.
Format by File Explorer
The computer programme known as file explorer is the one that enables its user interface to be utilized in the administration of a variety of file and folder structures. Start the formatting of the floppy disc with it by following the procedures below.
Step 1: The first step is to place the floppy disc in the drive and then open the Run dialogue box.
Check that the disc is inserted with the correct side facing up, and make sure that the disc is not in the locked position before continuing your search for the necessary disc that has to be formatted. To access the Run menu, select the Start button, then type run into the search bar that appears.
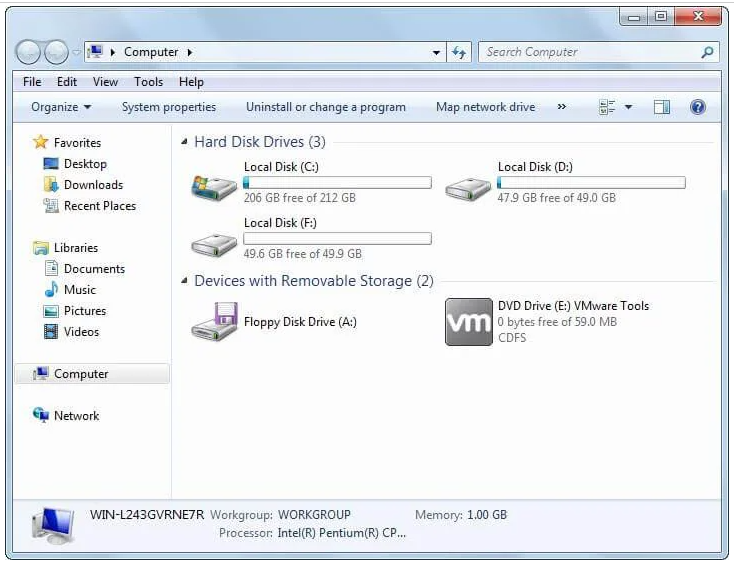
Step 2: Launch Explorer and select My Computer from the drop-down menu.
In the field labelled Open: type explorer, and then click the OK button. You can also launch it by clicking on your computer and then pressing the Win key plus the E key. This will display all of your discs.
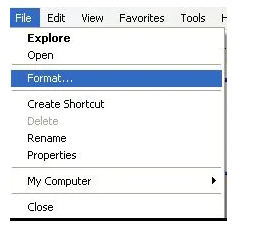
Step 3: Select Format from the drop-down menu that appears when you right-click on the Floppy Disk.
Pick the floppy disc that is typically denoted as A: or B: from the list of drives that are currently available, and then select Format from the File menu after making your selection.
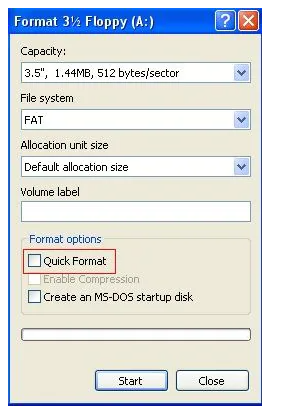
Step 4: Adjust the Preferred Settings
When you click on the format, a window similar to the one shown in the following picture will appear before you. Adjust the settings so that they read as follows:
- Capacity: Adjust the setting to 3.5 inches and 1.44 megabytes.
- Select FAT as your file system. It is the file system that is supported by Windows as well as Linux and Mac.
- Allocation unit size: Adjust this to the default size of the allocation.
- The maximum number of characters that can be used for the Volume Label is 16, and it should be a name that describes the disc when it is inserted.
- Formatting alternatives: The data will be removed rapidly using the quick format, however the information will not be deleted in a secure manner in this manner. Therefore, you do not need to check it.
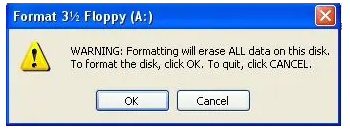
Step 5: Click on the Start button, followed by the OK button.
To get started with the format, click the option labelled “Start.” To proceed with the formatting of the floppy disc, select OK from the confirmation box when it comes on the screen.
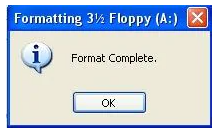
After the formatting has been finished, the window that says “Format Complete” will appear. You can then close the window by clicking the OK button. The diskette that you have is now ready to be used.
Format by Command Prompt
The command-line interpreter can be found in nearly all versions of the Windows operating system. The procedures that are listed below will walk you through using the built-in command prompt to format the floppy disc.
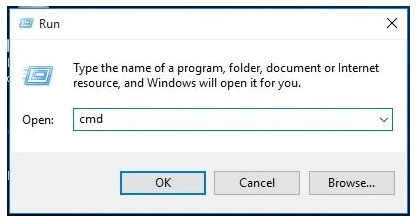
Step 1: Open the Command Prompt Window
On the keyboard, press the Win key plus the R key, and then type cmd into the run box that appears.
Step 2: Insert Floppy Disk
Before searching for the disc on the computer, make sure that it has been properly inserted, and check to make sure that it is not in a locked state.
Step 3: In the Format box, type *:
Start the basic formatting by typing the command that was just shown. The letter “*” denotes the letter that the computer has designated as being the letter that represents the floppy drive.
Step 4: The fourth step is to validate the formatting.
To begin the formatting, press Y when requested, and then confirm your selection. You are able to make changes to the format by appending a number of switch commands to the end of the format command.
- /fs: filesystem – Based on the specifications you’ve provided, you should replace the filesystem with either FAT, exFAT, FAT32, NTFS, or UDF.
- /v: label Will cause the label to be replaced with the name that you have given the disc. However, you should limit it to no more than 16 characters.
- /q – For fast format.
- /c – It will compress the files that have been added on its own (NTFS only).
- /p:# is a command that overwrites the space on the disc with zeroes and then, after each count, with random numbers. The number of the count is shown by the symbol # here.
It is the most effective method for erasing sensitive information completely from a computer running an operating system later than Vista, such as Windows 7.
Video

Vampire Crawlers Coin Farming Guide

Forza Horizon 6 Performance: Why 60 FPS Is Still the Console Standard

Yoshi and the Mysterious Book (2026) – Full Completion Guide, Rewards & Secret Ending

How to Get Free Pets in Adopt Me: A Guide for Players

Roblox Username Generator – Create a Cool & Unique Username in Seconds
How to Get Free Pets in Adopt Me: A Guide for Players

Grow a Garden Recipes in Roblox: Guide to Cook (Donuts, Sushi, Pie, Pizza & More!)
Roblox Username Generator – Create a Cool & Unique Username in Seconds
Yoshi and the Mysterious Book (2026) – Full Completion Guide, Rewards & Secret Ending


