Apple
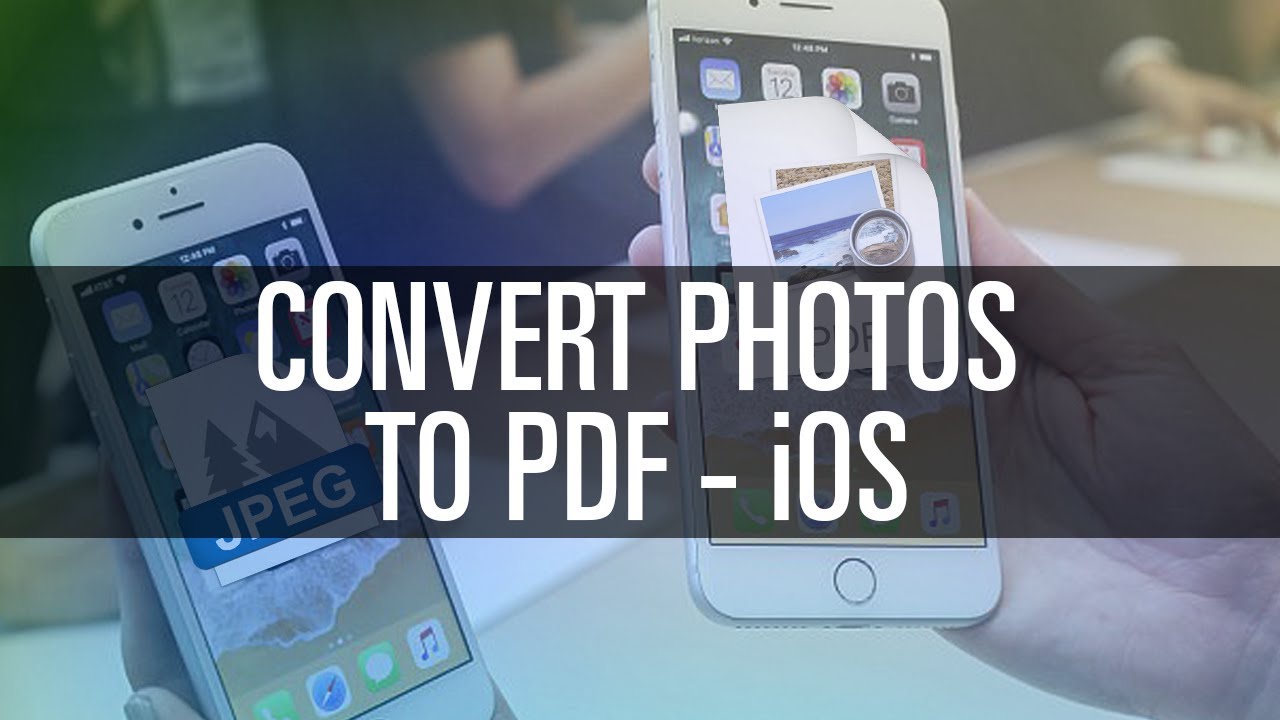
How to convert photo to PDF on iPhone and iPad
There is a good chance that the photographs stored on your iPhone are in a range of different file formats (like HEIC, JPEG, PNG, etc.) The majority of these file types are compatible with all of the major operating systems. For specialized uses such as paper work documentation, classwork, or other assignments, you may be required to save images to PDF format. https://www.pdf4sure.com
In this post, I’ll show you three different methods for converting photos to PDF on your iPhone or iPad. Read more.
Read Also: How To Fix Keyboard On IPad
How to convert a picture to PDF on iPhone using Printer Options
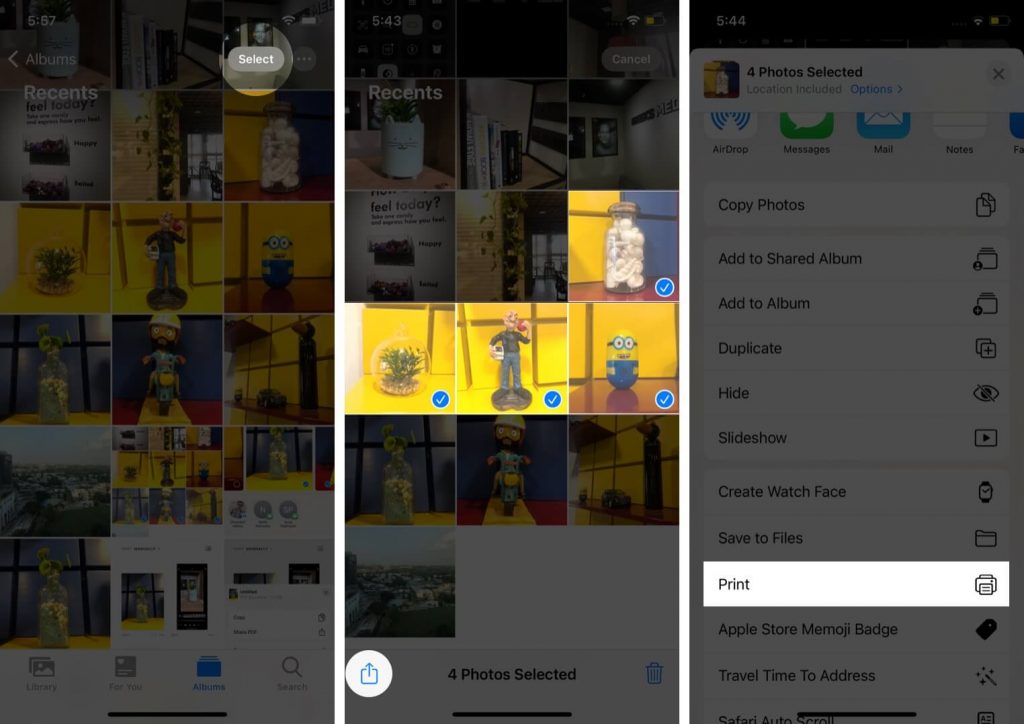
1. Open Photos on your iPhone and select Albums from the drop-down menu. Now, select one or more photographs by using the Select button.
2. To share something, press the Share button.
3. Select Print from the Share Sheet’s drop-down menu.
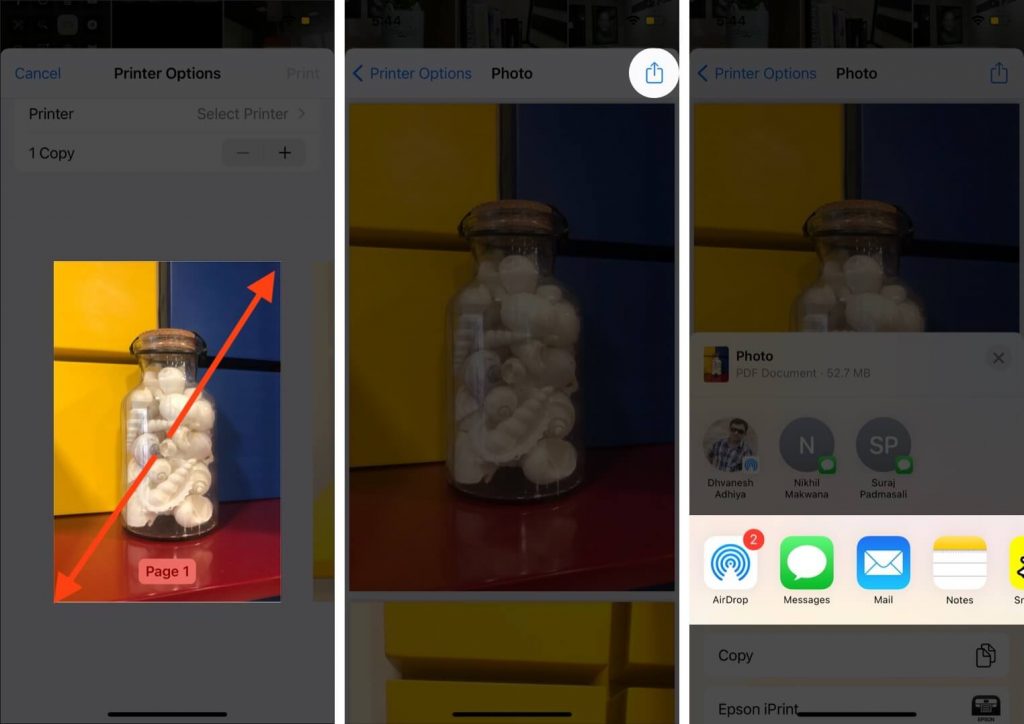
4. Using two fingers on the photo preview, pinch outwards to save the photo as a PDF.
1. Choose the photographs you want to share and press the Share button.
2. On the Share Sheet, select Books from the drop-down menu. If necessary, swipe horizontally across the row of application icons.
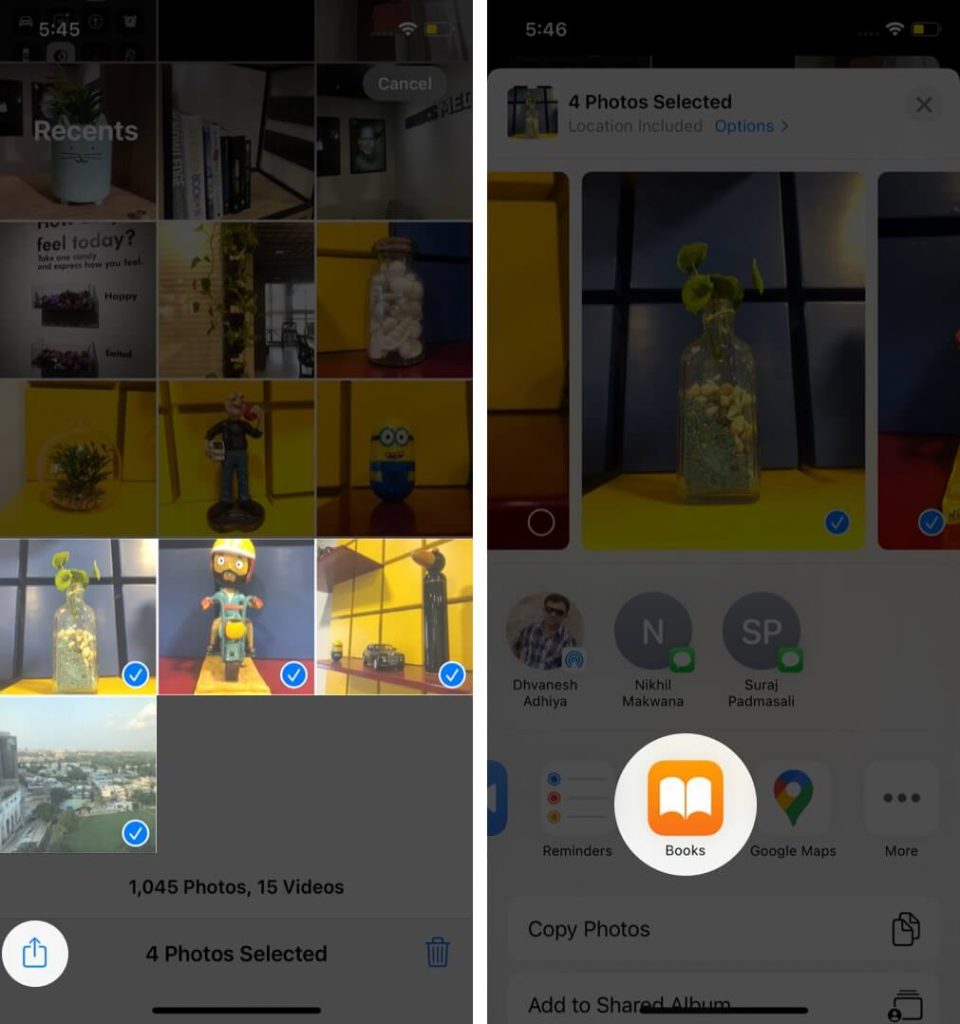
3. In Books, the images will be instantly converted into a PDF file and opened in the application. It will be saved at that location.
4. To return to the previous screen, tap the screen and then the back arrow.
5. Then select More from the drop-down menu (three dots).
![]()
Save photos as PDF on iPhone and iPad using the Files app
Files allows you to rapidly produce PDF documents. The photo, on the other hand, must be saved in the Files folder. Consequently, if you already have photographs in this location, go to the next step. If they are in Drive, Dropbox, One Drive, or another third-party cloud service, you can learn how to activate these third-party cloud services from inside Files.
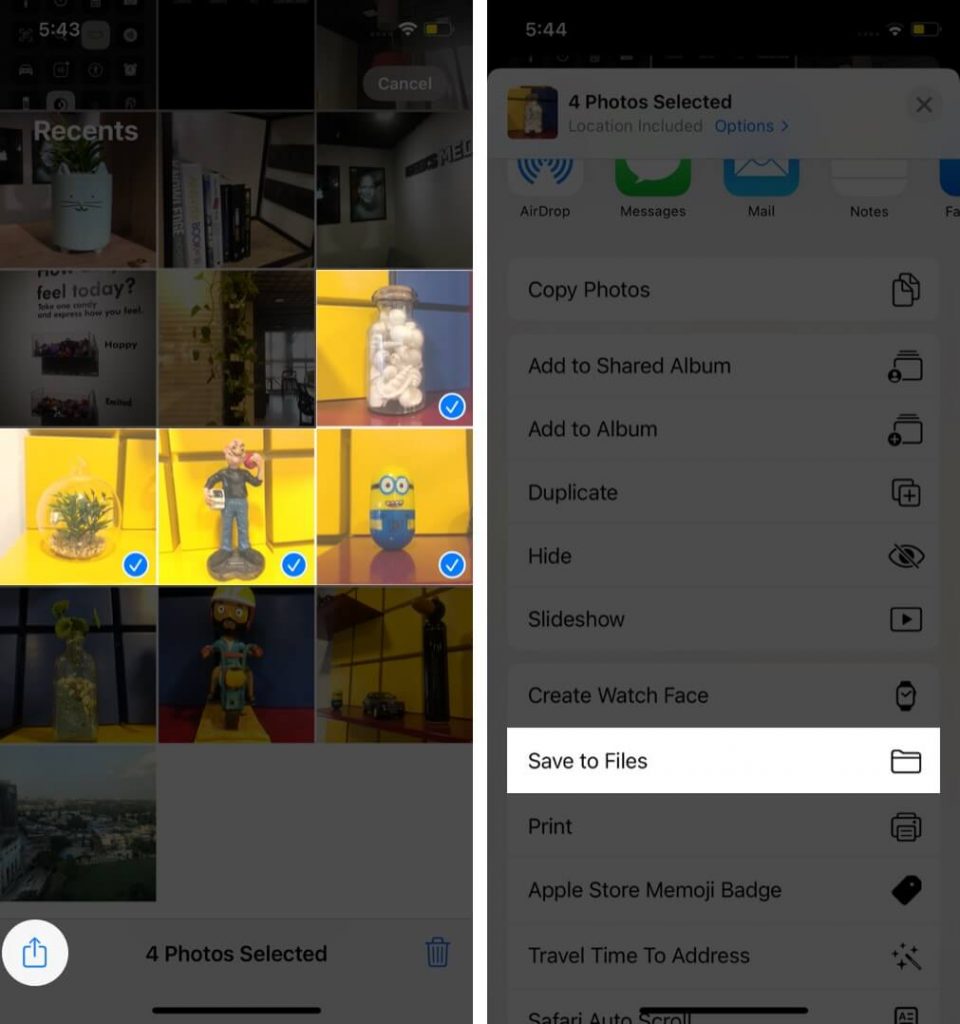
Alternatively, to copy photographs from Photos to Files, follow these steps: Choose the photographs you want to save from Photos by tapping the Share button and selecting Save to Files.
Following that, here are the procedures to follow in order to make a PDF from photos taken on your iPhone.
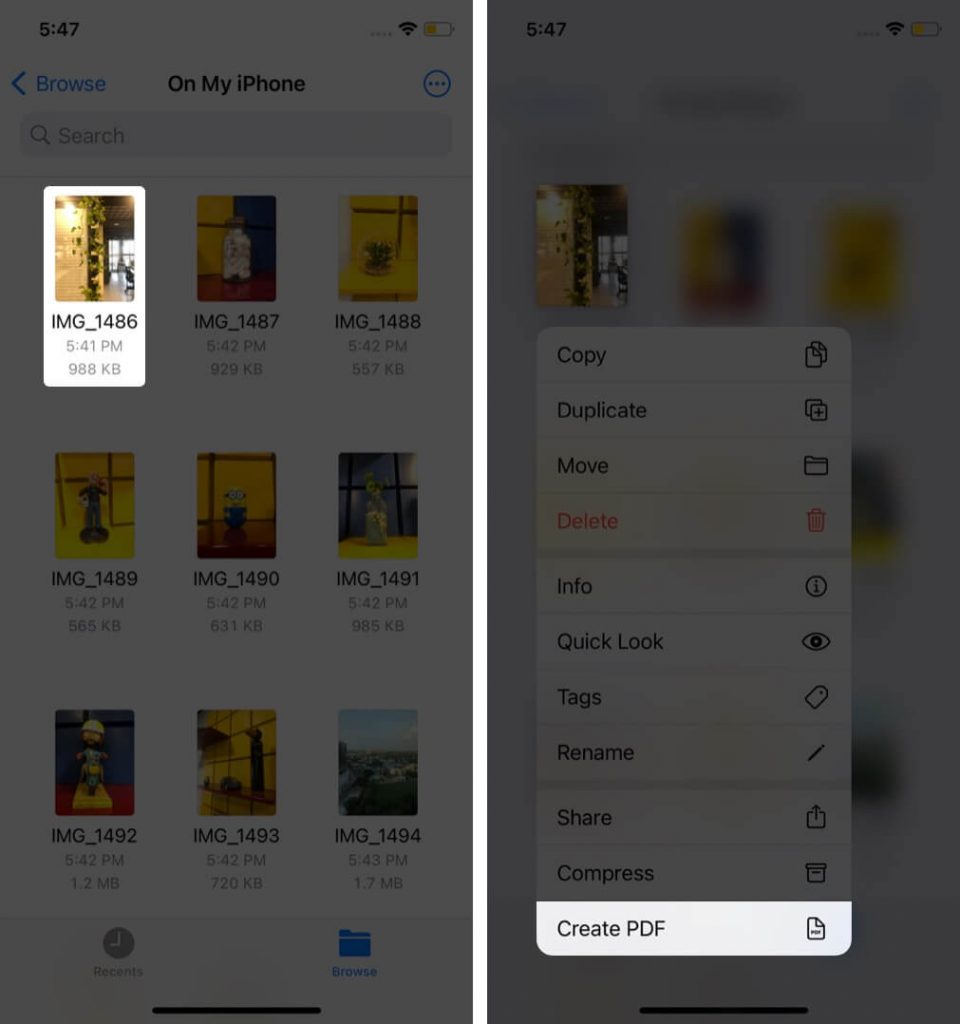
1. Locate the image by opening Files and selecting it.
2. To convert a single image into a PDF document, long press on the image and select Create PDF from the pop-up menu.
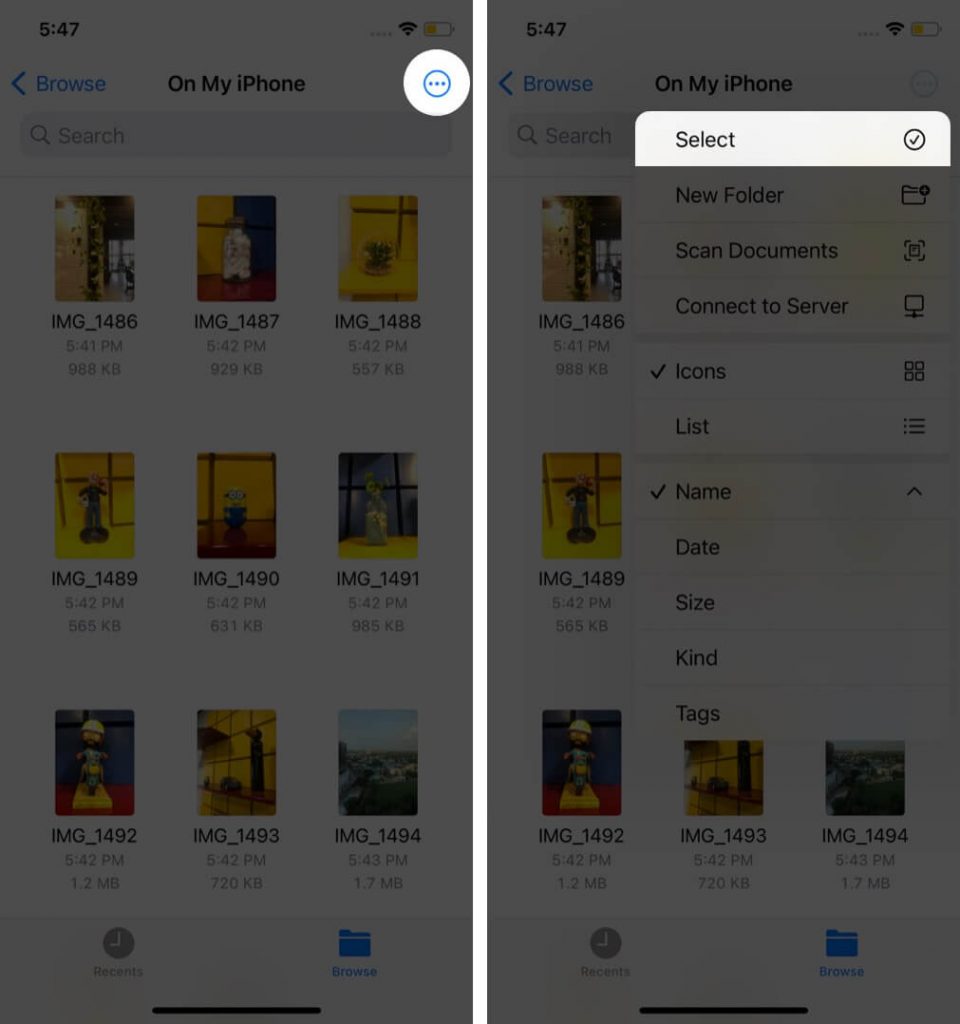
3. To convert several images into PDF: Tap More (three dots inside a circle) from the top right and tap on Select.
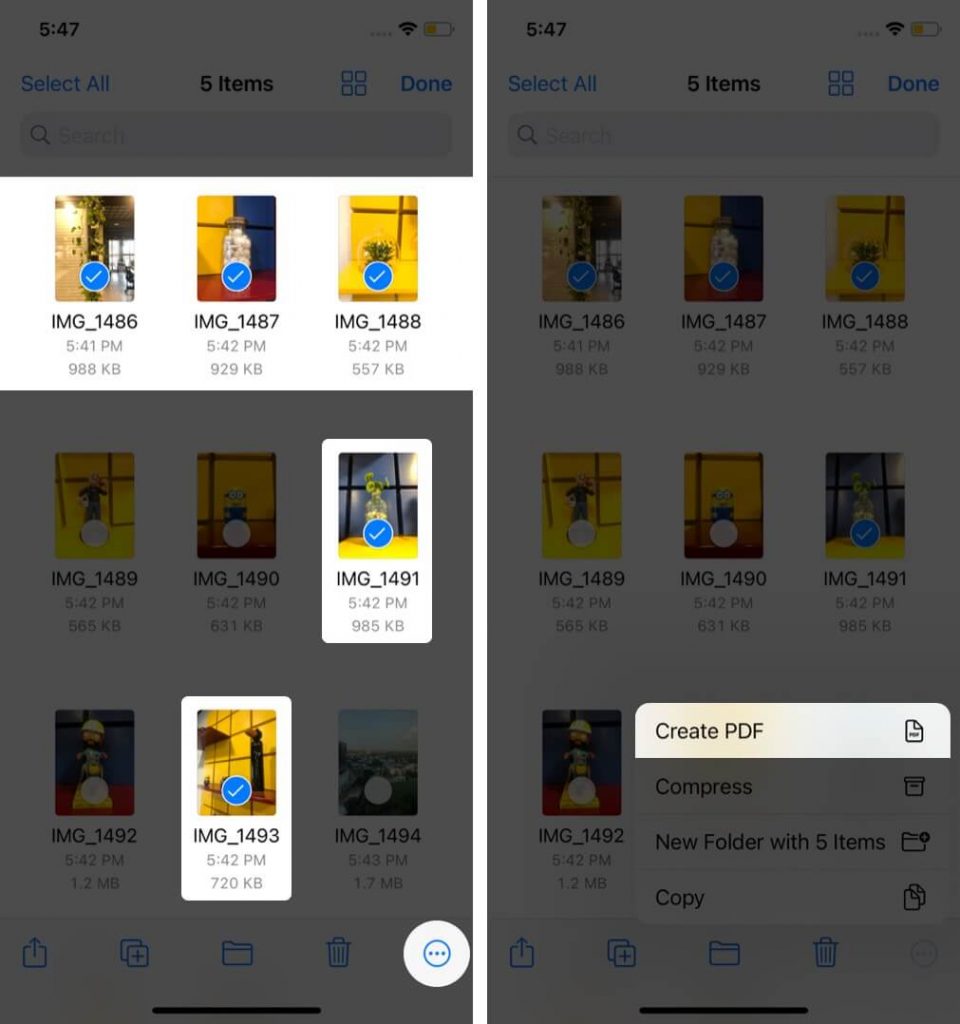
4. Now, tap multiple photos. Once done, tap More from the bottom right and choose Create PDF.
Files will create a PDF document from the images you provide. It will be saved in the same folder as the original photographs. You may read our complete tutorial on how to copy, transfer, and distribute this PDF by visiting Files.
Video
The following instruction was written to assist you in converting photographs to PDF on your iPhone or iPad. All three techniques are equally effective, but my personal preference includes the use of the Books application. With this procedure, the PDF is made fast and safely preserved in a location where it may be accessed at any time.

Vampire Crawlers Coin Farming Guide

Forza Horizon 6 Performance: Why 60 FPS Is Still the Console Standard

Yoshi and the Mysterious Book (2026) – Full Completion Guide, Rewards & Secret Ending

How to Get Free Pets in Adopt Me: A Guide for Players

Roblox Username Generator – Create a Cool & Unique Username in Seconds
How to Get Free Pets in Adopt Me: A Guide for Players
Yoshi and the Mysterious Book (2026) – Full Completion Guide, Rewards & Secret Ending
Forza Horizon 6 Performance: Why 60 FPS Is Still the Console Standard


