Guide
How To Record Screen On Mac – Complete Guide
Taking a video of your computer screen on a Mac is simple, whether you want to preserve a YouTube video you’re viewing or show someone a computer issue you’re experiencing on your computer. You can even capture audio, display your mouse clicks, and do a variety of other things. It doesn’t matter how old your computer is; here’s how to record your full screen or just a section of it on a Mac computer.
How to Screen Record with Keyboard Shortcuts
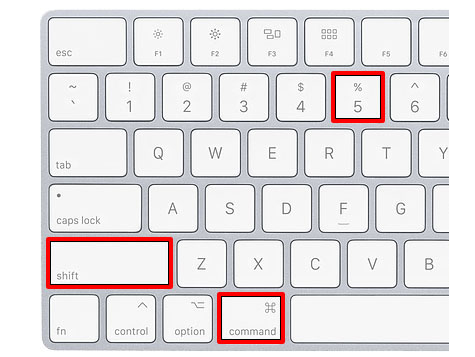
On a Mac, you may record your screen by pressing the Command + Shift + 5 keys on your keyboard at once. Then, in the pop-up toolbar that displays at the bottom of your screen, pick either the Record Entire Screen or the Record Selected Portion options to begin recording. Finally, press the Record button.
- Press the +Command Shift + 5 keys on your keyboard. This will open the Screenshot Toolbar at the bottom of your screen.
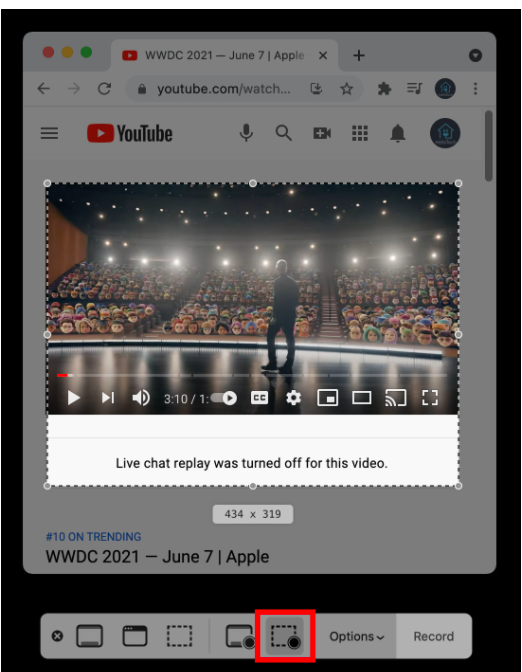
- Record the whole screen or pick a portion of the screen. You may record the full screen by pressing the fourth button after the “x.” In order to record a specific area of the screen, you may press the fifth button. When you hover your cursor over a button, you can see what it does.

If you choose to record a portion of your screen, you will see a box with broken lines appear on your screen. You can then click and drag the edges of the box around what you want to record.
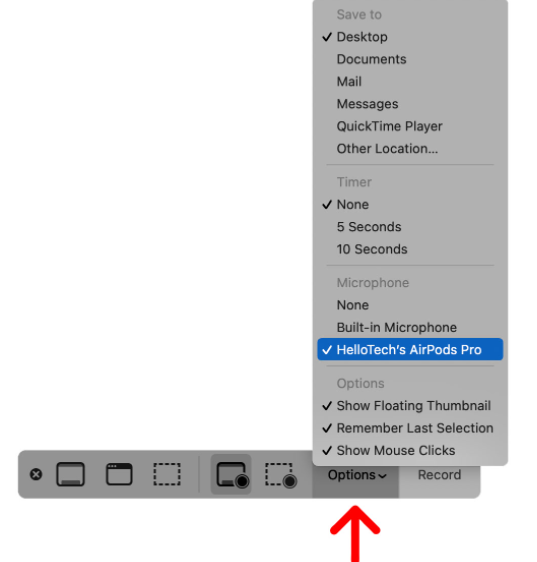
- The next step is to hit the Record button. Right-hand side of the toolbar is where you’ll find this option.

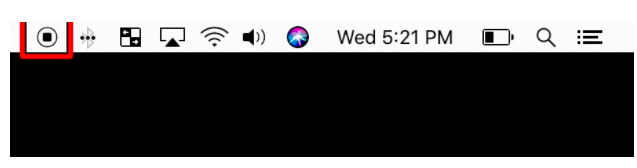
- Finally, click the square in a circle symbol at the top of your Mac’s screen to stop the recording. You may also stop recording by pressing Command + Control + Esc.

The QuickTime software may be used to record your screen if the keyboard shortcuts don’t work for you or if you have an older Mac. How to do it is as follows:
How to Screen Record Using QuickTime
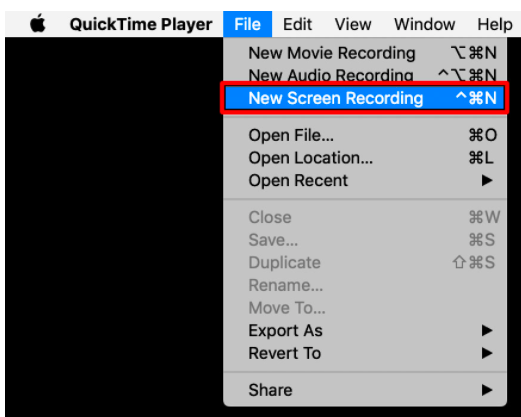
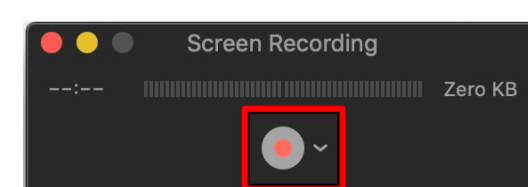
Take use of the QuickTime software on a Mac by clicking File in the upper right-hand corner. Select New Screen Recording, then click the red button in the pop-up box. To start recording, click.
- Download and use the QuickTime Player application on your mobile phone or tablet. Apple’s operating system includes this programme by default. To get it if you can’t find it in your Applications folder, click this link.
- In order to do this, click on the File button next. Apple Menu Bar at the top of your screen will show this.
- Afterwards, choose New Screen Recording. Using this method, you may start recording your screen activity.
- Start screen recording by clicking the red button. If you want to record the full screen, all you have to do is click on any part of the screen. In addition to dragging to pick a specific region to record, you may also click Start Recording inside that area and then begin recording.
- To stop recording, click the black circle button in the menu bar. You may also stop recording by pressing Command + Control + Esc.
QuickTime will open the video recording when you hit stop. The recording may then be played, edited, or shared. You may also save it by hitting the Command + S keys or by selecting File > Save from the QuickTime menu.
Read More: How to change your Xbox Gamertag – Complete Guide
Video

Vampire Crawlers Coin Farming Guide

Forza Horizon 6 Performance: Why 60 FPS Is Still the Console Standard

Yoshi and the Mysterious Book (2026) – Full Completion Guide, Rewards & Secret Ending

How to Get Free Pets in Adopt Me: A Guide for Players

Roblox Username Generator – Create a Cool & Unique Username in Seconds
How to Get Free Pets in Adopt Me: A Guide for Players
Yoshi and the Mysterious Book (2026) – Full Completion Guide, Rewards & Secret Ending
Vampire Crawlers Coin Farming Guide


