Guide
How to Create a Flowchart in Microsoft Word

The applications that are included with Microsoft Office receive even more functionality with each new version that is released. In today’s environment, flowcharts can be made without even the need to download a specialised tool in order to do so. Microsoft PowerPoint, Microsoft Word, and even Microsoft Excel all have the capability to be used in the creation of flowcharts. Creating a flowchart in Microsoft Word will be a step-by-step procedure that you will be guided through in this lesson. So let’s get started:
Read Also: How to Create and Print a Label in Microsoft Word
How to Create a Flowchart in Microsoft Word
By Using Shapes:
Because it can run on any type of computer, Microsoft Word is a widely popular word processor that is used all over the world. Word began as a straightforward word processor but has now developed into much more, which has contributed to the software’s ever-increasing popularity across all operating systems. You are now able to make flowcharts, barcodes, and even greeting cards thanks to the addition of drawing and design tools that are included in the updated version.
The Shapes tool is one of those tools. Creating a basic flowchart while you’re on the move is made much simpler by utilizing the Shapes tool. Therefore, let’s begin by creating a simple flowchart with shapes.
1. Begin with a Blank Document
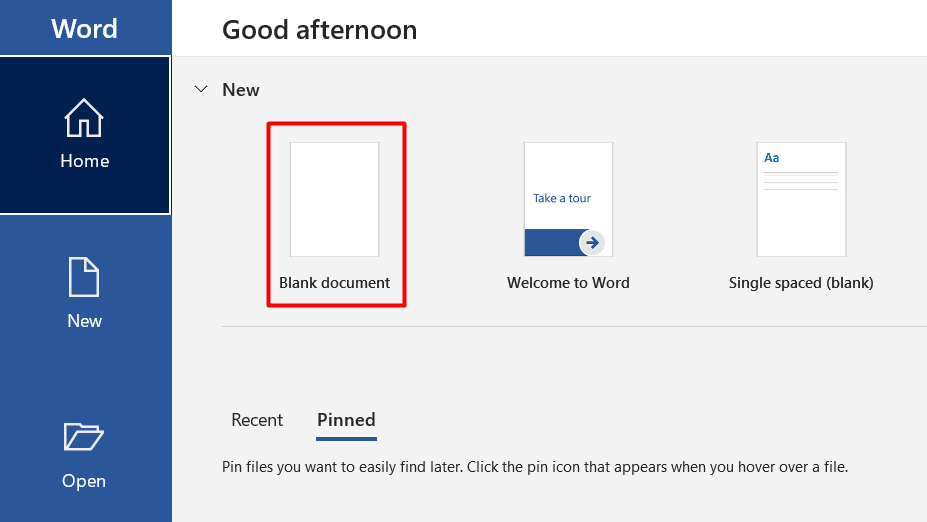
When you start up Microsoft Word, you will instantly be given the option to open a new document that is completely blank. This will happen as soon as Word has finished loading. Choose the option “Blank document” from the drop-down menu, and you will be all set to move through with the process.
2. Enable Gridlines:
This step is not required, but we strongly suggest that you do it because it will make things much simpler. You will have an easier time appropriately sizing everything and positioning each flowchart piece if you use gridlines. If you don’t have this function, there’s a chance that your flowchart may end up with uneven forms and drawings that aren’t aligned properly, which will make it look unprofessional.
Visit the View tab and choose the checkbox next to the Gridlines checkbox to turn on the gridlines.

Following this, the appearance of your document should be similar to the one seen below.

3. Insert Shapes:
To view the assortment of shapes that are available within Word, navigate to the Insert tab and select the Shapes option.

You’ll find that there are many distinct classifications of shapes.
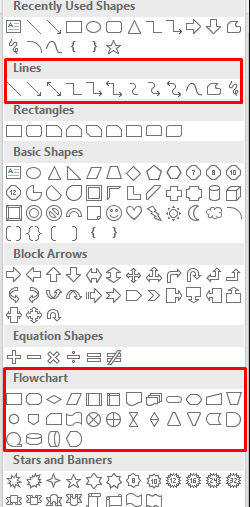
When it comes to the construction of our flowcharts, we are particularly interested in lines and flowchart shapes. There are a variety of functions that correspond to each shape. Even if the guidelines aren’t written in stone, it’s still a good idea to follow Word’s recommendations wherever possible. For instance, the rectangle is the appropriate shape for the process steps, while the diamond is the appropriate shape for the decision points. You can get this information by moving your mouse pointer over each shape and looking at the pop-up that appears.
Let’s go on to the next step and add the first form. First, we’ll work with an oval outline. Launch the shape menu, pick the oval shape, and then draw it by clicking and dragging the cursor with your mouse.
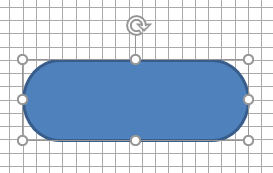
When you complete the creation of your first shape, a new tab will appear at the very top of the document. You now have access to the Format tab, which allows you to make changes to your shapes, add colours, and perform a variety of other operations.

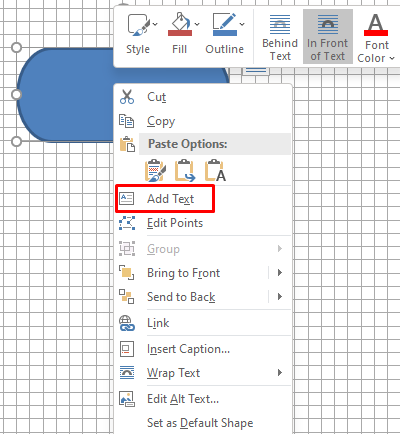
Simply right-click on the object you want to add text to, and then select “Add Text” from the menu that appears.
Now let’s add one more form, and then we’ll join all of these shapes together by drawing a line in between them.
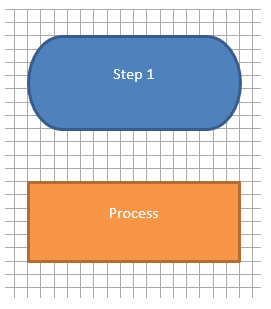
To add a shape in the form of a rectangle, repeat the procedures from above.
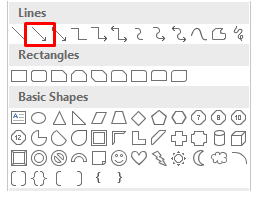
After that, navigate to the shape library and, rather than picking a shape from the Flowchart category, pick a line arrow from the Lines category.
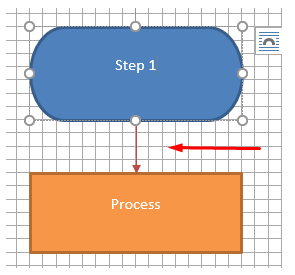
After selecting the first form to see the control points that are located on each of the sides of your shape, pick the arrow. To move the arrow to the centre handle of the second form, click on the low-bottom handle, and then drag it. Repeat these steps using different forms and lines in order to design the flowchart you desire.
FAQs
Is there a flow chart template in Word?
Navigate to the Insert menu, then click Illustrations, then Shapes. When you select “Shapes” from the menu, a submenu will display for you to select from. Find the shapes that have the label “Flowchart” on them. In this section, you can find all of the different forms that are required to construct a flowchart, such as decision boxes and process boxes.
Is it easier to create a flowchart in Word or Excel?
Excel is a programme that can be learned more quickly than Word, and it also has the same odd approach. When it comes to mapping flowcharts, Excel performs far better than Word on a number of different levels.
Does Microsoft have a flow chart tool?
Microsoft 365 now includes Visio. Microsoft 365 now includes essential Visio capabilities, allowing users to construct flowcharts, basic network diagrams, Venn diagrams, block diagrams, and business matrices. These skills were previously only available in Visio.
Is PowerPoint or Word better for flowcharts?
As long as all of the shapes can be contained inside the page limits of Word, Word is an excellent tool for creating straightforward flowcharts with a limited number of shapes. PowerPoint’s slide limitations are comparable to those of Word’s page limits; but, for bigger flowcharts, you can use PowerPoint’s hyperlinking capabilities to spread the same flowchart across numerous slides. This is possible thanks to PowerPoint’s similarity to Word’s page constraints.
Does Office 365 have a flowchart?
Word for Microsoft 365 includes a variety of predefined SmartArt templates that can be utilised in the creation of flowcharts. These templates range from visually appealing basic flowchart templates with graphics to more advanced flowchart templates.


