Guide
How to Create a Mii on Your Nintendo Switch
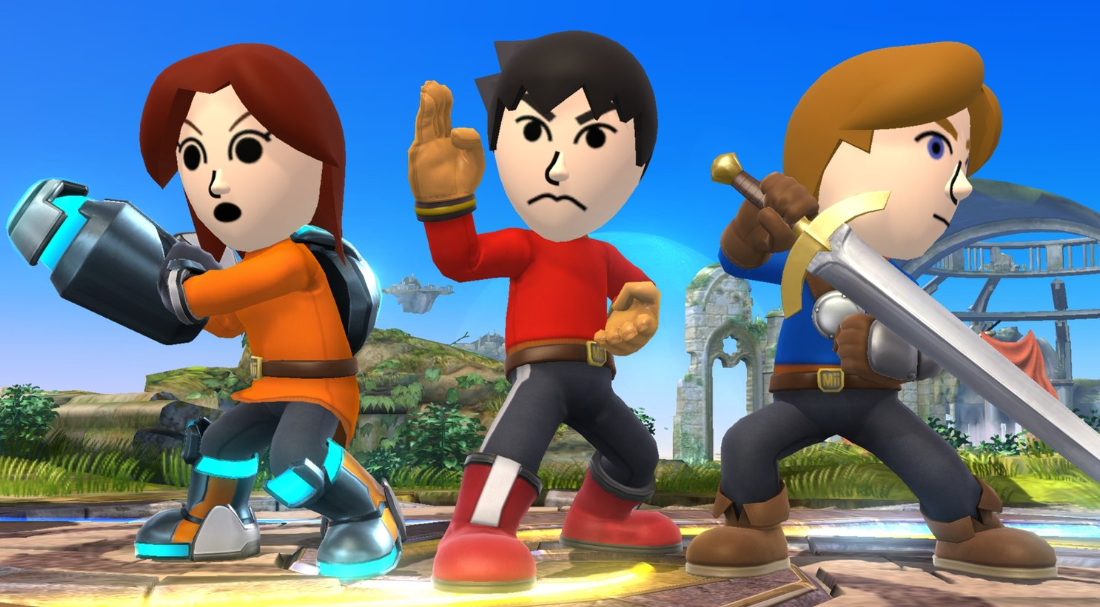
If you were one of the many people who at some point had a Nintendo Wii, then you probably have some sort of recollection of something called a Mii. In many ways, they can be seen as the ancestors of the Bitmoji and Animoji characters that are found in more recent video games. These are teeny-tiny characters that may be modified in a number of different ways and used in a vast array of different games.
Even though Miis aren’t as front-and-center as they were on the Wii, you can still make and save them on the Nintendo Switch. This is despite the fact that Miis aren’t as prominent on the Switch as they were on the Wii. In the paragraphs that follow, we are going to take you step by step through the process of creating a Mii on your Nintendo Switch.
Read Also: How to Record Fortnite on Nintendo Switch
How to Create a Mii on Your Nintendo Switch
Using the System Settings menu is the simplest and quickest way to create a Mii, as well as the sole way to modify existing Miis.
1. Navigate to the System Settings menu by clicking the second icon from the right in the bottom toolbar once you are on the home screen.

2. You can access the Mii tab in the sidebar for System Settings by scrolling down until you reach it.
3. To create or edit a Mii, navigate to the right side of the screen and press the A button.
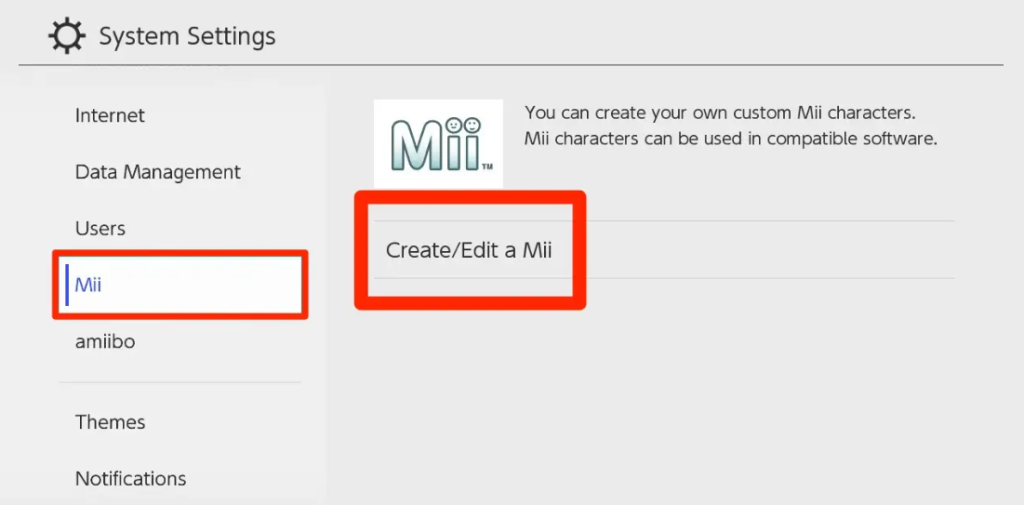
4. Choose an existing Mii from the Mii List to alter, or go to the sidebar and select “Create New Mii.” Both of these options are available once you reach this point in the game. You can also pick “Transmit/Receive” to connect to another nearby Nintendo Switch and send or receive Mii characters with that other device. This is done by connecting to the console and selecting the “Send/Receive” option.
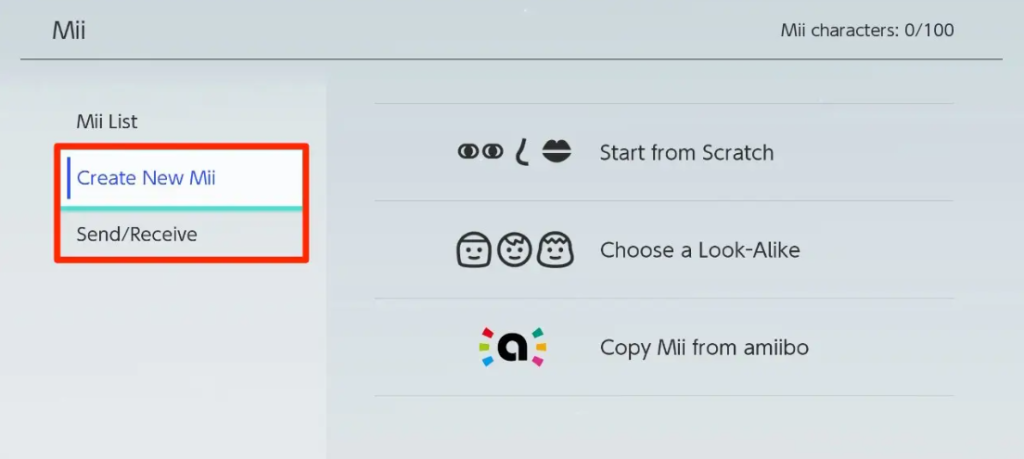
5. If you want to make a new Mii, you will have the choice between starting from scratch, selecting a look-alike, or copying a Mii from an Amiibo. If you want to make a new Mii, click here.
- If you want to begin the game from scratch, you will be given a Mii that has all of the factory settings applied to it. If you select a look-alike, you will be given the option to select a character who has a physical appearance that is comparable to your own, and then the features will be modified from there.
- If you want to replicate a Mii from Amiibo, you need to have an Amiibo figurine in your possession that already has a Mii saved to it.
6. Construct your Mii by adding features one at a time. There are many different sections of the body that may be customized, and you can do these customizations in whatever order you desire.
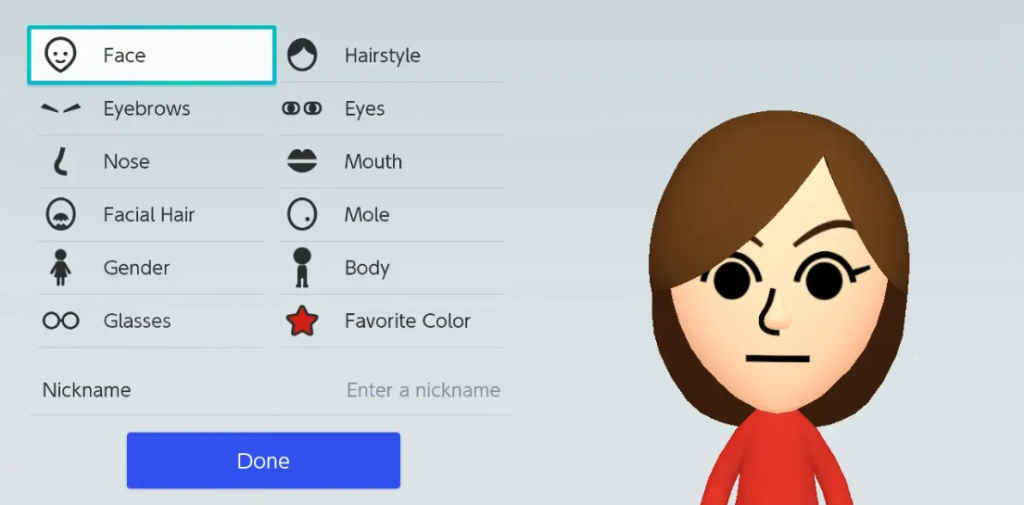
7. After selecting a part of the body, you can then use the L and R triggers to change various properties associated with that part of the body. To give you an example, while you are customising the face of your Mii, you can start by changing the head form, then tab over and change the cheekbones or face lines, and last choose the colour of the skin.
- When you have completed making changes to a specific region, use the B button to return to the previous screen and select another.
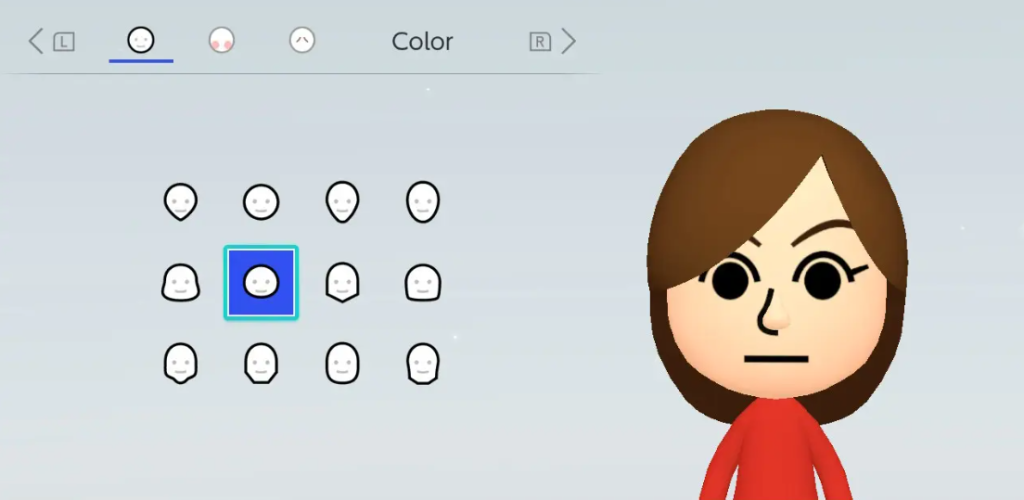
8. A slider gives you the ability to change the size of some of the features as well as where they are located. If you adjust the slider, the arrows next to each feature will show you if doing so will make that feature taller, smaller, wider, or narrower, or whether it will move higher or lower on the face.
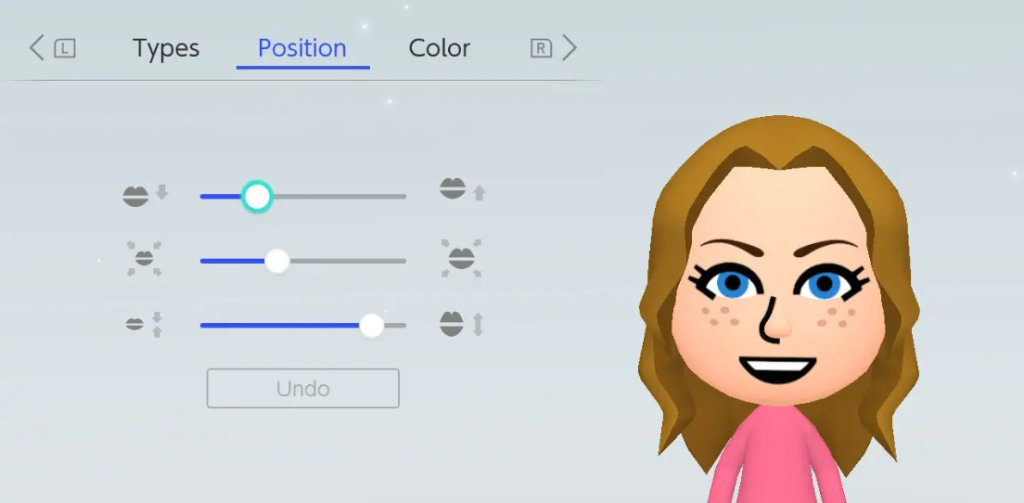
9. You also have the option to select the Mii’s “Favorite Color,” which determines the colour of the clothing they wear.
10. When you are done, tap the “Done” button, and then select a name for your Mii to complete the process.
- Some video games, such as “Super Smash Bros. Ultimate,” come with their very own individualised character designers known as “Mii.” These allow you to create a Mii and personalise it in the same way, but it is unlikely that you will be able to alter that Mii once it has been created.
- Your Miis, which you make while playing those games, will be saved on the system. On the other hand, Miis that you download from the internet almost never are.


