Guide
How to Disable a Laptop Keyboard in Windows 10

Manufacturers have reduced the size of laptop keyboards in order to make them lighter and more portable. Compared to using an external keyboard on a desktop, typing on a laptop has become more difficult because of this. You may now deactivate the laptop keyboard on your Windows 10 PC and use an external keyboard instead. This post’s advice is all you need to know.
External keyboards may be cumbersome to take around, but they provide a number of advantages than laptops, including a more durable frame, better typing, and the ability to easily change the keyboard.
Read Also: How to Take a Screenshot on Asus Laptops
How to Disable a Laptop Keyboard in Windows 10
There are two safe ways to deactivate your laptop’s keyboard in Windows 10: disable it in Device Manager or remove it from the system entirely.
Another method is to prevent the keyboard from operating by making it use a device driver that it is unable to utilize. Although it’s not something we encourage, if none of the other options work, this is a possibility.

Use Device Manager to Disable the Keyboard
Permanently shutting off a laptop keyboard using this technique is the safest and simplest option, although it may not work on all laptops.
Using Device Manager, you may turn off a device:
1. Enter devmgmt.msc in the command line of the Run dialogue box (Win+R) to start Device Manager. Choose the Device Manager tool by right-clicking the Start button and selecting from the menu that appears.
2. Open up the Keyboards section to obtain a comprehensive list of available input methods.
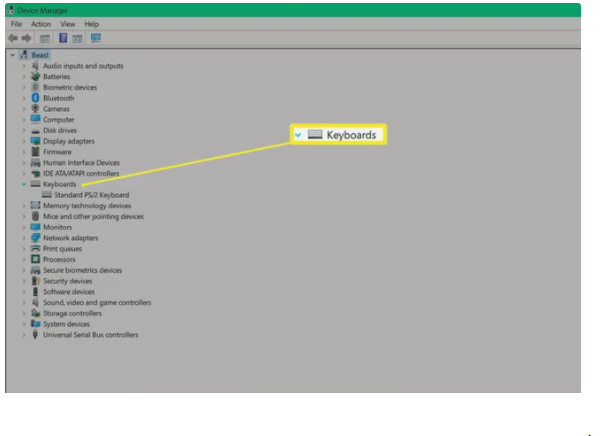
3. Disable the device by selecting Disable from the context menu of the right-clicked Standard PS/2 Keyboard. If you don’t see this option, follow the instructions below to see if you can get it to appear.
4. With the help of Yes. Restart the machine if the keyboard isn’t deactivated immediately away.
Use the Wrong Driver to Break the Keyboard
Updating a device with an incompatible driver is an unusual procedure that should be avoided wherever possible. However, it is a valid option in this particular situation. When you install a keyboard driver that is incompatible with your operating system, the keyboard will stop working.
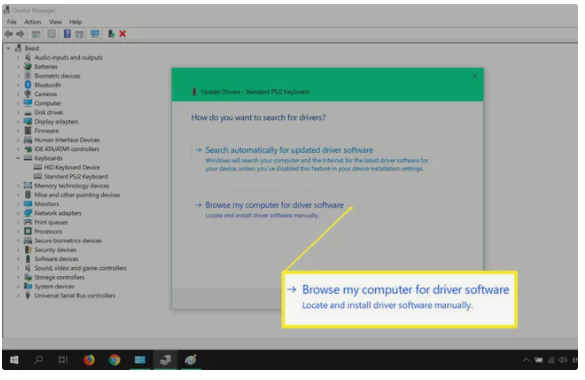
1. Right-click the Standard PS/2 Keyboard in Device Manager and pick Update Driver from the drop-down menu that appears.

2. Select Browse my computer for driver software.
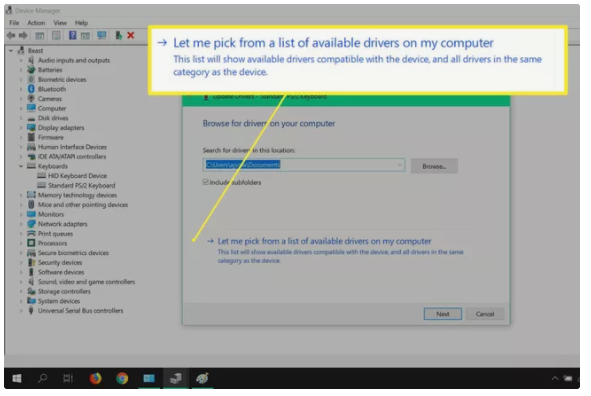
3. Select Allow me to select a driver from a list of those that are currently installed on my machine.
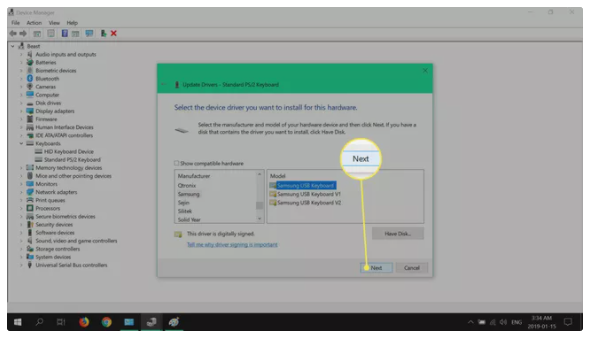
4. Clear the Show compatible hardware check box.
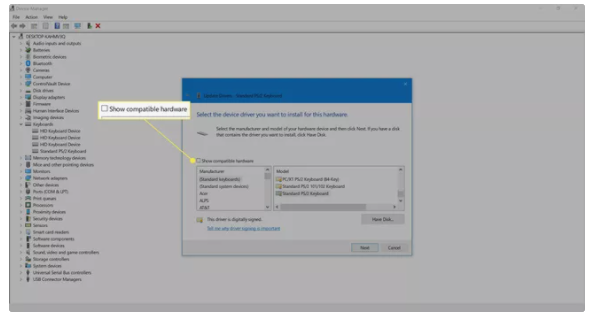
5. Click Next once you’ve scrolled through the list and selected a manufacturer (which is different from your usual keyboard), followed by a model selection.
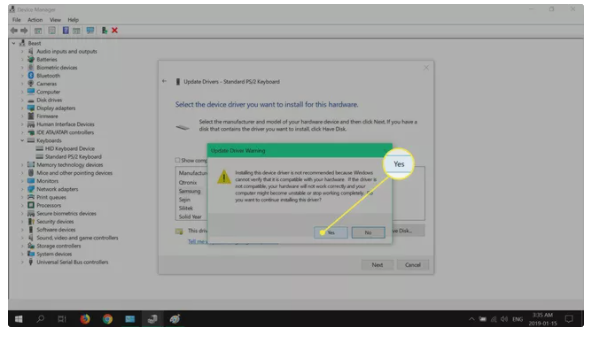
6. Select Yes from the drop-down menu.
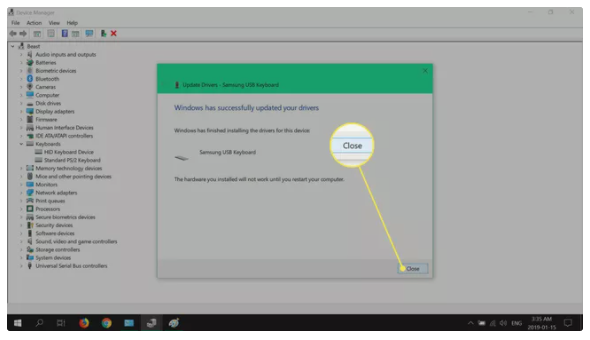
7. Select Close once the driver is updated.
8. To restart the computer, select Yes from the drop-down menu.
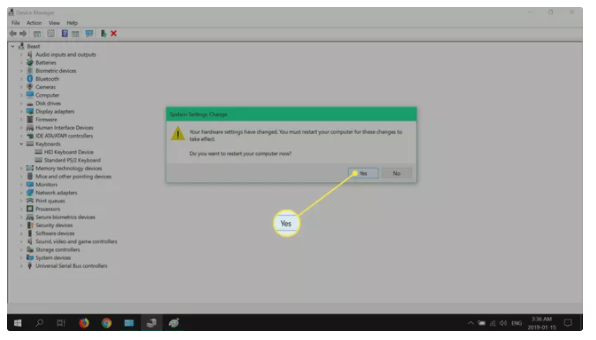
9. The built-in keyboard will no longer operate when the computer has been restarted.
You may restore keyboard functionality by repeating steps 1 and 2 but selecting Search automatically for drivers instead of Manually search for drivers.
Video
FAQS
How do I disable my laptop keyboard without removing it?
You may deactivate a device in Device Manager without having to remove the drivers for the device in question. To disable the device, simply right-click on it and select “properties.” This is the strategy I use on a number of different laptops. Some models additionally include touch-pad managers, which have the ability to deactivate the keyboard while another device is present.
Why can’t I disable my keyboard?
If you are unable to deactivate the laptop keyboard, you may enable a device installation restriction using the built-in Local Group Policy Editor to prevent the keyboard from being reinstalled every time your computer is powered on. Keyboards are a good example of this. Properties may be accessed by selecting Standard PS/2 Keyboard from the context menu.

Vampire Crawlers Coin Farming Guide

Forza Horizon 6 Performance: Why 60 FPS Is Still the Console Standard

Yoshi and the Mysterious Book (2026) – Full Completion Guide, Rewards & Secret Ending

How to Get Free Pets in Adopt Me: A Guide for Players

Roblox Username Generator – Create a Cool & Unique Username in Seconds
How to Get Free Pets in Adopt Me: A Guide for Players

Grow a Garden Recipes in Roblox: Guide to Cook (Donuts, Sushi, Pie, Pizza & More!)
Roblox Username Generator – Create a Cool & Unique Username in Seconds
Yoshi and the Mysterious Book (2026) – Full Completion Guide, Rewards & Secret Ending


