Guide
How To Fix A Disabled Graphics Card On A Laptop Or PC
In the event that you have deactivated your computer’s primary graphics processor, your screen will immediately go black. This circumstance develops as a result of inactivity on the part of the electronics that sends visual data to your screen. Regardless, the problem is totally a software issue, and it is completely reversible by just resetting the CMOS, which is in charge of controlling the BIOS.
Depending on how familiar you are with computers and how many accessories are in the way, the procedure for reinstalling your graphics card will appear either shockingly easy or terrifyingly difficult. If you are unfamiliar with computers, you should consult a computer professional.
This article describes how to restore functionality to your disabled graphics card via both the BIOS and the Windows operating system, depending on how you disabled it first.
Read Also: How to Upgrade RAM on a Laptop
What is BIOS and CMOS?
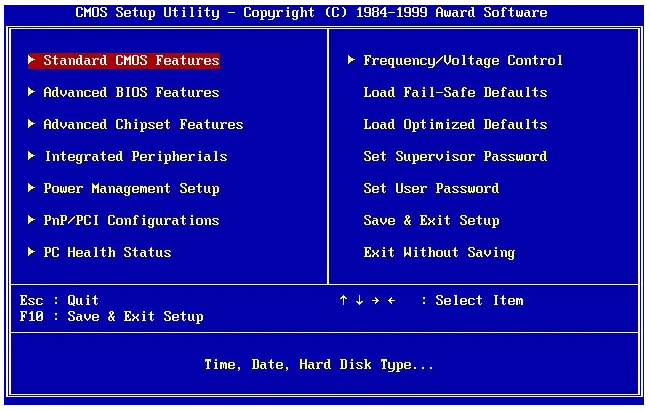
BIOS is an abbreviation for Basic Input/Output System, and it is the firmware on a chip that is read first during start up, as well as the software that instructs your computer on what to do with each piece of hardware it comes into contact with. In the following picture, the graphical user interface (GUI) will appear or be similar to what is shown:
In the BIOS, the Complementary Metal Oxide Semiconductor (CMOS) serves as short-term memory, which instructs the BIOS on what to perform each time the computer is powered on. It is common for the CMOS to be found in the RTC clock semiconductor, however some motherboards feature a CMOS chip on its own.
Fixing a Graphics Card Disabled from BIOS
Option 1: Reset the BIOS using a Switch on Your Laptop or Desktop PC
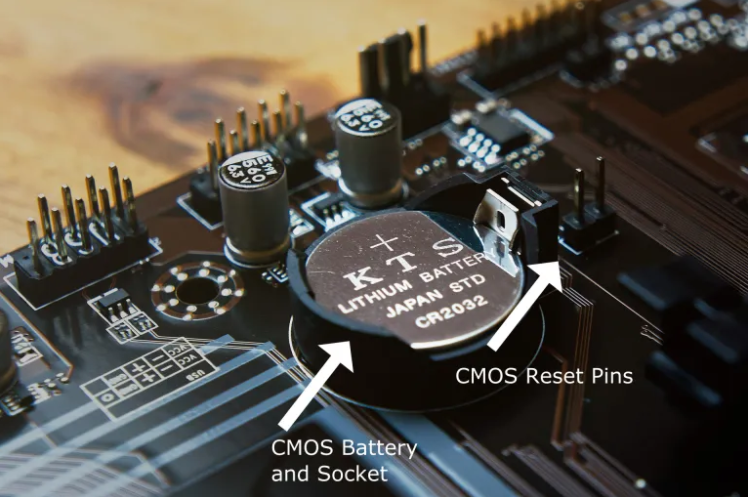
On the majority of modern motherboards, there is a CMOS reset button, which disables the backup battery’s ability to supply power to the BIOS—it is a simple pin-and-plug configuration. On some motherboards, though, it may be necessary to press a button. Resetting your CMOS and BIOS setup is much easier if your board is equipped with a reset button.
Two or three pins are usually found on a switch of this type.
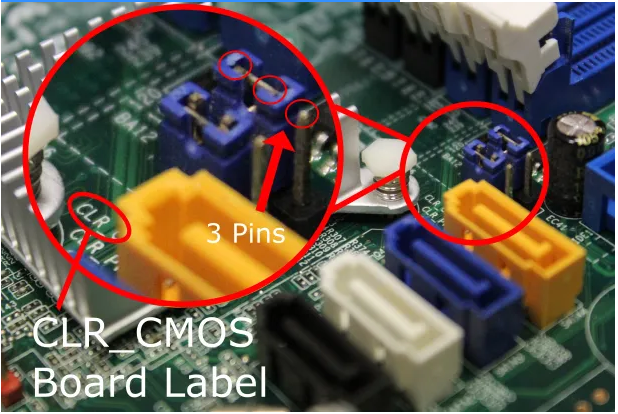
1. Unplug the device and then press and hold the power button for at least 20 seconds to drain any remaining charge. If your switch has a third pin, remove it and connect it to the outer pin on the opposite side, as shown in the figure above. Once more, press and hold the power button for at least 20 seconds to turn on the computer.
2. Then, reinstall the plug in its original location, or, in the event of a three-pin arrangement, reinstall it on the outer pin that was removed.
Simply by removing the connector from the pins, the BIOS is forced to ‘forget’ what settings it should use at startup and to revert to its factory settings. Don’t be concerned. Because your files and data are kept on a hard drive or solid state drive, they cannot be edited or destroyed. Instead, the machine reverts to its default startup configuration.
Option 2: Remove the CMOS Battery on Your Laptop or Desktop PC
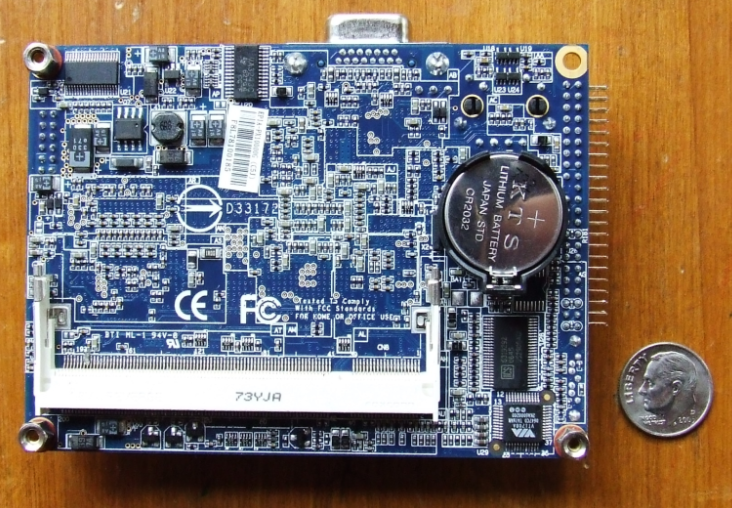
Because this CMOS is powered by a tiny battery (the CR2032), the second BIOS reset option is to remove the battery from the computer.
Desktop CMOS Battery Removal
1. For desktop computers, removing the CMOS battery is pretty simple: first, confirm that your system is turned down and that all external cords have been disconnected, then open up the casing to show the circuitry within. Consult the manufacturer’s instructions if you’re unclear how to proceed; nevertheless, keep in mind that doing so may result in the termination of your warranty.
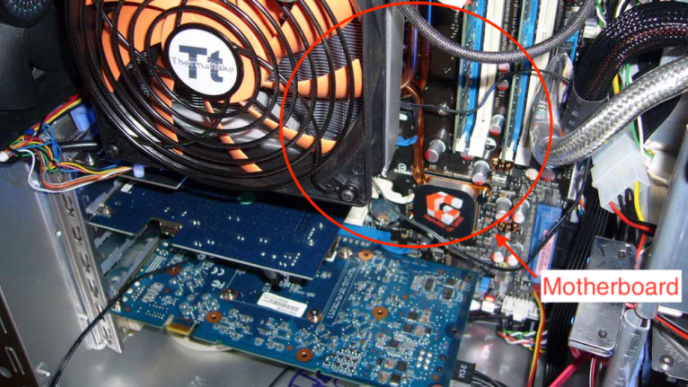
2. The CMOS battery, which resembles a huge watch battery and is normally situated in an exposed enclosure on the motherboard, should be discovered and removed once the internal components are accessible. Once you’ve located the battery, just pop it out; however, you may need to disable some type of clipping mechanism first.
3. Once you have removed the CMOS battery, press and hold the power button for about 15 seconds to drain any remaining power from the motherboard. This procedure should provide enough time for the CMOS to restore itself to its default settings.
4. Reinstall the CMOS battery, taking care to ensure that it is installed correctly.
5. After that, reseal your computer’s casing and restart your computer to complete the process. If this is the case, your BIOS should have have reset itself, re-enabling your integrated graphics in the process.
Laptop CMOS Battery Removal
Accessing the CMOS battery on a laptop computer may be more difficult for laptop users. The chassis of certain versions contains a small pop-out tray for simple removal, which is comparable to a DVD tray but is considerably smaller in size—approximately one inch wide—to allow for more compact storage. It is necessary to disassemble your “portable PC” in order to reach the battery housing if your laptop does not have a tray feature (which the majority do not).
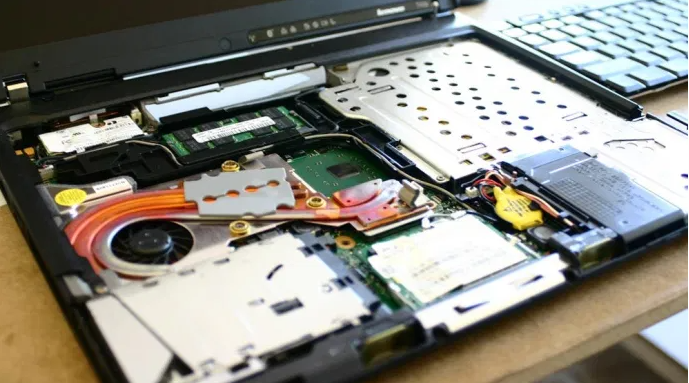
As a result of the large number of different laptop brands and models on the market, it is difficult to give a thorough guide on disassembling them all. The most effective approach to learn how to disassemble your specific machine is to first determine your laptop’s model number, and then do a web search to discover a decent lesson or video on the subject.
Once you have access to the battery, proceed in the same manner as you would for a desktop PC: remove the battery, drain the power, replace it, and restart.
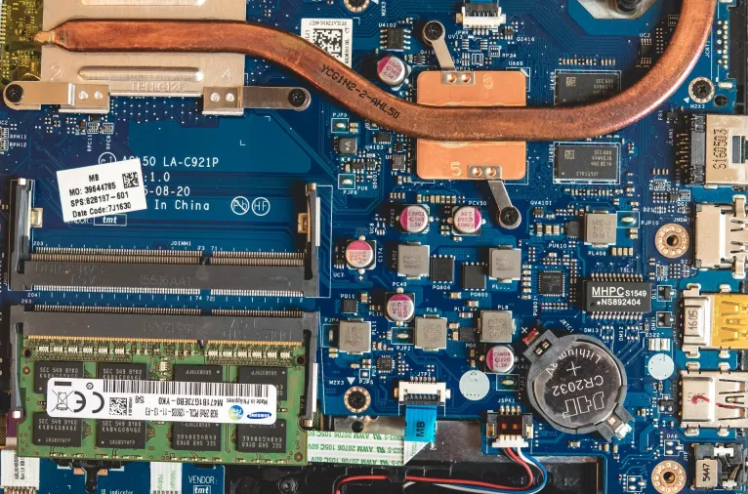
After you’ve rebooted your computer, your BIOS should be restored to its previous state, complete with a working screen. If you are still experiencing problems after following the instructions outlined above, you might consider replacing the CMOS battery with a new one.
Alternatively, you might take it to your local computer repair shop for assistance. Inform the staff that you want a BIOS reset, which can be accomplished by removing the CMOS battery, and they will frequently be pleased to perform the task for you while you wait.
Video

Vampire Crawlers Coin Farming Guide

Forza Horizon 6 Performance: Why 60 FPS Is Still the Console Standard

Yoshi and the Mysterious Book (2026) – Full Completion Guide, Rewards & Secret Ending

How to Get Free Pets in Adopt Me: A Guide for Players

Roblox Username Generator – Create a Cool & Unique Username in Seconds
How to Get Free Pets in Adopt Me: A Guide for Players

Grow a Garden Recipes in Roblox: Guide to Cook (Donuts, Sushi, Pie, Pizza & More!)
Roblox Username Generator – Create a Cool & Unique Username in Seconds
Yoshi and the Mysterious Book (2026) – Full Completion Guide, Rewards & Secret Ending


