Guide
How to Install a Motherboard
It’s possible that the motherboard in your computer isn’t the most interesting component, but it’s certainly one of the most crucial ones. It is also the largest, which means that it can be a little bit awkward to install; nonetheless, as long as you are careful, it is not difficult at all. In just a few simple steps, you will learn how to install a motherboard in your computer, regardless matter whether you have a massive eATX board, a more normal ATX board, or one of the smaller mATX or ITX possibilities.
Here are some excellent choices for gamers’ motherboards to consider if you are still undecided about which one to purchase.
Read Also: How To Test A Motherboard
Step 1: Prepare your tools
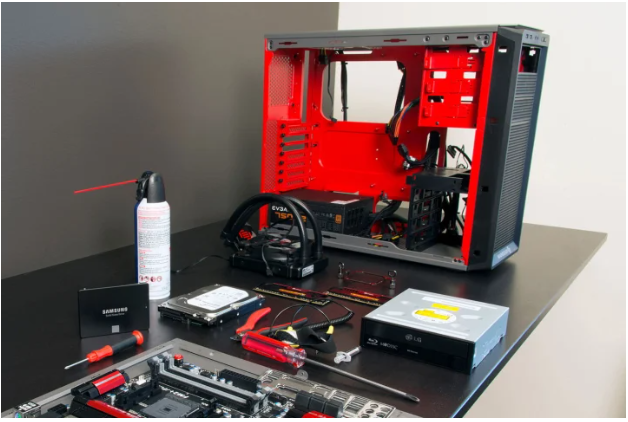
It is essential to ensure that you have all of the necessary tools and that you have taken the necessary precautions to safeguard both yourself and your computer hardware before installing any component on your computer. This necessitates the use of an anti-static wristband and the performance of the installation on a surface that is not conductive; in no case should it be attempted on a carpeted floor.
In the case of a motherboard, you will need a long screwdriver with a Phillips head, and if possible, you should go for one that has a magnetized tip so that the screws may be held to it. In the event that you need to retrieve any screws that have fallen deep within the interior of your computer case, it is a good idea to have a set of needle-nose pliers on hand.
We would also recommend getting good lighting so that you can see what you are doing, and if you have any questions that are particular to your motherboard, you should make sure to have the manual for that board on hand.
Step 2: Screw in the standoffs
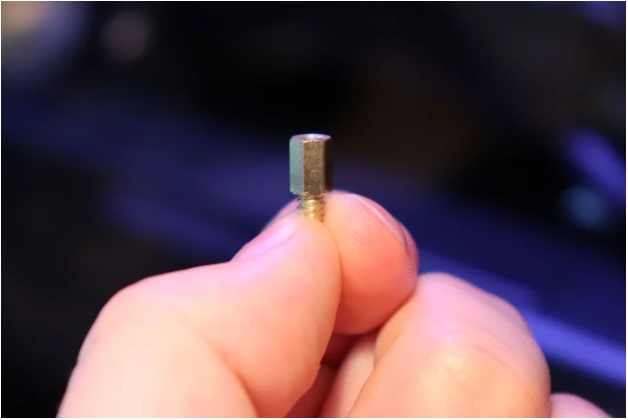
Because a motherboard is a delicate piece of electronic hardware, we do not want it to come into contact with the conductive chassis that is within your case. For this reason, we need to install the standoffs before we can proceed with installing the motherboard itself. These screws have a male thread but a female head, which enables you to directly screw the motherboard into them. They are often made of brass but may also have a black paint finish. You ought to have received a number of these in a little bag along with your motherboard, or alternatively, along with your case. In many cases, these will already be pre-fitted, but they might not be for the particular shape or size of the motherboard that you are utilizing.
You can figure out which ones you need to screw in and where to put them by consulting the manuals for both your motherboard and your case (or looking for eATX, ATX, mATX, or ITX notes on the motherboard tray). After you have determined where they should be placed, manually tighten the screws. Although it may be a little tricky at times, you shouldn’t have to resort to using any kind of tools in order to have them installed. If you find yourself in this situation, it is most likely because the standoff alignment is incorrect. Make the necessary adjustments, then try it out again.
Step 3: Install the I/O shield
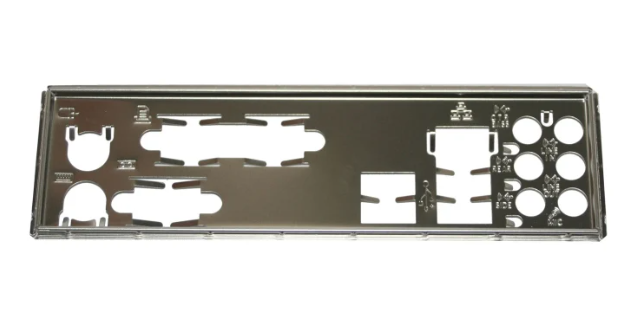
Installing the I/O shield is the last step to complete before attaching the motherboard itself. The panel, which can be silver or black and will protect the ports on the back of the motherboard, should have been included in the package with the motherboard when you purchased it.
Locate it and then insert it into the space at the back of your case. It ought to be evident where it belongs, but before you press it in, make sure to double verify the alignment by looking at it from several angles.
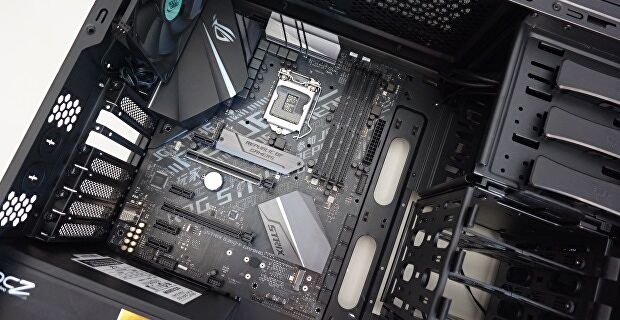
Step 4: Install the motherboard
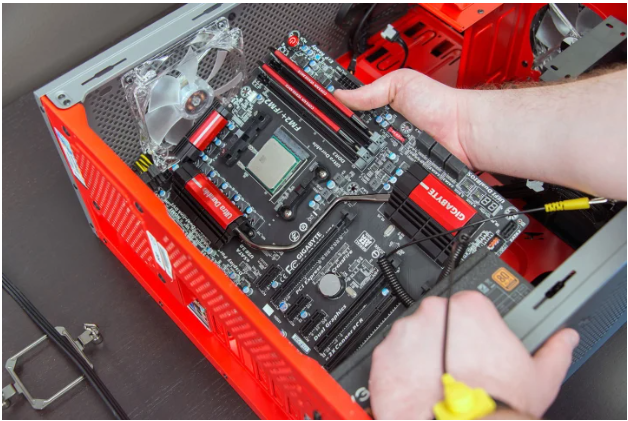
It is up to you at this stage whether or not you wish to install the central processing unit (CPU) first. The following guide will explain how to install a CPU, regardless of whether it is manufactured by AMD or Intel. In order to successfully install the motherboard, you will need to carefully lower it into the case. Depending on the chassis, approaching the motherboard from an angle that is inclined upwards and toward the front of the case can be helpful.
It is important that the screw holes on the board and the spacers that you have installed be aligned properly. Also, check to see that it can be installed easily into the rear I/O shield, and that none of the ports are covered by any bits of metal.
Make sure to utilize the screws that came included with your motherboard. Once the first few of screws are in, you might need to hold the motherboard carefully in place while you put the rest of the screws in, but after that, you shouldn’t have any trouble screwing in the remainder of the screws. In the same way as with the standoffs, unscrew it and try again if you feel like you are trying too hard.
Before going around and individually tightening each screw, it’s a good idea to start by screwing the screws in just a little bit so that you can have a feel for where they should go.
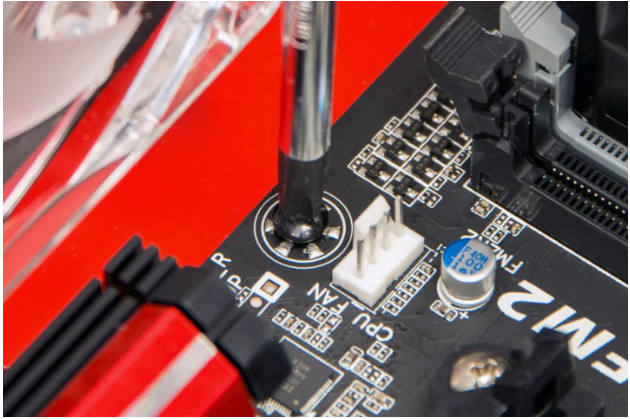
Step 5: The power cables
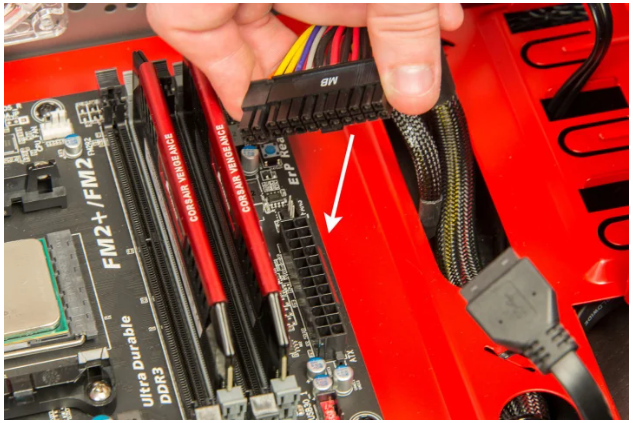
In order for your motherboard to get power, you will also need to ensure that its power cables are plugged in. For the majority of boards, this will entail using the longer 24-pin connector in addition to a shorter connector with either four or eight pins. After the motherboard has been installed, the former component is often found on the right side of the board, whereas the later component is typically found near the top. However, placement can be different, so make sure you check the manual that came with your motherboard.
Once the cables have been directed to the desired locations in any manner you see fit, you should carefully insert each one into the appropriate slot while ensuring that they are facing the right way. If you are still unsure, inspect the geometry of the power sockets; they are purposefully designed to be rounded and squares so that improper inputs are never conceivable.
Video

Roblox Username Generator – Create a Cool & Unique Username in Seconds

Grow a Garden Recipes in Roblox: Guide to Cook (Donuts, Sushi, Pie, Pizza & More!)

Job Opportunities in Dubai – 2026

Mr Bit at the SBC Awards Europe 2025: The Bulgarian Brand Setting New Standards in the European Gaming Industry

Dennis Rodman Net Worth 2026 – Everything You Need to Know

Bloxburg Neighborhood Codes 2026
Grow a Garden Recipes in Roblox: Guide to Cook (Donuts, Sushi, Pie, Pizza & More!)
Job Opportunities in Dubai – 2026
Dennis Rodman Net Worth 2026 – Everything You Need to Know


