Guide
How to Make a Shadow in Photoshop
When you are constructing a composite image, adding shadows to your photos is essential for grounding an object in the scene you are photographing. You are going to learn how to create a shadow in Adobe Photoshop by reading this post. Both to a photograph with a white background and to one depicting a picture of the natural world.
Let’s get started with this straightforward Photoshop walkthrough, shall we?
Read Also: How To Change Skin Tones In Photoshop
How to Add Shadows to a White Background
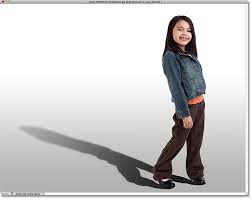
If you want to make a shadow in Photoshop, the best place to start is with a canvas that is completely white and blank. You can also get some practice with the fundamental stages involved in making realistic shadows. Photography of products almost always takes place against a white background. But when they are photographed inside of a lightbox, these pictures do not have any shadows.
You are going to learn how to create a great soft drop shadow in this section. Not a harsh one, such as the one that you would get from a direct strobe flash.

Create a Drop Shadow
The first thing you’ll need to do is make a drop shadow. This should not present too much of a challenge for you.
- Your object will need to be cut out of another photo. If you already have a photo of the object taken against a white background, this should be much simpler for you to do. To make the selecting process simpler, activate the Object Selection Tool by pressing the W key on your keyboard.
- Import the image you want to work with into a fresh project in Photoshop. In this Photoshop file, you will need to create a new backdrop layer and colour it white. You will also need a layer on which to position your object.
- Click the Layer Effects button in the layer that contains your object. You’ll find this at the very bottom of the window that displays your layers. It is written “fx.” Make sure the drop shadow option is selected before continuing. You now have the ability to influence the effect. You have the ability to alter the opacity, angle, size, and distance of the shadow, as well as the colour (the default is black).
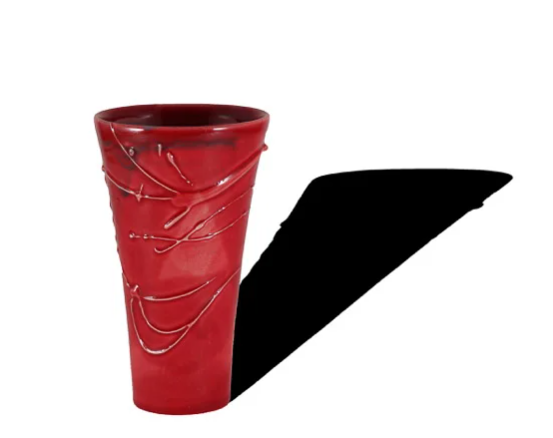
The configurations for the Layer Effects dialogue box are listed below.
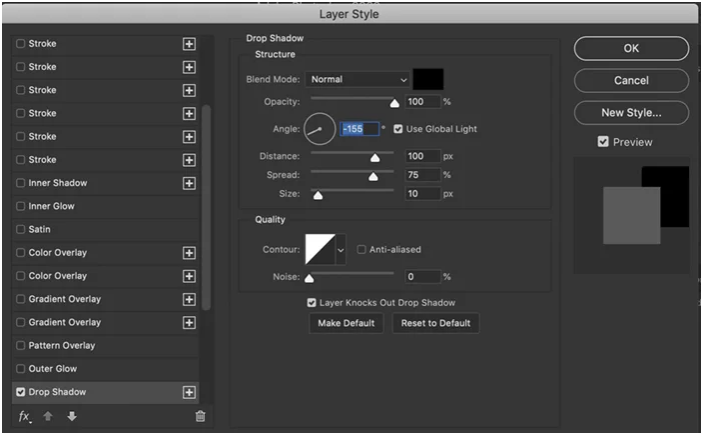
The length of the drop shadow needs to be increased so that it can convey a sense of realism.
Make the Shadow Realistic
The next thing that has to be done is to make that shadow look more realistic. Create a new layer for the drop shadow and change it. You are now able to exercise free will over it. In order to make this happen, follow these steps:
- Where your shadow is, on the layer that contains it. To bring up the context menu for the fx symbol that has just appeared, right-click on it. Choose to create a new layer. There should be a new layer that appears with just the drop shadow on it.
- You are going to want to move the shadow in a different direction now. Choose Skew from the Edit > Transform dropdown option on your menu bar. When pulling the shadow further out, use the top two anchor points. Within the context of this illustration, I will move the shadow to the right. You have control over how much of the shadow should fall on the side of the object. In this particular instance, I will drag to an angle of about 45 degrees.
- You should be able to change this as well because the shadow is now quite long. Navigate to Edit > Transform > Scale. You will now be able to modify the duration of the shadow by sliding the top anchor either upwards or downwards. In this particular instance, the length of the shadow has been reduced.
- Last but not least, you will need to distort the shadow in such a way that it continues to be consistent with the object that is casting it. You will need to check to see if the base of the shadow is still in contact with the object’s base. Choose Warp from the Edit > Transform menu. You can adjust the placement of the shadow by dragging the anchor points to the desired locations.
Finishing Touches
There should be a distinct difference in intensity between the shadow at the bottom (strongest) and the top (lightest). Create a second shadow layer to do this.
- Go to Layer>Duplicate Layer (Ctrl or J) and choose your shadow layer. You now have a copy of the document at hand.
- The first shadow layer can be clicked on. In the Fill box at the top of the layers window, type in 90%. This is the deepest recess in your swath. You may do this by selecting the layer copy and entering 40% in the Fill box. It’s your light swath. To observe a difference in the intensity of the shadows, simply uncheck the eye symbol to the left of the layers.
- The shadow’s sharpness may now be fine-tuned. As you go further away from the object, the light should get more diffuse. You’ll need to add a Gaussian blur to achieve this effect. Select the layer with a light shadow by clicking on it. Select Gaussian blur from the Filters menu. Set the pixel radius to 25 in the dialogue box. Add around 5 pixels of blur to the dark shadow by clicking on it and dragging the mouse. Adjust the pixel radius to your preference to fine-tune the shadow’s appearance.
- The next step is to add gradation so that your shadow gradually fades from dark to bright. To begin, create a white layer mask on top of your dark shadow layer. At the bottom of the layers window, click the Layer Mask tool. It appears to be a rectangle with a circle inside it.. To reveal all of a layer’s mask, use the Layer > Layer Mask > Reveal All menu option.
- Go to the left-side menu and select the gradient tool. Make certain that the foreground is black and the background is white. Drag the gradient back through the object that casts the shadow at a place about halfway up the shadow. Close to the item, the shadow’s darker area should be. The longer the line, the more graded the shadow will be. Press the option key and drag the layer mask to copy it onto the light shadows layer. Select Image>Adjustments>Invert (Ctrl or I) to invert the layer mask copy.
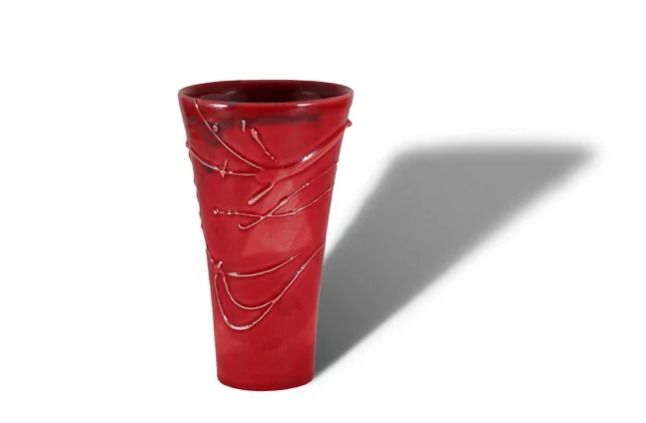
You’ve completed your task! Your shadow should appear as if it’s been there for a long time.
Video

Vampire Crawlers Coin Farming Guide

Forza Horizon 6 Performance: Why 60 FPS Is Still the Console Standard

Yoshi and the Mysterious Book (2026) – Full Completion Guide, Rewards & Secret Ending

How to Get Free Pets in Adopt Me: A Guide for Players

Roblox Username Generator – Create a Cool & Unique Username in Seconds
How to Get Free Pets in Adopt Me: A Guide for Players
Yoshi and the Mysterious Book (2026) – Full Completion Guide, Rewards & Secret Ending
Vampire Crawlers Coin Farming Guide


