Guide
How To Change Skin Tones In Photoshop
When shooting photographs, it is possible that the white balance will be slightly wrong, resulting in images that are discolored. Photographers may have difficulties while shooting people because their skin may take on a greenish or reddish tinge as a result of this. Knowing how to adjust skin tones in Photoshop is critical for resolving this issue successfully.
Strange skin tones in photographs are not just created by the white balance of the camera, but they can also be caused by the lighting conditions at the time the photograph was shot. Skin tones can also be mistakenly altered during post-processing if the colour of the image is changed without the photographer’s knowledge.
When you suddenly notice that the subject’s skin tone isn’t quite correct, you’ll want to address the issue as soon as possible rather than waiting until later. After all, no one wants to appear unwell or sunburned depending on the colour of their skin, and this is especially true for children.
To learn how to correct skin tones in Photoshop, as well as fascinating ways to add creative colours to the skin to create a fantasy-like impression on your photographs, read on. How to Change Skin Tone in Photoshop
Read Also: How To Change the Background Color in Photoshop
How To Change Skin Tones In Photoshop
A typical problem in portrait photography is skin tones that are excessively pink, orange, or red owing to a combination of variables. Using Photoshop, you can rapidly correct the slightly off-colored skin tones in your photograph once it has been opened.
It is effective when the skin tone is near to what it should be for the desired result. However, it is recommended to fix the skin tone as early in the editing process as feasible. This procedure may be used before or after other modifications, depending on your preference.
Using The Curves Adjustment Layer
The Curves adjustment method gives you control over the colors in the image with the ability to adjust multiple control points within the tonal range in the image.
Step 1: Select The Skin Tones In The Image
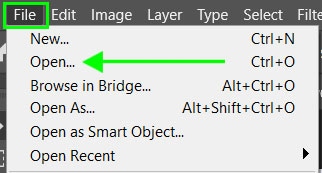
To correct skin tones in Photoshop, open the image by navigating to File > Open.
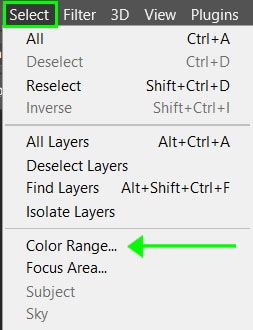
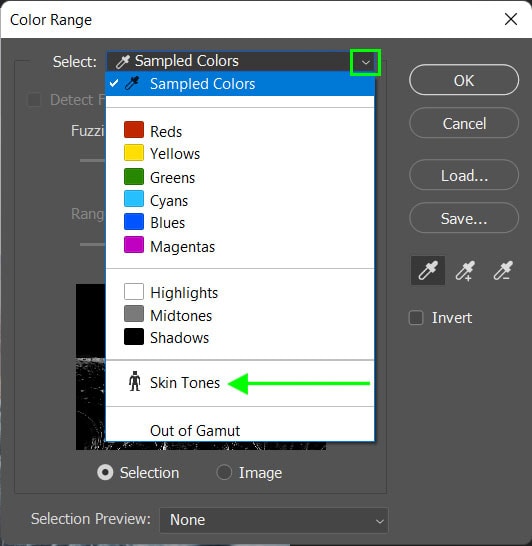
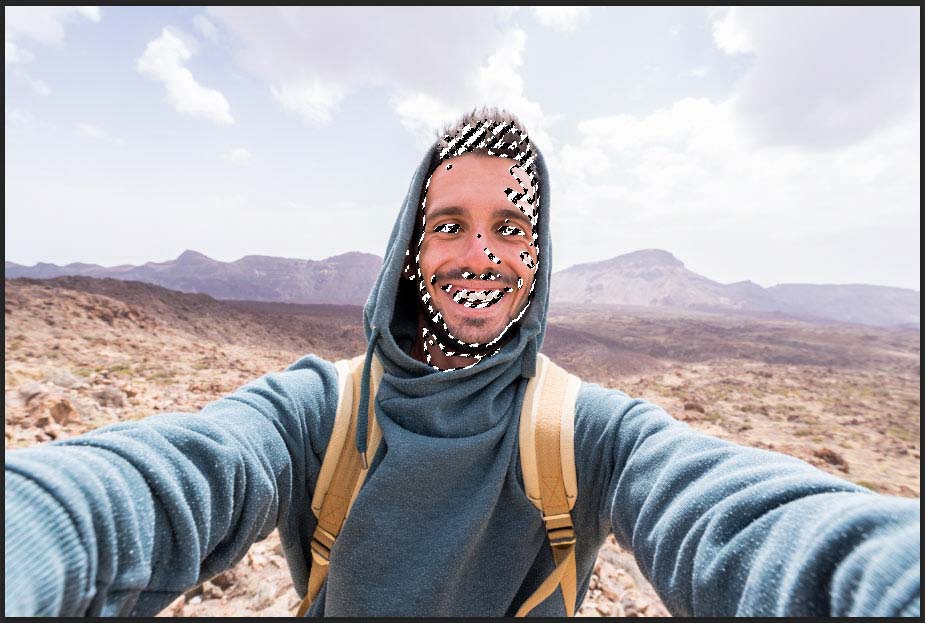
Once the file has been opened, you must choose the skin tones carefully so that you do not alter the remainder of the image. The Color Range window may be accessed by selecting Select > Color Range from the main menu bar.
Skin Tones may be found in the Color Range window by selecting the drop-down menu next to Select and selecting Skin Tones from the list.
As soon as you’ve picked Skin Tones, click the box next to Detect Faces and adjust the Fuzziness slider to around 50 percent. In this way, Photoshop will be able to focus on the skin tones in the image rather than other comparable colours in the image. The quantity of Fuzziness in your photograph will vary depending on the skin tones in your image.
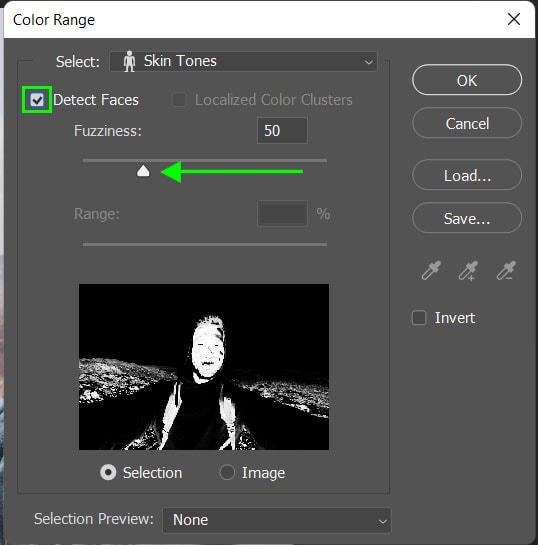
The preview box will provide you with an indication of the tones that will be used in the final image you will be creating. This box may be used to determine the appropriate Fuzziness for your image.
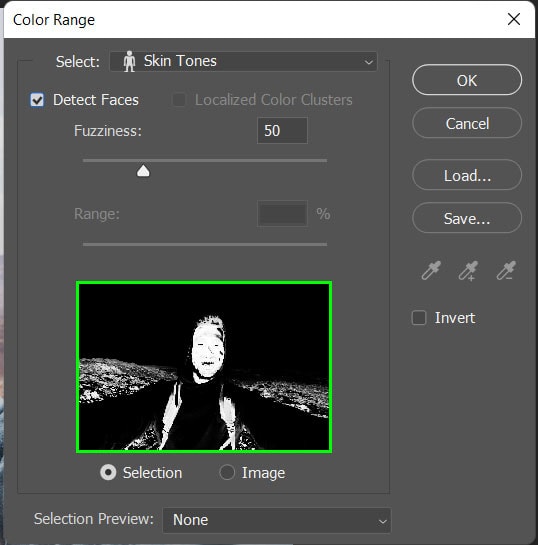
As soon as you are satisfied with your pick, click OK, and you will observe marching ants around the skin tones in your photograph. Additionally, if there are any additional places in the image with tonal values that are comparable to those found on the subject, these areas will be picked.
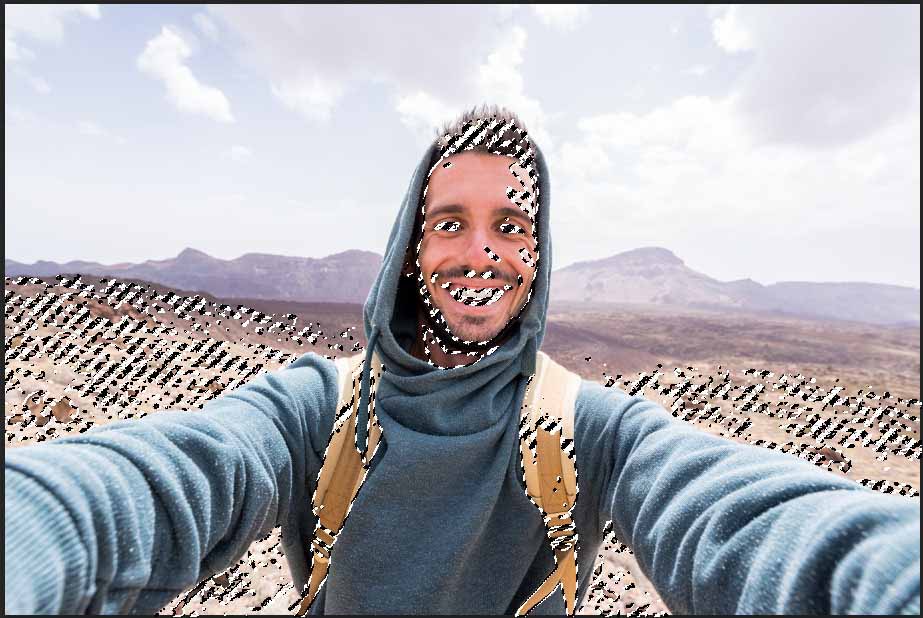
In order to prevent the colour correction from affecting other regions of the image, use the Quick Selection tool from the toolbar or press W to select and delete those areas from the image. Holding down the Alt (Windows) or Option (Mac) key while dragging over the regions you wish to deselect will result in the tool being chosen.

After you have removed the unwanted areas, you will only have the areas of skin selected. You can now move on to correct this color.
Video

Vampire Crawlers Coin Farming Guide

Forza Horizon 6 Performance: Why 60 FPS Is Still the Console Standard

Yoshi and the Mysterious Book (2026) – Full Completion Guide, Rewards & Secret Ending

How to Get Free Pets in Adopt Me: A Guide for Players

Roblox Username Generator – Create a Cool & Unique Username in Seconds
How to Get Free Pets in Adopt Me: A Guide for Players
Yoshi and the Mysterious Book (2026) – Full Completion Guide, Rewards & Secret Ending
Vampire Crawlers Coin Farming Guide


