Guide
How to Make a Table in Excel

When you create a table from an Excel range, you may interact with the table data independently of the rest of the worksheet. Additionally, filter buttons are immediately generated and presented on the column headers, allowing you to filter and sort columns even more rapidly. Also available is the ability to quickly apply table formatting as well as add the total number of rows.
Read Also: How to Freeze a Row in Excel
How to Make a Table in Excel
Creating a table from an existing collection of data is simple if the data has already been organized. Ensure that there are no blank rows or columns in a data range before converting it into a table. Also, make sure that a single column does not contain different types of data in the same spot.
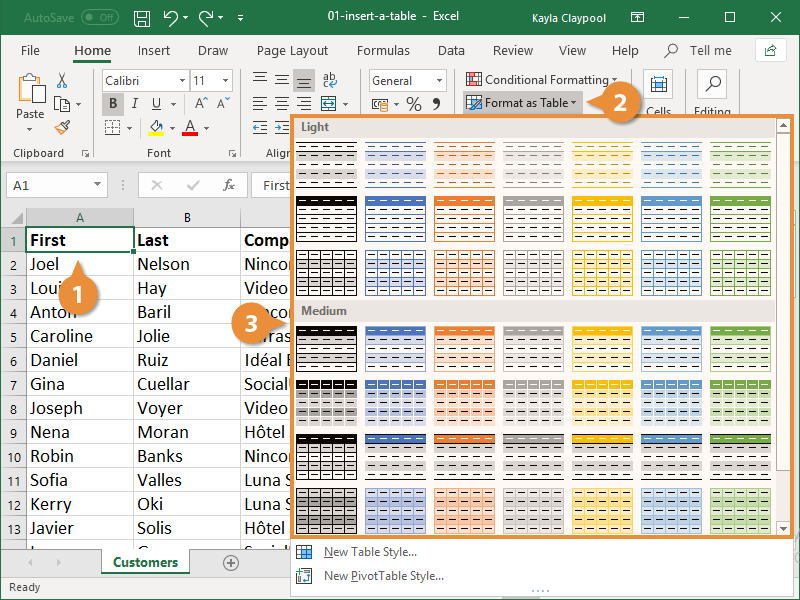
1. Choose one cell from the range of cells you wish to convert in order to create a table from that range.
2. To build a table, navigate to the Home tab and select the Format as Table button.
3. Selecting the table style you want to employ from the Table Style drop-down option will be easy.
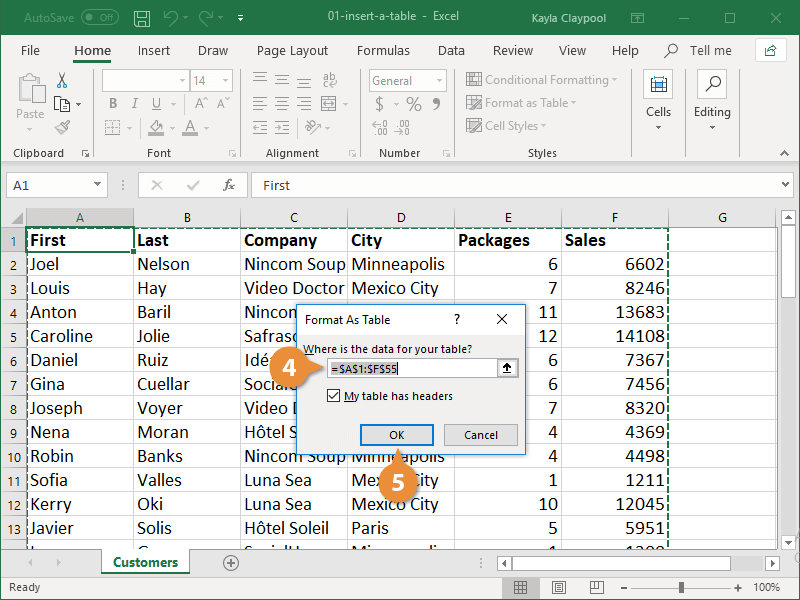
4. Before proceeding, double-check that the data range contains all of the cells that you want to include in the table before continuing. Please remember to mention whether or not a header row appears in the table as well. The absence of a header row above the table data will be compensated for by Excel adding one.
5. To proceed, press the OK button.
The table is now a physical reality. Filters are applied to each column, and the table is produced in accordance with a predefined style. The Design tab may be found in the Table Tools part of the Ribbon, near the bottom of the window.
Apply a Table Style
It is possible to change the appearance of a table at any time by applying a table formatting style that has been previously defined to the table.
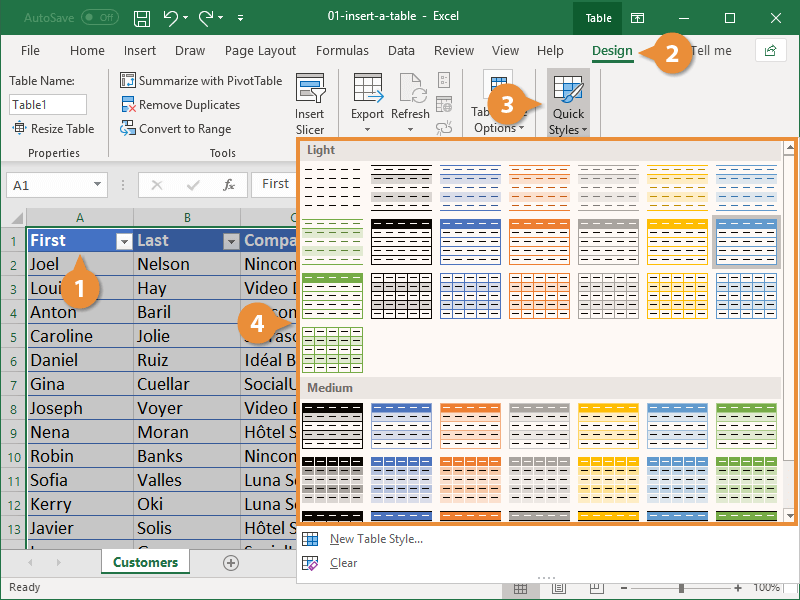
1. By clicking on a cell in the table, you can select that cell.
2. From the drop-down menu, select the Design tab to begin working.
3. The Quick Styles button may be found in the Table Styles group on the left-hand side of the screen. The table styles gallery is displayed on the screen. From the drop-down menu, choose styles from the Light, Medium, and Dark categories to suit your needs. For the Dark section of the list to appear, you may need to scroll down the page.
4. Select a design style from the options.
Convert to A Range
The conversion of a table back into a standard range of data should occur whenever the table is no longer required.
1. By clicking on a cell in the table, you can choose that cell.
2. From the drop-down menu, select the Design tab to begin working.
3. The Convert to Range button can be used to convert a number to a range of numbers.
4. Yes should be selected from the drop-down option.
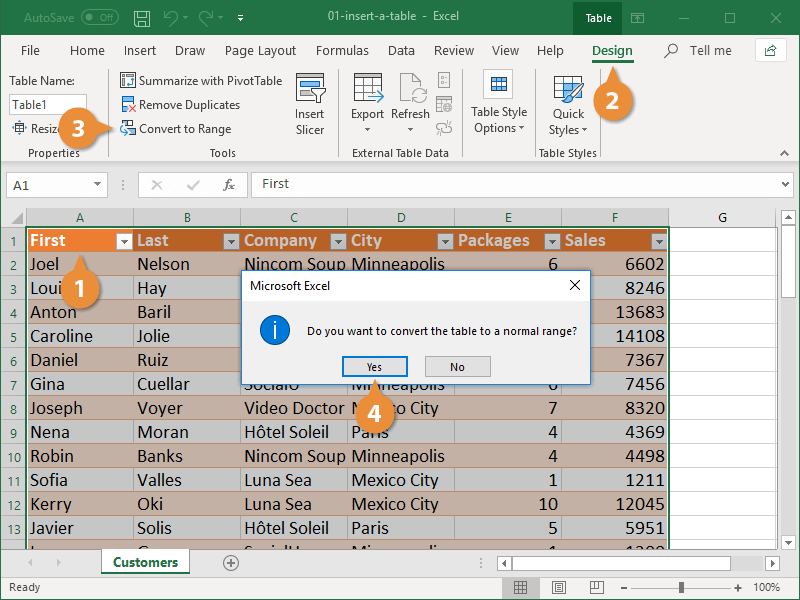
Despite the fact that the table has been changed back to a conventional range of cells, the table formatting has remained in place throughout the conversion.
Video

Vampire Crawlers Coin Farming Guide

Forza Horizon 6 Performance: Why 60 FPS Is Still the Console Standard

Yoshi and the Mysterious Book (2026) – Full Completion Guide, Rewards & Secret Ending

How to Get Free Pets in Adopt Me: A Guide for Players

Roblox Username Generator – Create a Cool & Unique Username in Seconds
How to Get Free Pets in Adopt Me: A Guide for Players
Yoshi and the Mysterious Book (2026) – Full Completion Guide, Rewards & Secret Ending
Forza Horizon 6 Performance: Why 60 FPS Is Still the Console Standard


