How to Make a Timeline on Google Docs

Developing a schedule from scratch may call for some of your time and work, but the end result will be well worth it (so if you think you may need it again, saving a plain version of your timeline can save time later on). In addition, if you are concerned about having level lines, you don’t need to be because the “Drawing” tool on Google Docs offers a great deal of assistance in this regard. This assistance includes instructions that help guarantee that everything is properly spaced out. The following is a rundown of everything you need to know in order to create a timeline in Google Docs:
Read Also; How to Delete a Table from a Google Docs
How to Make a Timeline on Google Docs
Using the ‘Drawing’ tool
1. On your personal computer, open a brand new Google Doc.
2. In the toolbar that’s toward the top of the screen, click the “File” button, and then pick “Page setup.”

3. Make sure that the orientation of the page is set to “Landscape.”
4. In the top toolbar, select “Insert.” Hover your mouse pointer over “Drawing,” and then click the “+ New” button (a new window will pop up over your doc.) You don’t need to be concerned if the line you construct isn’t centred along the y-axis because you can easily nudge it higher or lower once you’ve made the line.
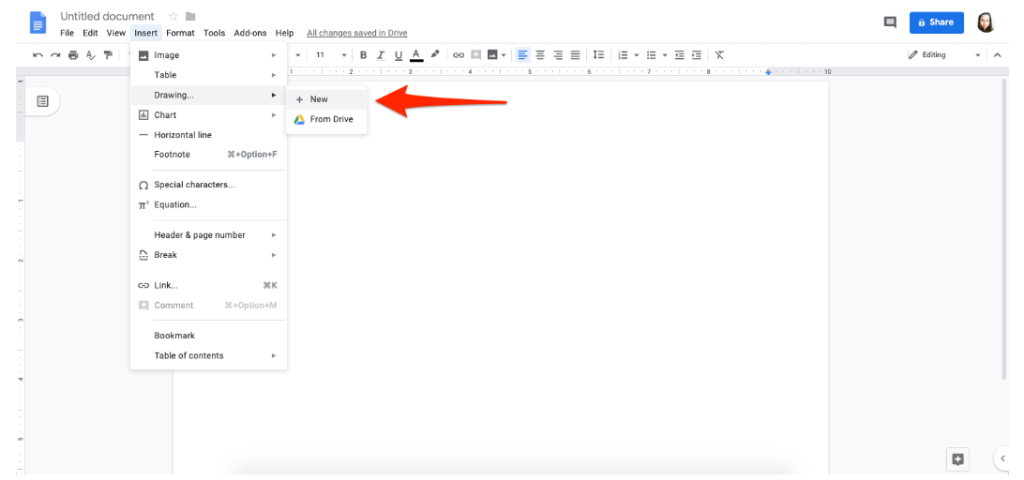
5. Select “Arrow” from the drop-down menu that appears next to the button labelled “Line” in the top toolbar of the pop-up window.
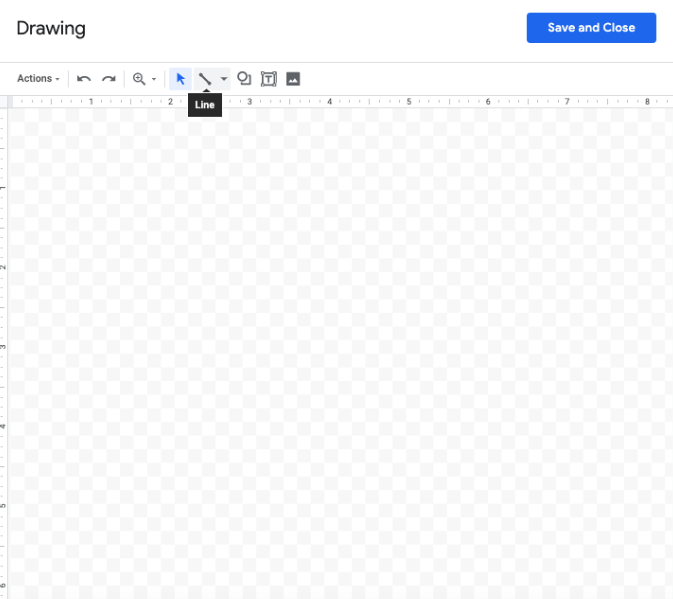
6. Beginning at either end, click and drag the line across the pop-up in a horizontal direction (you’ll know it’s level if the left-side axis doesn’t show more than one line; alternatively, you can use the grayed-out grid backdrop to confirm that it’s straight).
7. In the top toolbar, locate the red arrow that is labelled “Line start.” Click on it, and then select any option from the drop-down menu that appears. This arrow will be pointing the opposite direction as the one that is already present on your drawing canvas. It will add the arrow that you’ve selected to the opposite end automatically, making it so that both ends include arrows.
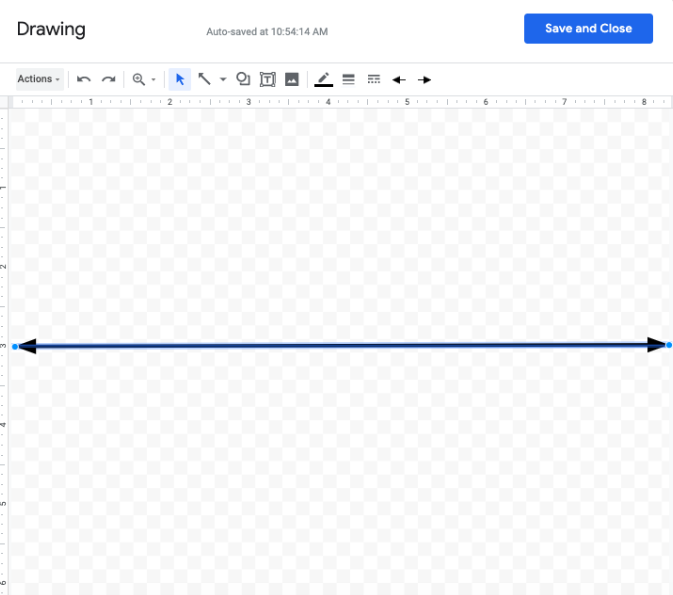
8. If you want the line to be thicker, go to the “line weight” tool (it looks like three lines of varying thicknesses) and choose a bigger pixel weight from the drop-down menu. This step is optional.
9. To begin adding entries to the timeline, select the “Text box” tool (it looks like a “T” encircled by a box) and then click and drag a box either above or below the line. After that, you can dragged the text box to the left or right, depending on what you require.
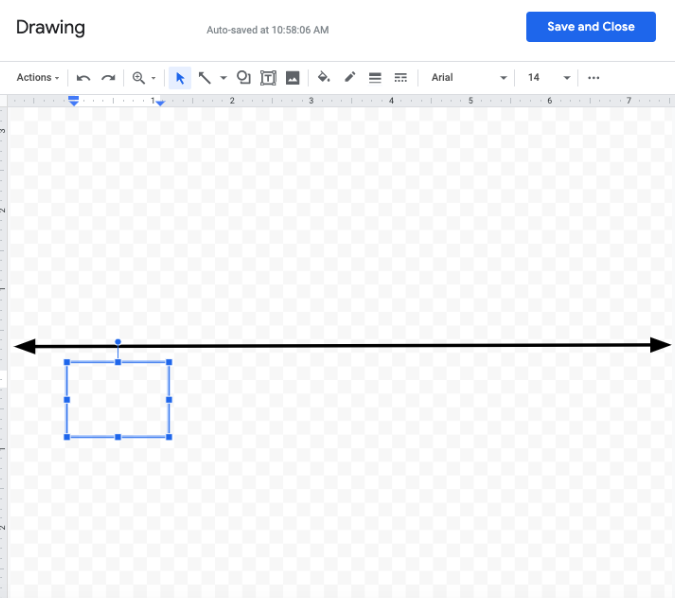
10. To ensure that all of your entries have the same size and format, copy the first text box using the keyboard keys that are available on your computer (a red guideline will help you reposition it so that everything is properly aligned).
11. Navigate back to the top of the toolbar and click on the down arrow. Next, select “Line” from the drop-down menu and draw a line that is perpendicular to the main timeline. Once again, refer to the recommendations in the ruler section to ensure that the line is drawn correctly.
12. Using the text-box tool, create a box at the bottom of that line by clicking on it.
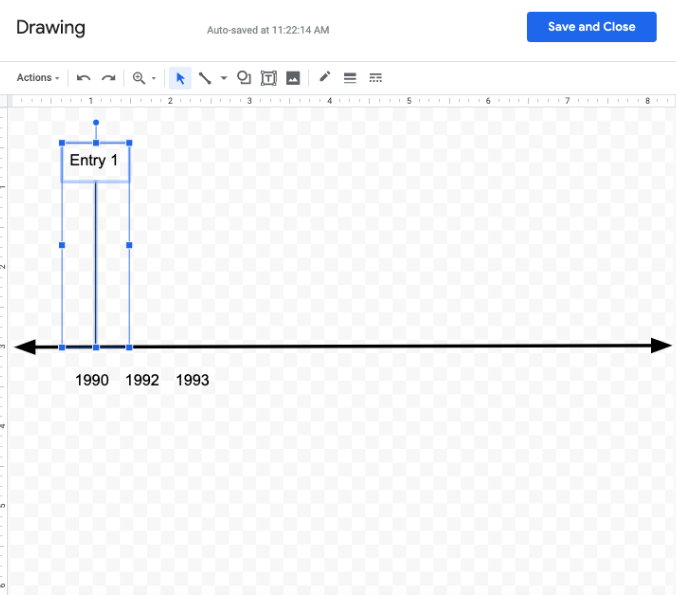
13. After you have selected both the line and the text box, use the keyboard shortcuts on your computer to copy and paste the text. This will mimic the pattern for each consecutive entry; however, you may desire to alter the length of each vertical line in order to provide more breathing room for the text associated with each point.
14. When you have completed inputting your information, click the “Save and Close” button to add it to your Google Doc. This will add it to the end of your document.
You also have the option to add pictures to your timeline by selecting the “Picture” tool and then uploading the picture or artwork that you want to use.
If you are unsure whether or not everything is properly centred, you can activate extra guidelines by navigating to the “Actions” menu and then activating the vertical and horizontal guide lines, which can be found under the “Guides” menu.
Don’t worry if you discover a problem with the document after you’ve already added your timeline to it; you can easily fix it by clicking on the timeline you’ve drawn and then selecting “Edit” from the drop-down menu that appears.
FAQs
Does Google Slides have a timeline template?
Use a Timeline Template
Make sure that the correct slide is selected, then go to the Insert menu and choose Diagram from the list of options. Select the Timeline template from the list of options in the sidebar on the right. To configure your diagram, use the drop-down choices for the Dates and Color categories.
How do I make a Gantt chart in Google Slides?
To insert a chart from Sheets, select Insert > Chart > From Sheets in Google Slides. Select the Gantt Chart Template that is available for use with Google Sheets, and then click the Select button. You can import one or more charts into your Google Slides presentation by clicking the chart(s) you wish to import, and then selecting whether or not you want the chart to link to the spreadsheet.
Can you download templates for Google Docs?
Using Google Documents, you are able to make modifications to the template’s appearance, in the event that you desire a different look. Because it is both easy and quick, you do not need any assistance with it. In addition, the template can be downloaded and printed in an unlimited number of copies. Remember that we frequently introduce new collections of free templates for Google Docs, so keep an eye out for those.
Does Google have a free Gantt chart?
Online Gantt chart that is free to use and integrates with Google Drive. Free online Gantt Chart that supports support from Google Drive storage and helps you plan your work more effectively. Simply download this application from the GSuite Marketplace onto your account, and you may immediately begin using it. Start making your Gantt chart right now!

Vampire Crawlers Coin Farming Guide

Forza Horizon 6 Performance: Why 60 FPS Is Still the Console Standard

Yoshi and the Mysterious Book (2026) – Full Completion Guide, Rewards & Secret Ending

How to Get Free Pets in Adopt Me: A Guide for Players

Roblox Username Generator – Create a Cool & Unique Username in Seconds
How to Get Free Pets in Adopt Me: A Guide for Players
Yoshi and the Mysterious Book (2026) – Full Completion Guide, Rewards & Secret Ending
Vampire Crawlers Coin Farming Guide


