Gaming
How to Move Overwatch to Another PC – Complete Guide

The essential motive which you may need to do some thing like stated above is your C pressure is walking out of area, or you have a brand new HDD or SSD, and also you need to transport the sport to from one tough pressure to any other to decorate the pc overall performance and growth sport loading pace.
When you want to extrade Overwatch location, you don’t have any desire however to uninstall and reinstall. However, this isn’t always what many customers need. Because the sport documents are considerable and the Internet pace could be very slow, it’ll take a long term to redownload. Can you pass Overwatch to SSD or to any other HDD with out reinstalling?
Yes, right here comes the most effective manner that will help you pass Overwatch to a distinctive pressure with out release problem. Whilst we additionally cowl extra courses for shifting Overwatch from one PC to any other in Part 2. Click to look details.
Move Overwatch to SSD Without Reinstallation Quickly
The APP Migration function of this device permits you to switch programs domestically among disks and pass farfar from big applications that soak up a whole lot area at the gadget pressure to hurry up PC. Now, download this software migration application and migrate Overwatch to some other HDD or SSD with ease.
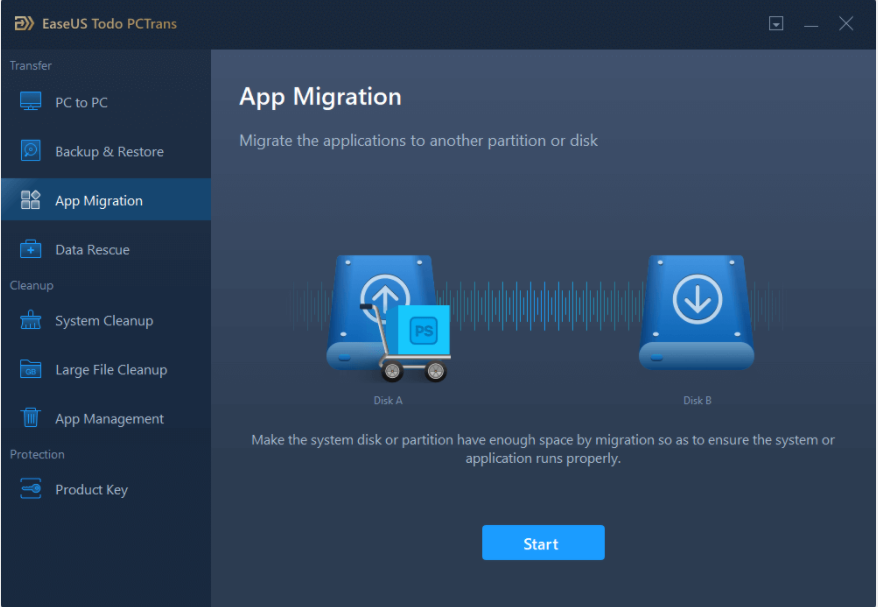
Step 1. Launch EaseUS Todo PCTrans and select transfer mode
On the main screen of EaseUS Todo PCTrans, go to “App Migration” section and click “Start” to continue.
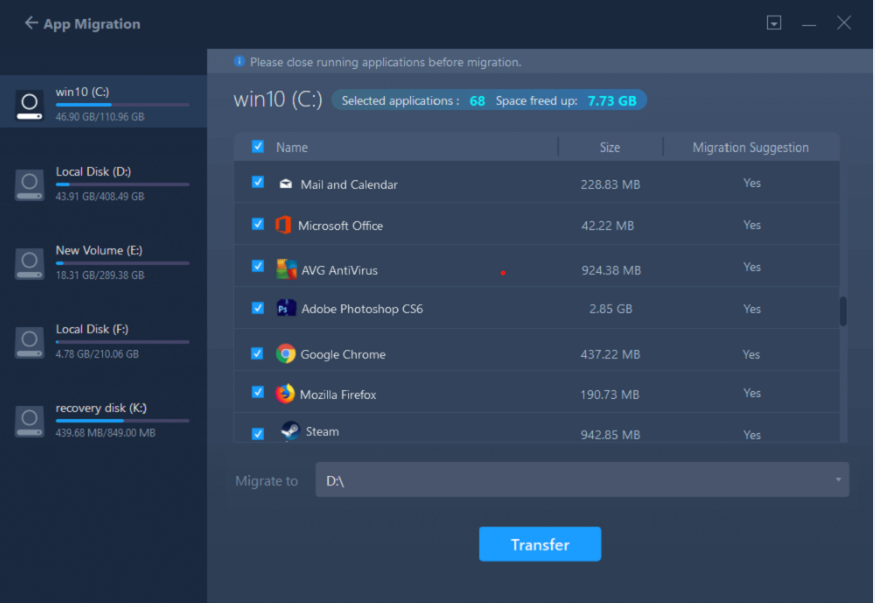
Step 2. Select apps and another drive to transfer
1. Select the supply partition and tick applications, applications and software (marked as “Yes”) that you need to migrate.
2. Click triangle icon to pick out some other force or disk as your goal tool and click “Transfer” to begin the migration.
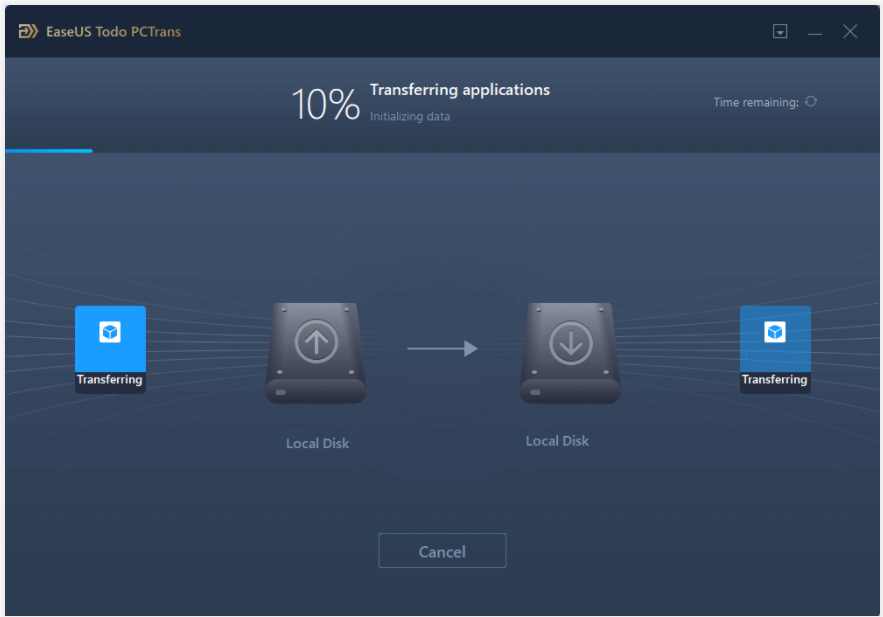
Step 3. Finish the migration process
When the moving technique finishes, click “OK” to complete.
You can restart your PC to preserve all of the changes, and also you ought to be capable of run your migrated apps on the opposite force again.
2. Move Overwatch to Another Drive by Re-downloading
If you need to switch Overwatch to a distinctive force manually, test the manual below.
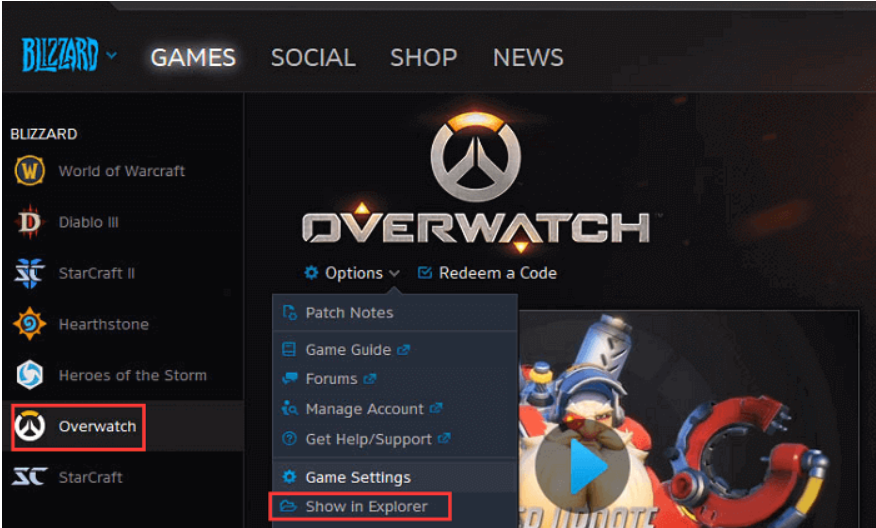
Step 1. Start Battle.Net Launcher. Click “Overwatch” > choose “Options”, then click on “Show in Explorer”.
Step 2. Go to the set up area of Overwatch. Move the folder to the goal force thru copy-and-paste. After that, you want to accurate the area withinside the launcher.
Step 3. The Battle.Net Launcher will count on the sport has been uninstalled. So, you want to click on the “Install” button and alternate the set up area. Wait patiently till the manner finishes.
With the assist of an outside device, this guide manner additionally may be carried out to switch Overwatch from one PC to another. But all of us recognise that after we deplumation an software, a number of registry associated records is written to special places at the C drive. Moving recreation folders manually does now no longer assure that the copied software can run well due to the fact a few registration records is missing.
How to Move Overwatch to Another PC
- PC to PC: Connect two Windows PCs by local area network, and transfer files, apps, and accounts from one PC to another
- Image Transfer: When you don’t have a network, you can use the feature to make images of files, folders, and programs on the source PC, and transfer to the target device. See how to file transfer from PC to PC via USB.
Step 1. Run EaseUS Todo PCTrans on each PCs
On the supply PC, select “PC to PC” on the principle display of EaseUS Todo PCTrans and pass on.

Step 2. Choose transfer direction – Old or New Computer
“New” – Transfer all records from far off vintage pc to modern new pc.
“Old” – Transfer all facts from present day antique tool to a brand new computer.
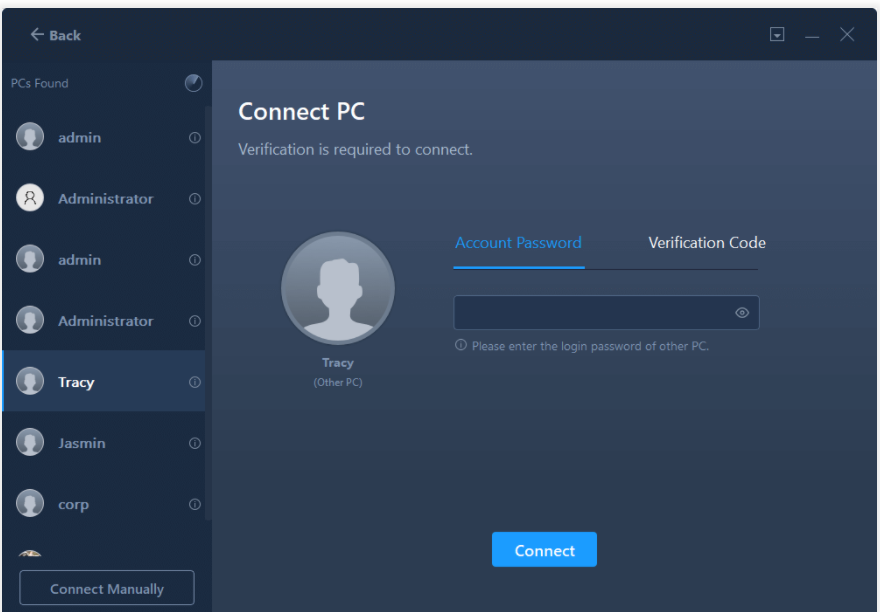
Step 3. Connect two computers
1. Select your goal PC to attach thru its IP cope with or tool call and click “Connect”.
2. Enter the login password of your goal PC and click “OK” to confirm.
If you failed to see the goal PC withinside the indexed devices, you may additionally click “Add PC” to manually join the goal PC through inputting its IP deal with or tool name.
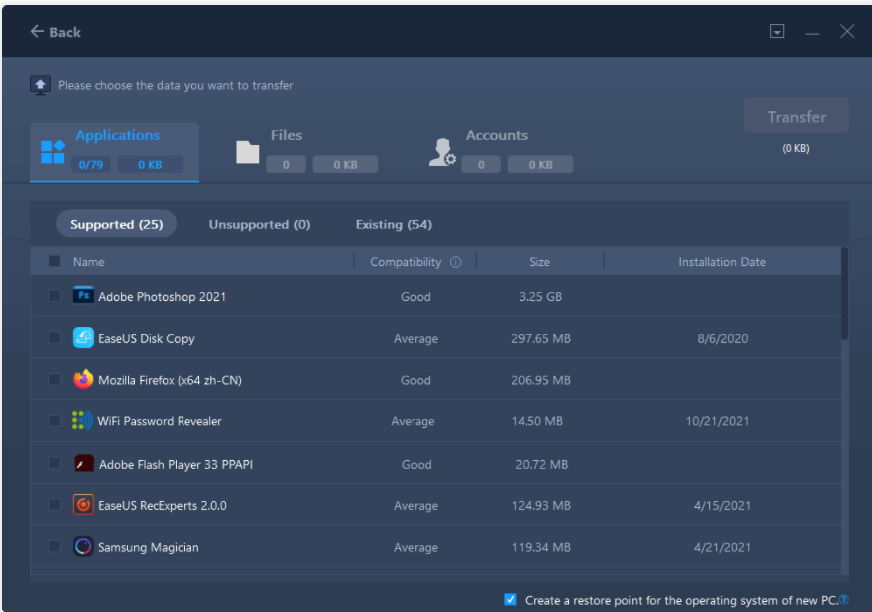
Step 4. Select apps, programs, and software and transfer to the target computer
1. You can choose and pick what you need to switch from the cutting-edge pc to the goal PC.
2. After deciding on favored packages and programs, click “Transfer” to begin the moving process.
FEATURED Video
Conclusion
It’s not always easy to figure out how to move your favorite game from one hard drive to another, but it’s not too difficult either. All you need is a little bit of patience and a few tools. I hope this tutorial has been helpful for you to clarify what you need to do in order to move Overwatch from one hard drive to another.

Vampire Crawlers Coin Farming Guide

Forza Horizon 6 Performance: Why 60 FPS Is Still the Console Standard

Yoshi and the Mysterious Book (2026) – Full Completion Guide, Rewards & Secret Ending

How to Get Free Pets in Adopt Me: A Guide for Players

Roblox Username Generator – Create a Cool & Unique Username in Seconds
How to Get Free Pets in Adopt Me: A Guide for Players
Yoshi and the Mysterious Book (2026) – Full Completion Guide, Rewards & Secret Ending
Forza Horizon 6 Performance: Why 60 FPS Is Still the Console Standard


