Apple
How to Print Any Document on a Mac

Despite the fact that wireless printing has been there for years, and I couldn’t possible count the number of articles, emails, images, and spreadsheets that I’ve printed with it, I’m still fascinated by the technology today. It’s reassuring to know that, even in the age of speedy wireless printing, you can still physically connect a computer to a printer for offline printing, which is a nice alternative to using a wireless printer.
When it comes to printing from a Mac, there are only a few easy steps to follow as well as a few short keyboard commands or mouse clicks to master before you can get started.
Read Also: How to Connect AirPods to MacBook Air
How to Print on a Mac
On a Mac, you can either choose File > Print from the Apple Menu Bar or use the Command + P keyboard shortcut to print a document or a web page from your computer. Then, from the drop-down option at the top of the pop-up window, select Print to send the document to your printer.
1. Open the document or web page that you wish to print on your Mac and click “Print this page.”
2. Then, in the Apple Menu Bar, select File from the drop-down menu. This may be found in the top-left corner of your screen, near to the Apple symbol, on your computer.
3. Following that, at the bottom of the drop-down menu, select Print.
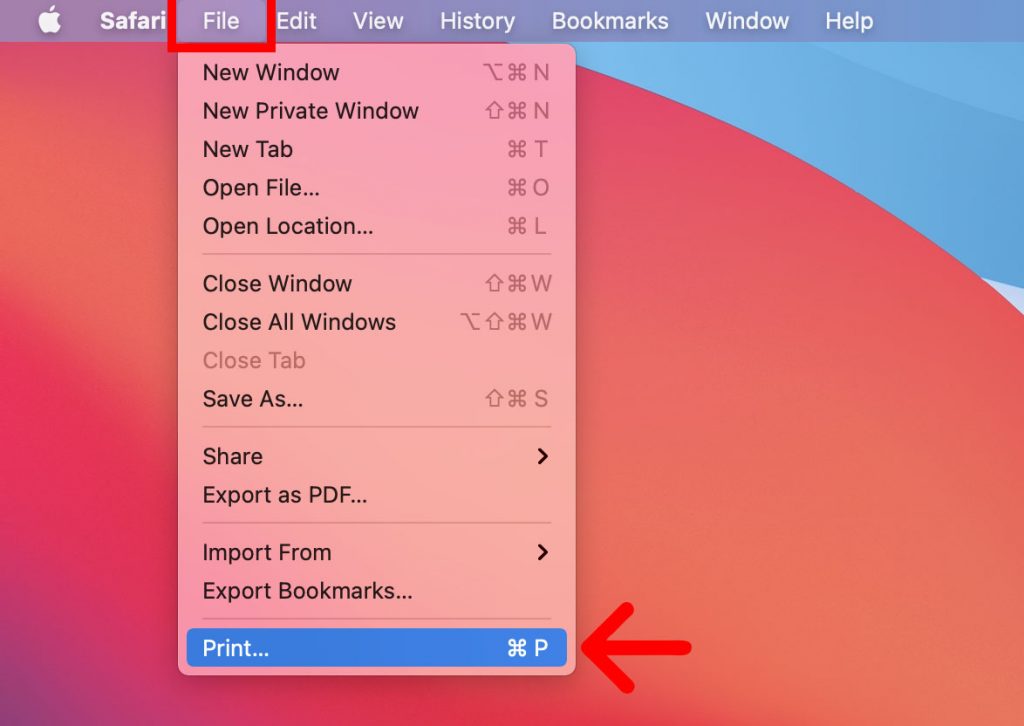
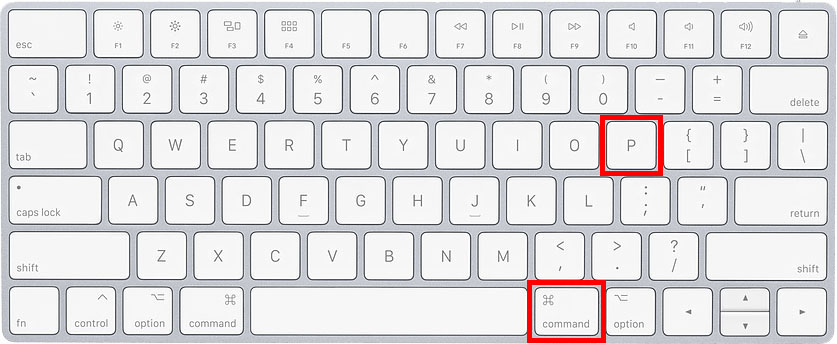
NOTE: Please keep in mind that you may alternatively press the Command + P keys on your keyboard at the same time to bypass the last two stages entirely. Using this keyboard shortcut will allow you to print from any programme that supports printing.
4. Then, from the pop-up box that appears, select your printer. Pinter is located in the top-right corner of the pop-up window, and this drop-down menu will appear next to it.
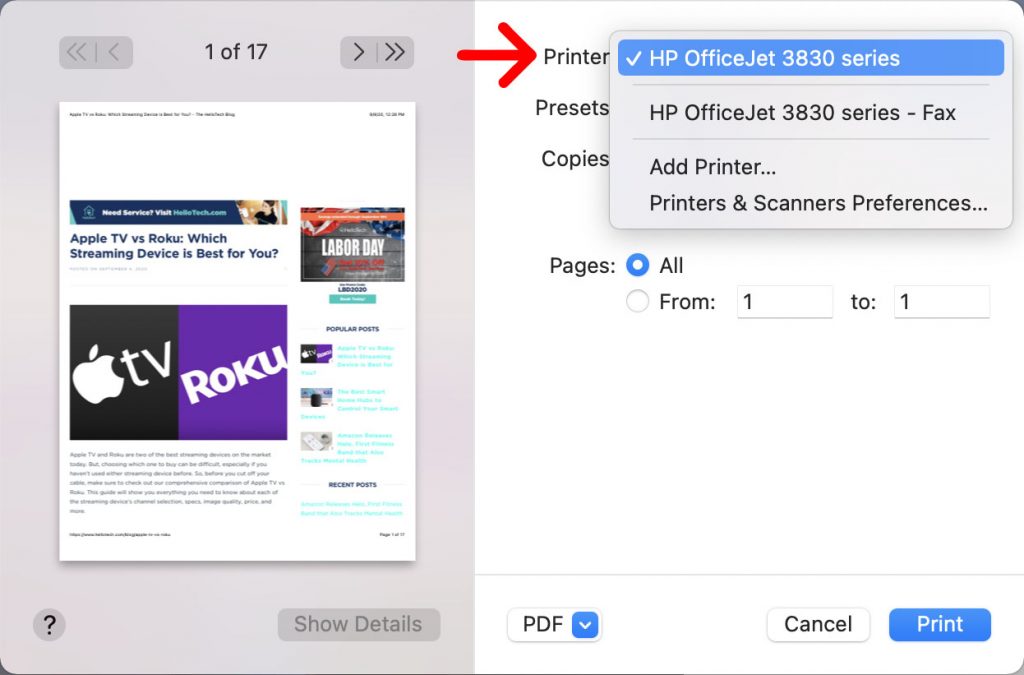
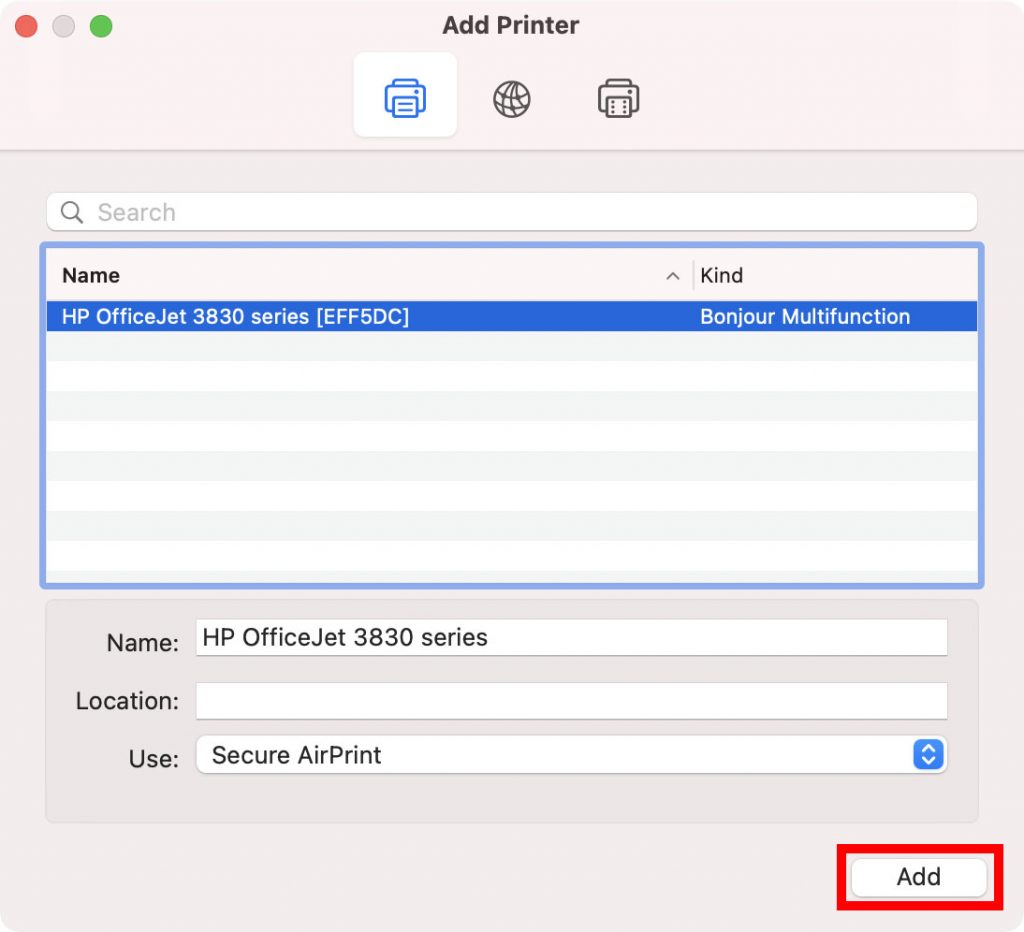
NOTE: Please keep in mind that if there are no printer options available, you will need to pick Add Printer or Nearby Printers. Select your printer from the pop-up window and then click the Add button in the bottom-right corner of the window. If you are still unable to locate your printer, refer to our step-by-step instruction on how to add a printer on a Mac for assistance.
5. Following that, pick the quantity of copies and pages you require. Following the selection of your printer, you may modify the number of copies that will be printed by entering a number in the area next to Copies. Then, by selecting the circle next to From under Pages, you may choose which pages to print and which ones not. If you don’t want to print in colour, you can select the option to print in black and white instead.
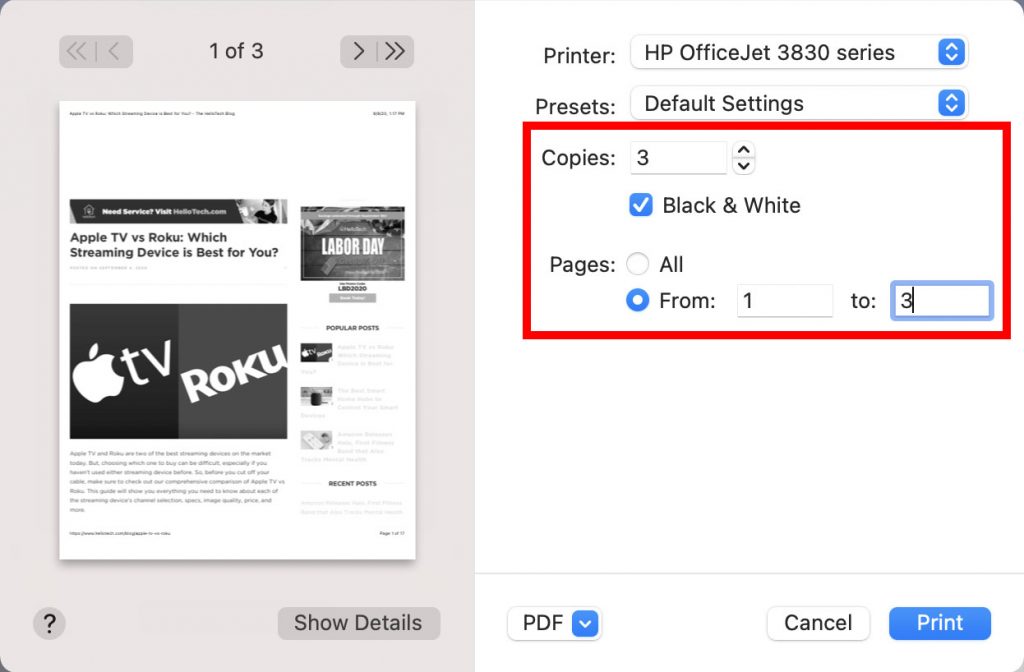
6. Finally, press the Print button. This blue button will be located in the bottom-right corner of the pop-up window, and it will be clickable. You may also use the Enter key on your keyboard to complete the action.
If you have a printer that is capable of printing on both sides, here’s how to print on both sides on a Mac:
How to Print a Double-Sided Document on a Mac
Double-sided documents may be printed on a Mac by selecting File > Print from the Apple Menu Bar. Then, in the pop-up box that appears, click Show Details and choose the app name from the drop-down option that appears. Finally, pick Layout and then tick the box next to Two-Sided to complete the process.
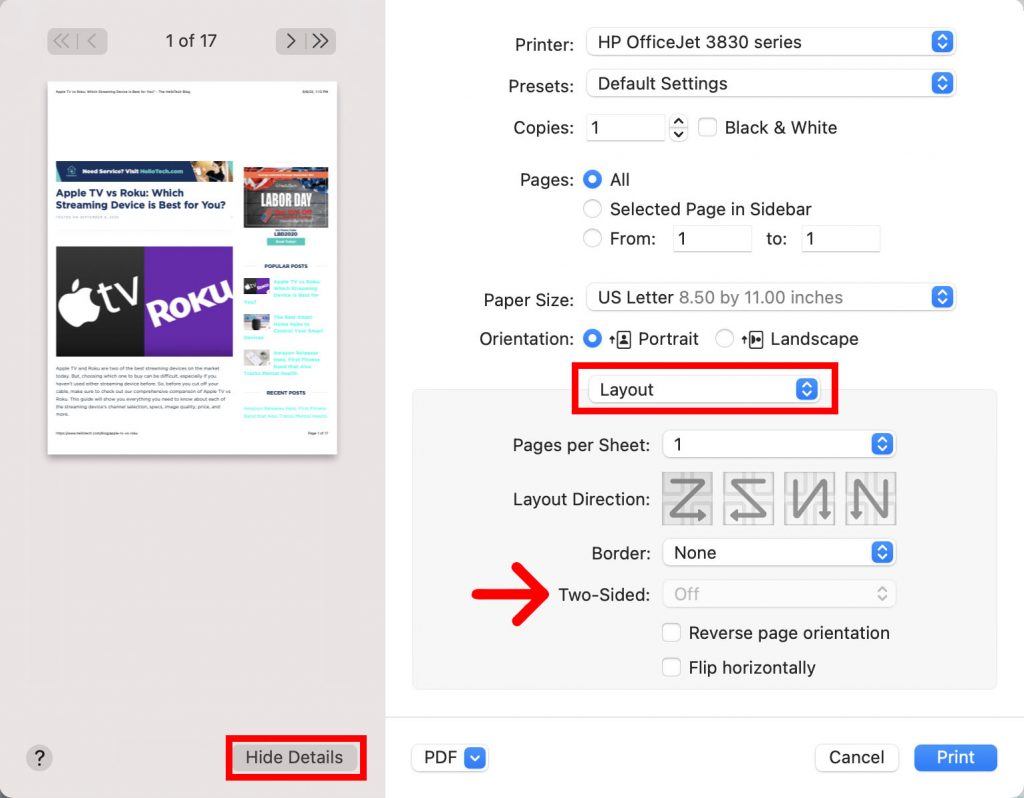
Note: If the printer you are using does not allow double-sided printing, the Two-Sided checkbox will be greyed out and will not appear.
If you want to print multiple papers with the same parameters in the future, you may create a preset to save time in the future. To accomplish this, navigate to the Presets drop-down menu and select Save Current Setting as Preset from the option that appears. Then give your preset a name and hit the OK button.
Video

Roblox Username Generator – Create a Cool & Unique Username in Seconds

Grow a Garden Recipes in Roblox: Guide to Cook (Donuts, Sushi, Pie, Pizza & More!)

Job Opportunities in Dubai – 2026

Mr Bit at the SBC Awards Europe 2025: The Bulgarian Brand Setting New Standards in the European Gaming Industry

Dennis Rodman Net Worth 2026 – Everything You Need to Know

Bloxburg Neighborhood Codes 2026
Grow a Garden Recipes in Roblox: Guide to Cook (Donuts, Sushi, Pie, Pizza & More!)
Job Opportunities in Dubai – 2026
Dennis Rodman Net Worth 2026 – Everything You Need to Know


