Guide
How to Record Audio on Your Windows 10
By following the steps in this article, you will get the knowledge necessary to record sound on a computer that is operating with Windows 10 installed. You can use a desktop computer, a laptop computer, or any other device as long as it is running Windows 10 to follow these instructions. So let’s get started:
Read Also: How to Disable the Touchscreen in Windows 10
How to Record Audio on Your Windows 10
With Windows Voice Recorder
It is possible to record sounds directly from the microphone of your computer by using the Windows Voice Recorder program, which is a user-friendly application that is pre-installed with Windows and comes at no additional cost. In addition to that, it comes with a basic editor that you can use to remove undesired parts from the beginning and the end of the recording.
1. Connect an external microphone to your computer before starting Windows Voice Recorder if it does not already have a microphone built in.
2. You have to check to see that the recording device that is selected by default is the microphone. Choose Settings from the menu that looks like a gear, which you may get by going to the Start menu.
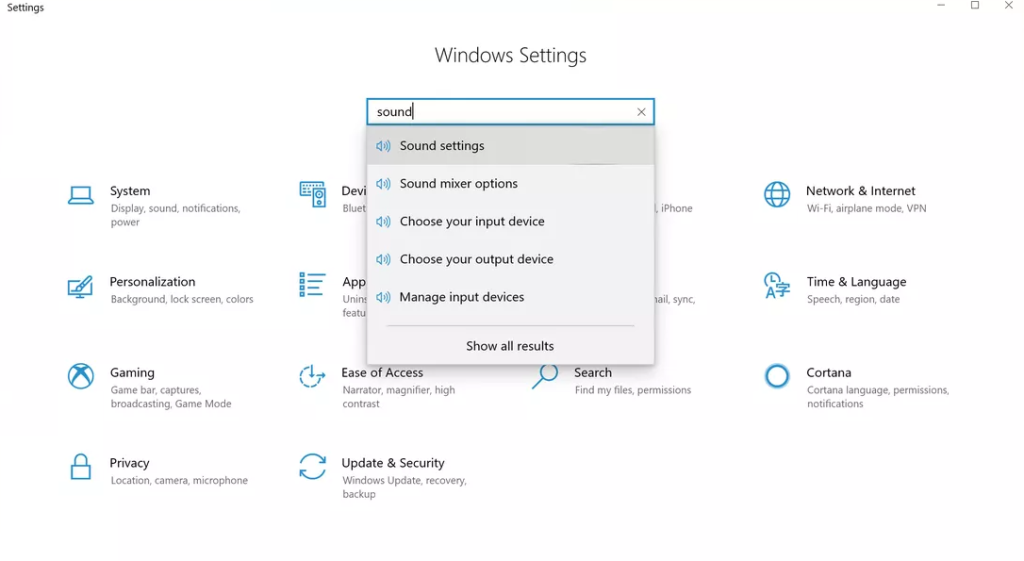
3. Enter “Sound” into the search box under “Windows Settings” and hit the Enter key. Click the Sound Settings option that appears in the list of search results.
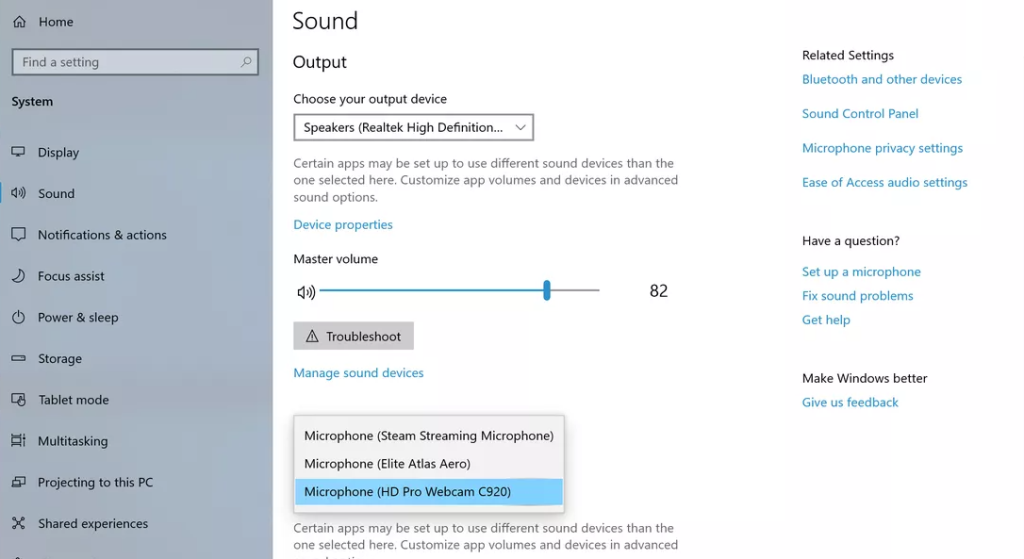
4. Choose your microphone from the drop-down menu located in the Input section of the Settings window. After making your selection, you can then close the window.
5. Launch the Windows Voice Recorder application by selecting it from the Start menu. It is expected that it will already be installed, but in the event that it is not, it can be located in the Microsoft Store.
6. To begin recording, navigate to the left side of the screen and select the icon labelled Record.
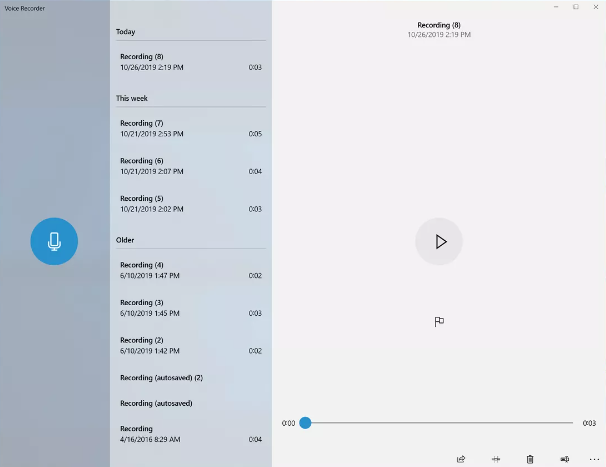
7. If you want to temporarily stop recording while you’re in the middle of it, you can pick the icon that looks like a pausing recorder and then select it again to resume recording to the same file.
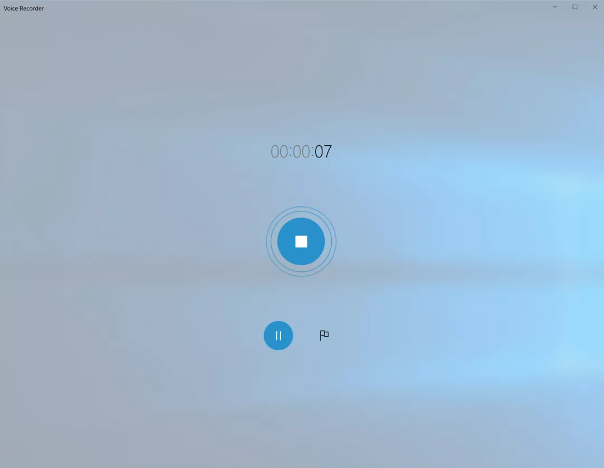
8. When you are finished, click the Stop icon on the toolbar.
9. After you have finished recording, you can choose the recording file, and then click the Play icon, to play back what you have just recorded.
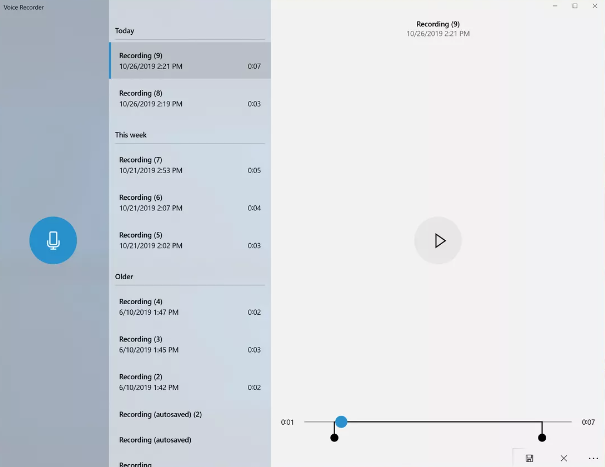
10. Select the icon that looks like a pair of scissors at the bottom of the window if you want to cut out the beginning and the end of the audio.
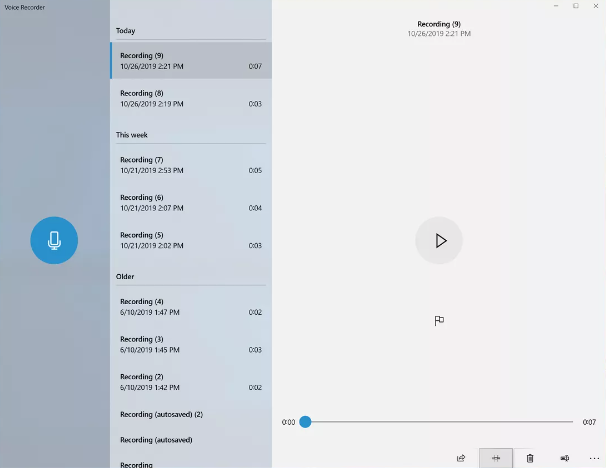
11. You can modify the audio by dragging the start and end bars until you’re satisfied with the results. To hear your updated start and end positions, select the Play icon from the toolbar. When you are finished making changes, pick the Save icon and decide whether you want to make a copy of the existing file or keep the one you have.
12. Right-clicking the file and selecting “Open File Location” from the context menu will take you to the location of the MP3 file on the hard drive of your computer. You can also transmit the file to someone else by selecting the Share icon and sending it via email or sharing it on a social networking platform.
FAQs
Does Windows have an MP3 recorder?
Windows 10 does, in fact, come equipped with its own built-in audio recorder, which can be used to record MP3 files.
What happened to Windows Sound Recorder?
However, the programme was completely removed from Windows 10 and changed to be replaced with a whole new app named Voice Recorder. Voice Recorder has the ability to capture and edit simple sound recordings and export them as m4a files. The Sound Recorder app is now making a comeback, and Microsoft is in the process of testing a redesigned version of the app with Windows Insiders in the Dev channel right now.
What is digital voice recording?
The term “digital sound recording” refers to a method of preserving sound in which audio signals are converted into a series of pulses that correspond to patterns of binary digits (that is, 0s and 1s) and are recorded as such on the surface of a magnetic tape or optical disc. Digital sound recording is also known as “lossless” sound recording.


