Guide
How to Record Your Screen With Microsoft PowerPoint

You don’t need to look any further than Microsoft PowerPoint if what you’re after is a straightforward and speedy method to record what’s happening on your computer screen. Indeed, you have it correct! The software that Microsoft provides for the creation of presentations does, in fact, include a screen recording option among its other tools. The procedure is as follows.
Read Also: How to Copy and Paste Slides in PowerPoint
How to Record Your Screen With Microsoft PowerPoint
Start by opening either a new presentation or an existing one, and then follow these steps to produce a screen recording in PowerPoint:
1. Click the Screen Recording button that can be found under the Insert tab.
2. To select an area, either click Select Area in the dock that opens or press the Windows key plus Shift plus A on your computer.
3. Clicking and dragging the mouse will allow you to select the area of your screen that will be recorded when the crosshairs tool displays.
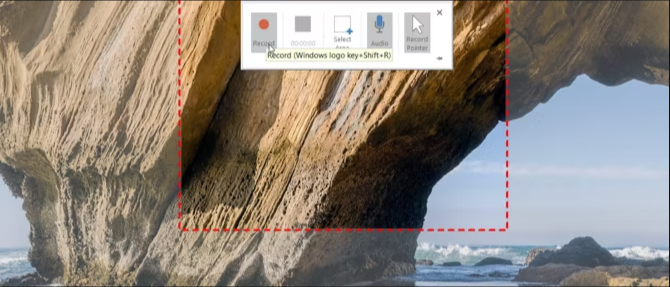
4. Both the audio and the location of the mouse pointer are recorded by default. If you do not wish to record them, you may turn them off by clicking the corresponding buttons in the dock.
5. To begin recording, either select the option to do so by clicking the Record button or by using the keyboard shortcut Windows key + Shift + R. This keyboard shortcut also allows you to pause and restart recording at any time. PowerPoint will continue to record even if you switch to a different programme or window while it’s running in the background.

6. When you are through recording, move the pointer of your mouse back to the location where the dock was, and it will reappear there. To stop the recording, either click the Stop button or press the Windows key plus Shift plus Q on your keyboard simultaneously. (Click the pin symbol in the lower right corner of the screen if you want to keep the dock pinned while you are recording.)

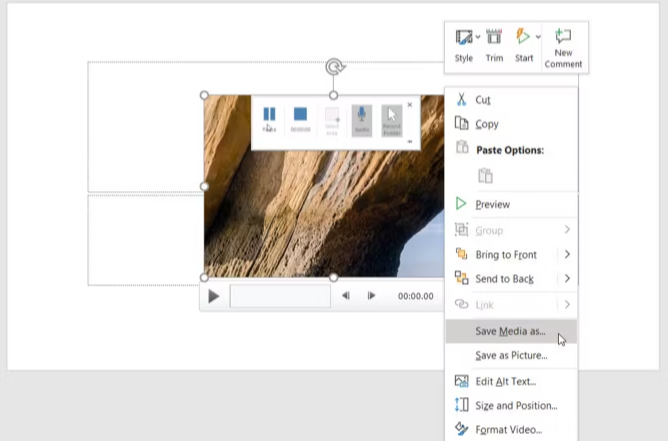
7. You can store the recording on your computer by right-clicking the still shot of the video, then selecting the Save Media As option from the context menu that appears.
8. You can select the file’s name and location in the Save As dialogue box that appears after clicking the Save button.

This function is only available on personal computers that are running Microsoft PowerPoint 2016 or more recent versions of PowerPoint 2013.
FAQs
Where is video tools in PowerPoint?
Clicking on the video object on the slide will bring up the contextual Movie Tools tabs at the top of your screen. Once those tabs are visible, click on the Playback Tab to begin playing the video. Locate the Editing group on this Ribbon, and once you’ve located it, click the Trim Video button within that group. To begin watching the video, click the Play button that is located in the dialogue box for Trim Video.
Why does video not work in PowerPoint?
If the video does not play when you try to play it in PowerPoint, make sure that the programme itself is open before adding your presence to it. Choose the Optimize Compatibility option from the main menu by going to the File > Info section and making your selection there. The application will automatically detect and optimise any video files that have been inserted in order to remove any possibility of compatibility issues occurring.
Which video format is best for PowerPoint?
We recommend that you use.mp4 videos encoded with H. 264 video (also known as MPEG-4 AVC) and AAC audio in PowerPoint 2013 and later versions for the best possible video playback experience. This recommendation applies to PowerPoint versions 2013 and later versions.
Why mp4 video is not playing in PowerPoint?
Always make sure the slide volume is turned up; there are occasions when it is muted, which might cause problems with PowerPoint not being able to play media mp4. Sometimes, problems with upgrading Windows Media Player are the root cause of the error, which states that PowerPoint is unable to play mp4 media files. Make the necessary upgrades, repairs, or replacements based on the needs.


