Apple
How to Use Split View on a Mac
A split screen is useful when you want to see numerous tabs on one screen without things becoming muddled. Split screens allow you to have two or more areas, each with its own set of information, on a single display screen. Working in these areas allows you to be more productive and to view more information without the need for a second screen. For the good news, recent versions of MacOS have a very simple split-screen capability known as Split View that anyone with a modern Mac may take use of. In this article, we’ll show you how to use Split View on a Mac to get the most of your computer’s capabilities.
However, while attaching numerous external monitors is always an option for larger tasks, this article will show you how to divide your screen into smaller sections whenever you need it.
Read Also: How to Update Chrome on a Mac
Get started with Split View
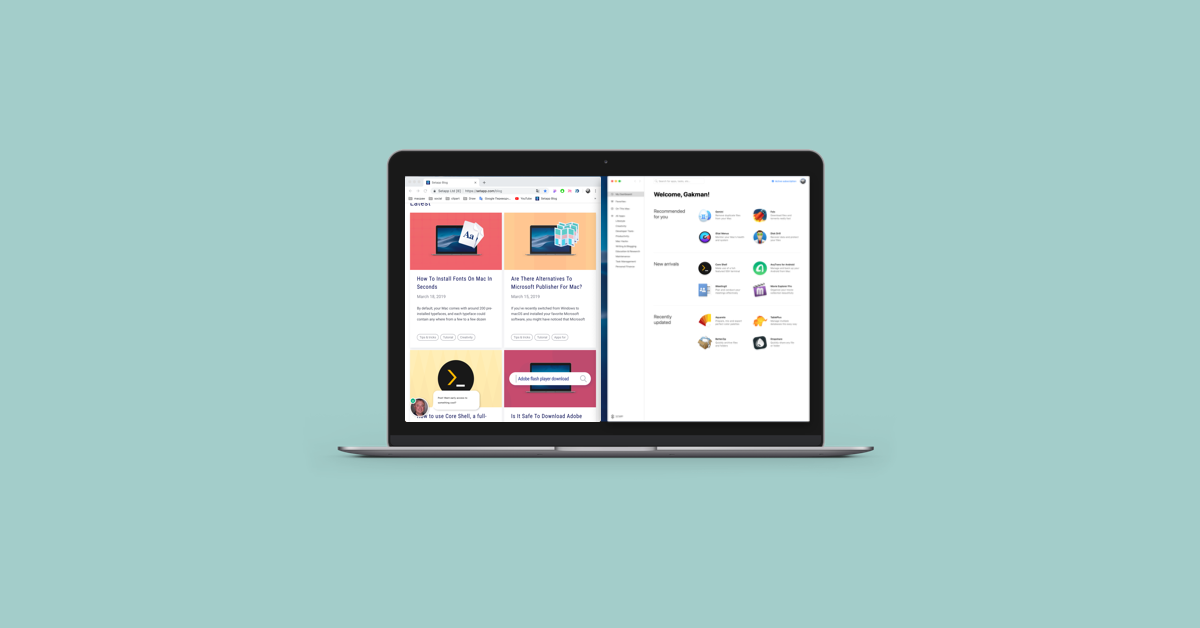
Step 1: The first step is to open two or more windows that will be paired together in a split-screen configuration, as seen below: It doesn’t matter if you’re using browser windows, applications, or documents. Look in the upper-left corner of your first window for three coloured dots: red, yellow, and green. This is your starting point. These are in charge of controlling the window.
Step 2: If you move your mouse cursor over the Green Dot, you will see two little “expand” arrows appear. Keep your finger on this Green Dot for a few seconds, and a selection of possibilities appears: Select Full Screen, Tile Window to the Left of the Screen, and Tile Window to the Right of the Screen from the drop-down menu. If you choose the second or third options, the window will take up the whole second or third row of your display.
Step 3: You have completed one side of your Split View. A thumbnail of any other open windows will appear on one side of the screen, and the primary app will take up one half of the screen. The other window that you wish to utilize in Split View mode will grow to cover the vacuum, making the Split View experience a whole lot more complete. You may adjust your primary attention by tapping on either window as needed, and vice versa.
Adjusting Split View
When using Split View, you don’t always have to divide your screen in half. Using the Black Divider, you may alter the left and right halves of the screen by clicking and holding and swiping. In the event that you need to examine a huge homepage with an unusual design or have a large spreadsheet to work with, this is an excellent option. In certain cases, you may not be able to resize the bar at all since some apps have minimum widths, such as Apple’s Photos. You may easily slide an app’s Title Bar to the other side if you discover that you prefer different-sized windows. Switching between the windows will be done automatically.
Have you lost track of your menus? The menu bar is automatically hidden while using Split View (and Dock). You may access the menus of each programme when using Split View simply by moving your cursor to the top of the screen.
Finally, you may change the resolution if the windows are too small. Press Esc or click the Green Dot in either window to exit Split View mode. When you exit Split View, both windows will be restored to their normal state, allowing you to resume your previous work.
Split View options
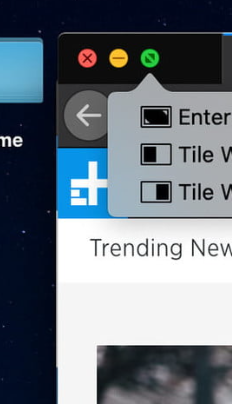
A window’s top-left Green Button has three additional options: Zoom, Move Window to the Left Side of the Screen, and Move Window to the Right Side of the Screen, if you hold Option (or Alt).
Full screen mode, on the other hand, obscures the Dock and menu bar, whereas Zoom leaves both in tact. To put it another way, tiling windows hides the Dock and menu bar, whereas moving does not. As a result, when you move a window to either side of the screen, there is no movable black bar in Split View. In addition, there isn’t any need to connect a second app.

Window snapping
After a lengthy wait, Mac users may finally enjoy window snapping in the same way that Windows 10 users do. The window will be protected by a transparent box if you move it to one of the four sides or four corners of your display. The window’s form may be seen here. To snap to this position, simply release the mouse button.
Different choices are available in MacOS Catalina (and newer):
- 25% of your screen will be taken up if you drag a window into a corner of your screen.
- On each side of the screen, drag it up to fill half of the screen, and it will resize accordingly. The bottom half of your screen will fill up if you do the same for the left or right side.
- If you drag the window to the left or right of the screen, it will fill the left or right half of the screen.
- To fill the centre third of the screen, drag it down to the bottom of the screen.
- Make the app full screen by dragging it to the top of the screen. If you then slide a little higher, you’ll enter Mission Control, so you’ll have to be careful with this..
There are so many options, it may take some experience to achieve the right balance.. Mac users, who have been without this feature for far too long, will be happy to see it added to MacOS.
Unlike Split View, window snapping doesn’t make applications go full screen when you drag them into position, and there’s no black bar to modify their size.
A quick word about Mission Control
Do you have several windows open and need a better way to see them all? Mission Control is here to help.
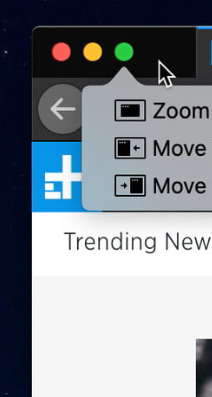
This mode helps you swiftly switch between all of your open windows in a ribbon-like layout. It’s possible to establish many virtual desktops (or “spaces”), each of which has its own programmes and windows active, using Mission Control. On the ribbon, you may quickly switch between desktops by clicking on them.
In order to go into Mission Control, you may just drag a window up to the top of your screen, which should put you in the mode. The Mission Control button (F3) on Apple keyboards may be pressed, or if you have a trackpad, you can swipe up with three or four fingers (depending on your trackpad settings).
Video

Vampire Crawlers Coin Farming Guide

Forza Horizon 6 Performance: Why 60 FPS Is Still the Console Standard

Yoshi and the Mysterious Book (2026) – Full Completion Guide, Rewards & Secret Ending

How to Get Free Pets in Adopt Me: A Guide for Players

Roblox Username Generator – Create a Cool & Unique Username in Seconds
How to Get Free Pets in Adopt Me: A Guide for Players
Yoshi and the Mysterious Book (2026) – Full Completion Guide, Rewards & Secret Ending
Vampire Crawlers Coin Farming Guide


