Guide
PC Won’t Boot To BIOS (causes) – How to fix

Booting into the BIOS is necessary in a variety of situations, including when you initially build your computer, when you want to modify certain settings, or when you need to resolve a problem.
Because of this, getting into BIOS, or even worse, the operating system, on your computer may be quite troublesome.
Continue reading to understand why your computer is refusing to cooperate and won’t boot into the BIOS or operating system, as well as how to resolve the problem.
How To Fix PC Not Booting To BIOS
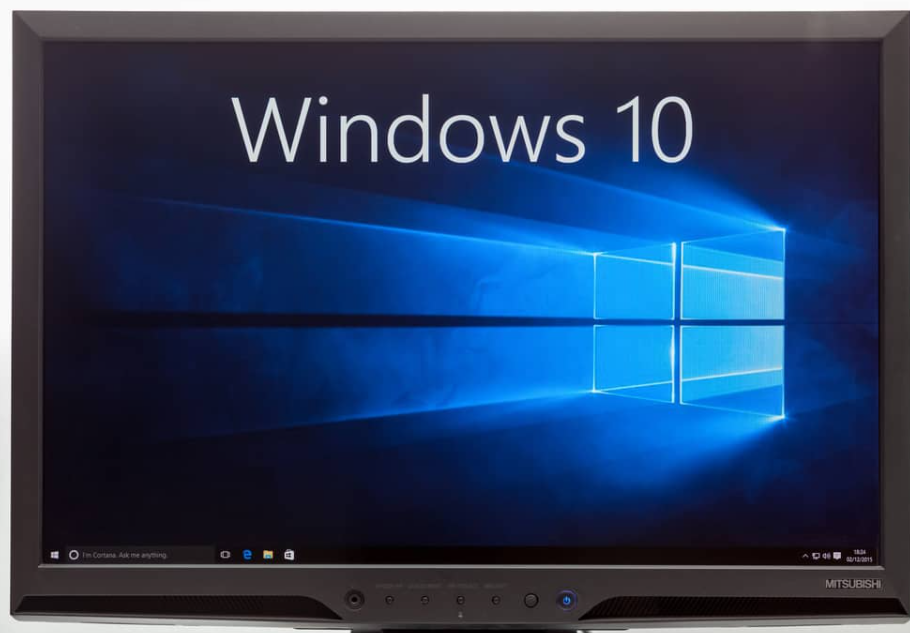
1. Use UEFI Firmware Settings

Given that your computer boots the operating system correctly but does not allow you to access the BIOS, accessing the BIOS using the UEFI firmware settings is the most efficient option if your operating system is Microsoft Windows 10.
- Select the Update and Security section from the Settings app’s Update and Security menu.
- Select the Recovery tab from the left-hand pane, and then, under the Advanced Startup section, click on the Restart Now option to restart the computer.
- To open a new window with the title “Choose an option,” choose the Troubleshoot button from the drop-down menu
- After that, go to Advanced Options and then UEFI Firmware Settings to complete the process.
- Now press the Restart button to force the machine to boot into the BIOS.
2. Fix Faulty Power Connector
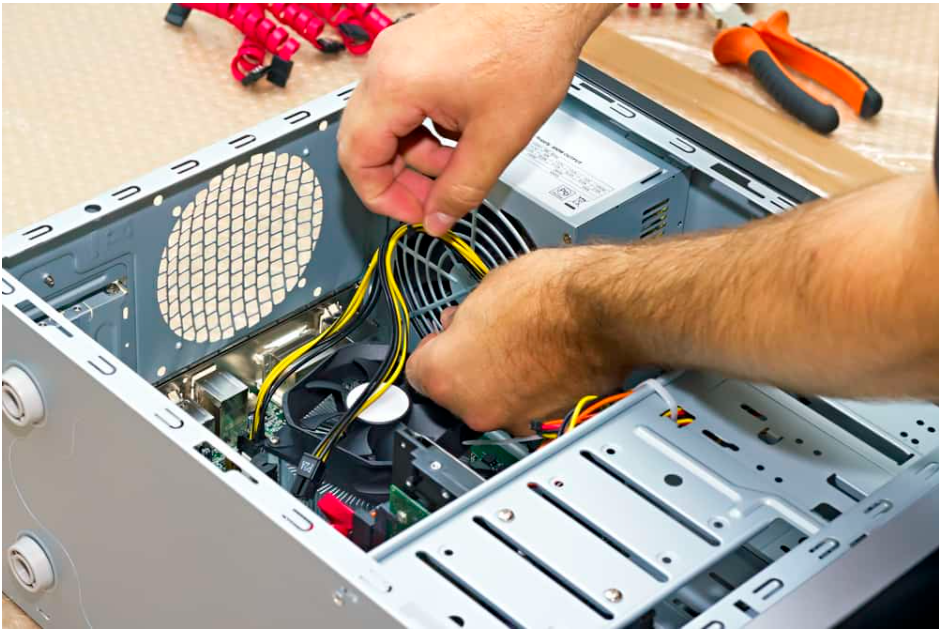
Booting into BIOS will be impossible if the motherboard or the CPU’s power connection are incorrectly or malfunctioningly connected.
It’s important to make sure that the 24-pin connection on the motherboard is properly installed and that there are no visible symptoms of damage on the wire itself before proceeding.
The CPU is typically connected to the motherboard through an eight-pin connection in a 4+4 configuration.
Make sure both ends are properly connected.
Check the other ends of the wires that are connected to the PSU to make sure they are connected properly.
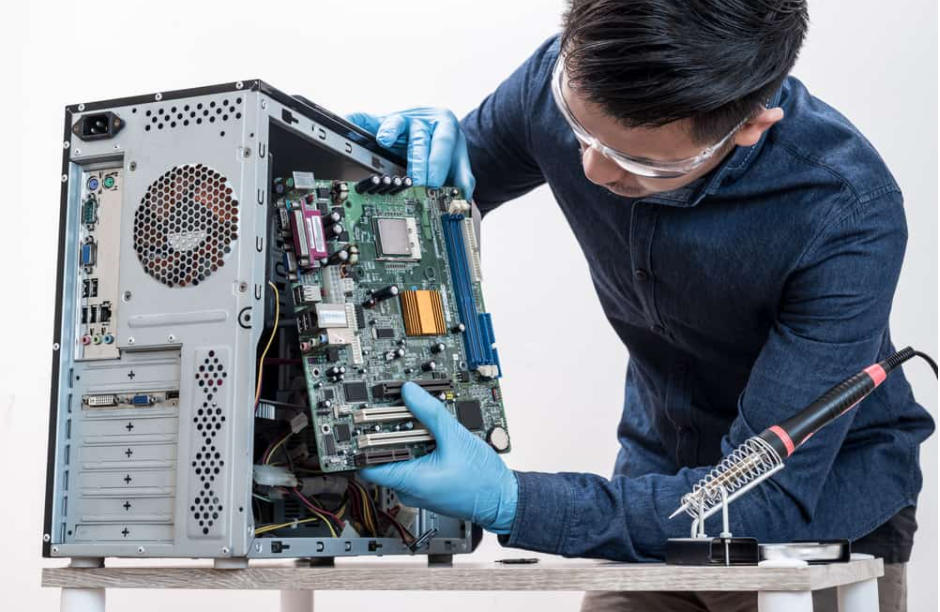
3. Troubleshoot The RAM Sticks
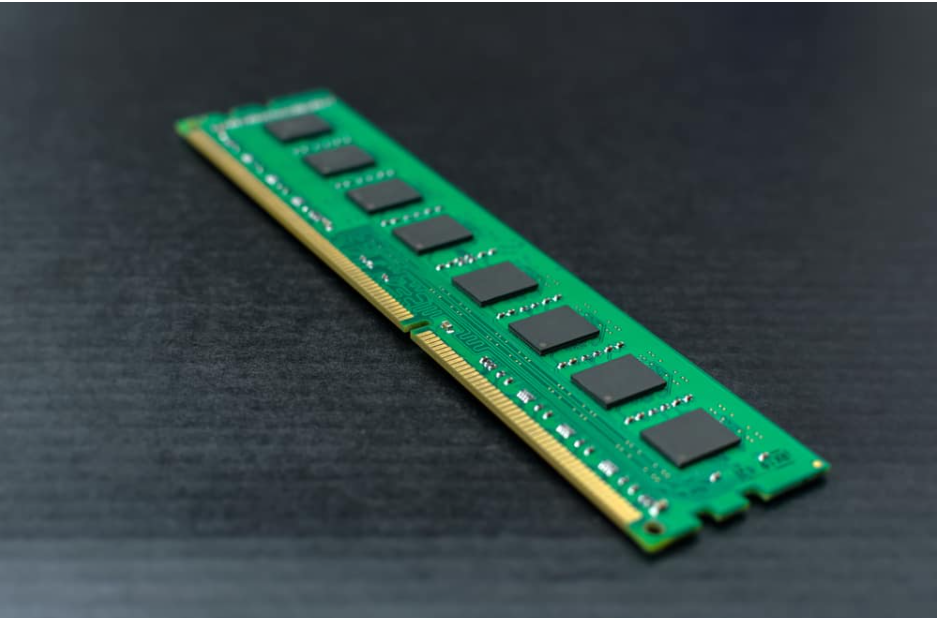
A RAM problem might cause your computer to fail when it attempts to boot into the BIOS or operating system.
Ensure that all of the RAM sticks are in good condition and are properly positioned.
Unplug the computer’s power cord and turn the machine off to complete the process.
Open the casing and look for the RAM sticks on the motherboard by following the arrows.
Remove them all from their respective slots and then reinstall them one by one.
When inserting each RAM module, make sure that the notch in the RAM corresponds to the notch in the slot on the motherboard.
If you have successfully seated the stick, the tabs on both sides should create a clicking sound when you release the stick.
Do not force the stick into the hole at the rear.
Try restarting your computer to see if the problem persists.
If it still doesn’t work, remove all of the RAM sticks and just plug in one of them at a time until it works.
If the system now boots, proceed to add the other RAM sticks, one at a time, until you locate the problematic RAM stick that will need to be replaced.
Be aware that there may be instances when a slot on the motherboard is broken, and you may need to test alternative slots in order to get results.
4. Remove The BIOS Battery To Reset The CMOS
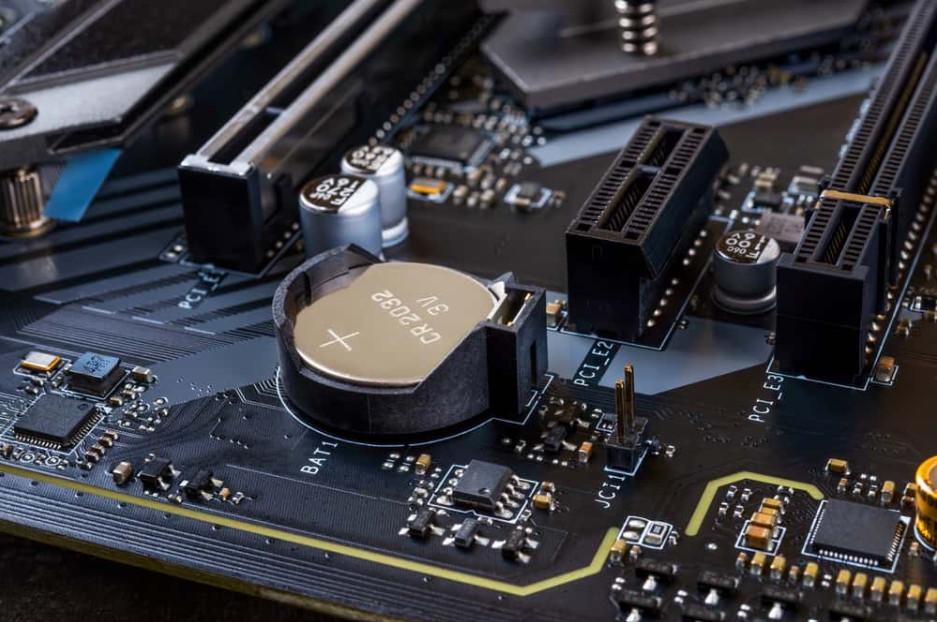
Because CMOS battery difficulties might result in boot problems, it is necessary to clear the CMOS by removing the battery from the device.
What you should do is as follows:
- Turn off and unplug any peripheral devices that are attached to your PC by a USB, HDMI, or other kind of interface.
Remove the PC’s power cord and remove the casing from the machine. - On the motherboard, look for a flat coin-shaped battery, which looks similar to a watch battery in design. If you are unable to locate it, consult the manual that came with your motherboard to establish its position.
- It is now necessary to carefully remove the battery from its original location.
- In certain cases, a clip or lever may be used to secure it in place. You may remove the barrier using your hands or a screwdriver, and then remove the battery from the battery compartment.
- Allow the battery to lie outdoors for about 20 minutes before putting it back in its place. Check to see that it is correctly seated.
- Remove everything from the case, reconnect everything, and restart the computer. It is important to note that the CMOS battery has a lifespan of around 10 years. If you’ve had the motherboard for so long, or if you’re using a second-hand motherboard, it’s fair to presume that the battery is no longer functioning properly. Purchase a new CMOS batteries and swap it out to resolve the problem if necessary.
How To Boot PC To Windows
This troubleshooting procedure is intended for people who have successfully accessed the BIOS but are still having difficulty starting the operating system.
1. Disconnect External Peripherals
It is possible that the Windows operating system may have difficulties starting because of a conflict with one of the peripheral devices or their drivers that you have attached.
You must detach them all, restart your computer, and check to see whether the operating system appears.
Completely shut down the computer and disconnect all USB devices, including the mouse, external hard drive, and any peripheral devices.
If you have a computer with just three connections attached, those are the power cable, the display cable for the monitor, and the keyboard and mouse.
Repeatedly pressing the power button will help to discharge any leftover electricity.
Then power on the computer, and if Windows starts up, you’ve identified the source of the issue.
As you connect each device, restart the computer until you’ve identified the one that’s malfunctioning.
2. Read The BIOS Error Messages

When the system is unable to complete the boot process, it will often display an error message or emit a beep code to assist you in determining the source of the issue.
Either read the error message that appears on the screen or listen to the beeps that occur when the computer is first booted up and research the significance.
Detailed information may be found in the handbook for your computer or motherboard, as well as on the manufacturer’s website.
If you do not see or hear anything, go to the next item on the list to identify the problem.
3. Fix Possible Boot Device Issues

If your computer boots to the BIOS but does not load the operating system, it is possible that there is a problem with the storage disc where Windows is installed or with the boot order.
System priority and scanning of storage choices are determined by the boot order, which is used to determine whether or not to launch Windows.
The drive on which the operating system is installed should be the first drive to start up in the boot sequence.
The following is a procedure for determining the boot order:
Remove any flash drives and external storage devices from your PC and restart it.
During the booting process, enter the BIOS as described in the preceding sections.
Locate the part of the BIOS that is devoted to storage, and click on it. It might be referred to as the Boot Order Menu, Boot Priority Menu, or anything else along those lines.
Place the main drive, which contains the operating system, at the top of the list. If you are unsure which of the discs houses the operating system, deactivate all but one of them and boot the machine. Continue to work your way down the list until you reach the appropriate drive. After that, enable all of the other storage discs in the system.
Don’t forget to save your modifications in the BIOS before closing the programme.
Remember that the BIOS may not be recognising the operating system drive at all, and therefore it will not appear in the list.
This indicates that there is a problem with the drive itself.
Check the cables that are attached to the storage disc to make sure they are all properly linked and secure.
If your operating system is stored on an M.2 SSD disc, make sure it is properly positioned.
When in doubt about whether or not your hard drive is damaged, it’s best to test it on another computer that’s still operational.
4. Update The BIOS
Update the BIOS if you’re creating your own PC or if you have an older motherboard installed, since this may assist with boot troubles.
Problems caused by newly-paired hardware may be solved by updating the motherboard’s firmware.
Check the motherboard manual or the manufacturer’s website for instructions on how to upgrade your motherboard.
5. Use Windows Safe Mode

Because it starts the system with the bare minimum of software and bypasses driver and software difficulties, booting Windows in Safe Mode may alleviate many boot-related issues.
Windows Recovery may be used to enter Safe Mode.
Three times in a row, you must interrupt the computer’s boot process in order to activate Windows Recovery.
A “Choose an option”-titled screen should appear on your screen.
Go to Advanced Options, then Startup Settings, after clicking Troubleshoot.
Safe Mode should now be accessed by restarting the computer.
With a Windows 10 recovery disc, Safe Mode may also be accessed.
You’ll need to build a recovery disc for Windows 10 first.
An external USB device with at least 512MB of storage space is required for this task.
Open Control Panel on the other computer and choose Create a recovery disc.
Save the data to the USB device by following the on-screen directions.
If you haven’t previously done so, make sure the USB discs are bootable in the BIOS.
Prioritize the storage disc.
Launch Safe Mode by restarting your computer.
6. Restore The BIOS Default Settings

Problems starting up may be caused by particular BIOS settings.
You may be able to get your machine to boot into Windows again if you disable them.
Fast Boot is the first option, allowing Windows to boot up more quickly by preloading discs.
Problems with Fast Boot compatibility might occur with certain Windows upgrades.
This is a BIOS setting that must be disabled.
Upon entering the BIOS, search for “Fast Boot” in the advanced options or boot options section of the menu.
The manual for your motherboard should be consulted if you can’t locate it in the above list.
You’ll have to turn it off once you get there.
Secure Boot is the second vexing option.
When the computer is starting, this function checks the hardware and discs for malware.
Secure Boot will generate an error if it cannot find hardware or a driver to begin the boot process.
Your problem may be solved if you disable this option in BIOS.
Boot Options is where you’ll typically find it.
It’s also possible that improper BIOS settings are causing booting problems; if so, restoring the BIOS to its default settings can resolve the issue.
There are choices in the BIOS for “Loading the System to Factory Defaults” or “Loading the Factory Default Options.”
Be careful to check out the Configuration and Security sections, as well as the Restart and Exit options.
The BIOS will be reset to the factory defaults after you click on the option and choose Yes in the dialogue box that appears.
7. Motherboard Standoffs
Though it may seem unusual, improper installment of the motherboard standoffs may cause boot issues in some systems.
Check if all the standoffs are present and aligned with the screw holes.
8. Perform A Malware Scan
If your computer has been infected by malware or viruses, it may not be able to boot.
You have no choice except to utilise a bootable antivirus rescue CD.
Your finest bets for a rescue disc may be found right here.
9. Use System Restore

To solve issues caused by a change you made in your system, you can use the System Restore feature to restore Windows to a previous point when everything was working normally.
Here’s how to perform a System Restore:
- Go to the Windows Recovery environment as explained in the previous sections.
- Select Troubleshoot Advanced Options More Recovery Options Startup Settings.
- Hit the Restart Now button.
- Choose Disable driver signature enforcement from the list of startup settings by pressing the 7 or F7 key.
10. Factory Reset
The final and most damaging option is a Factory Reset, often known as a “Reset” or a “Refresh” in Microsoft parlance.
You’ll be wiped clean of all of your previously stored documents and data.
Select Restart this PC in the Troubleshooting section of the Windows Recovery Environment.
What Is BIOS?
You may get the most fundamental information about your computer via the BIOS, which is an input/output system that is pre-installed on your motherboard as a ROM chip or firmware.
The BIOS acts as a go-between between the operating system and the hardware on which it is running.
It’s in charge of managing the flow of information between the operating system and peripherals including the hard disc, keyboard, mouse, and printer.
After you power on the computer, the microprocessor utilises the BIOS to start the system.
In order for a computer to start up, it requires a boot device.
A computer’s BIOS first checks to see whether all the essential hardware is working, and then it begins to boot the operating system.
What Are BIOS Functions?
You need to be familiar with the BIOS operations in order to figure out what’s wrong and how to fix it.
Before the BIOS installs the operating system, the Power-On Self-Test (POST) analyses the computer’s hardware and ensures that no faults exist. Hardware problems might cause your computer to not boot into BIOS or the operating system if it can’t pass the POST test. If you hear a series of beeps, that’s a code indicating whatever’s wrong.
BIOS will take control of the computer if the Bootstrap Loader locates a competent operating system.
Low-level BIOS drivers allow the operating system to take control of the PC’s hardware.
Complementary Metal Oxide Semiconductor (CMOS) is the abbreviation for CMOS.
System and hardware settings, such as the time and date, may be altered by users via the configuration software.
How To Correctly Enter BIOS

Every computer and motherboard provides a unique way for users to enter the BIOS setup, so there’s no “correct” way.
Most newly manufactured computers have the same method of entering the BIOS, and it requires a keyboard.
You’ll have to press one of the following keys on the keyboard while the computer is booting up:
- F1
- F2
- F10
- Del
- Esc
Since your computer’s details might be unique, consult your computer’s manual or the manufacturer’s official website to find out how to enter the BIOS.
If you’ve built the PC yourself, you’ll have to check the motherboard’s manual.
If you couldn’t enter the BIOS with the mentioned method, you can move on to the next section to fix the issue.
FEATURED Video

Vampire Crawlers Coin Farming Guide

Forza Horizon 6 Performance: Why 60 FPS Is Still the Console Standard

Yoshi and the Mysterious Book (2026) – Full Completion Guide, Rewards & Secret Ending

How to Get Free Pets in Adopt Me: A Guide for Players

Roblox Username Generator – Create a Cool & Unique Username in Seconds
How to Get Free Pets in Adopt Me: A Guide for Players
Yoshi and the Mysterious Book (2026) – Full Completion Guide, Rewards & Secret Ending
Forza Horizon 6 Performance: Why 60 FPS Is Still the Console Standard


