Gaming
The Outlast Trials: Kill the Snitch Walkthrough
Most players will begin The Outlast Trials with Kill the Snitch. They have to travel to a barren prison in order to eliminate a prisoner who is spreading information about the atrocities committed at Murkoff Facility. The ultimate goal of The Outlast Trials is to undergo rebirth through therapy. The only way to achieve that goal is to complete the tests established by the Murkoff Facility. The tests feature brand new adversaries, puzzles, and maps for Outlast. The Outlast Trials’ Kill the Snitch strategy guide is detailed here.
Read Also: Payday 3: How to Fix Nebula Connection Error
Walkthrough Kill The Snitch Program in The Outlast Trials
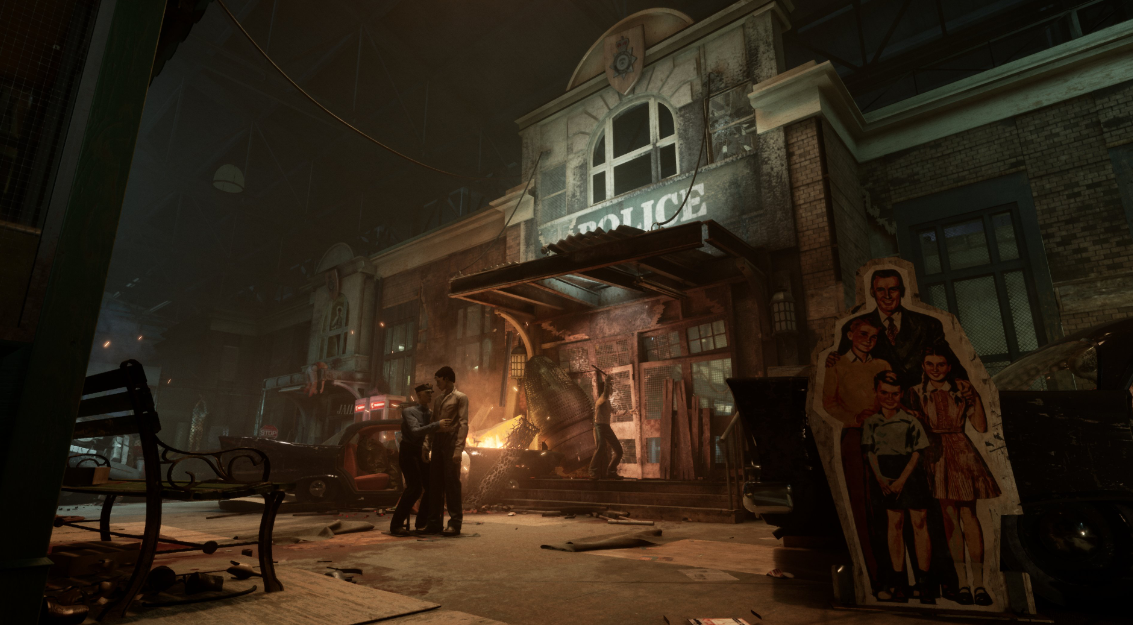
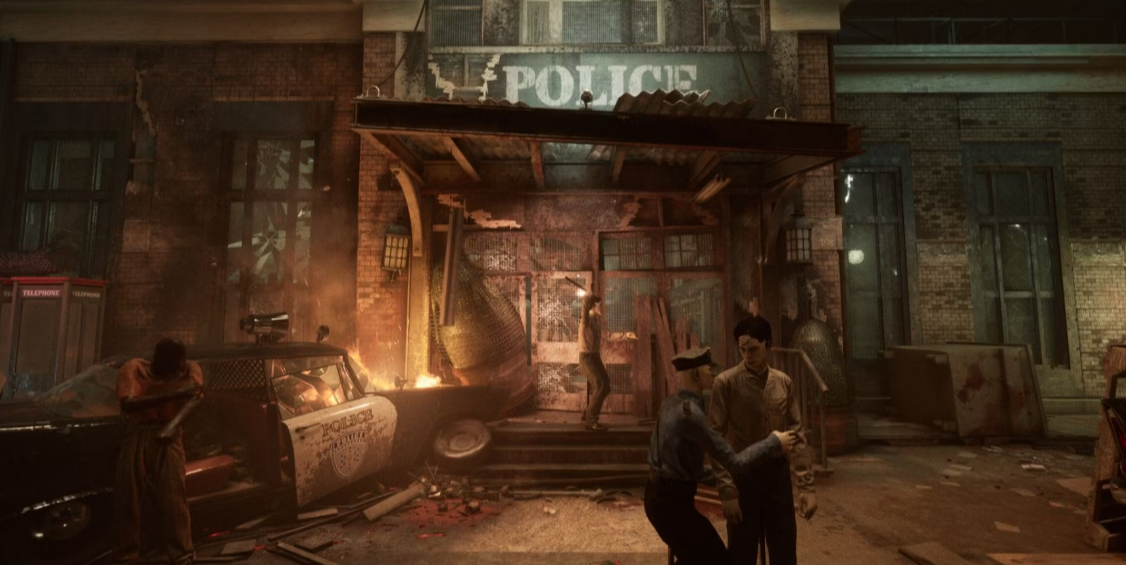
Infiltrate the Police Station: Head straight down the road after spawning to reach the police station. This structure has no front door, but the back of a parked vehicle provides access to the interior.
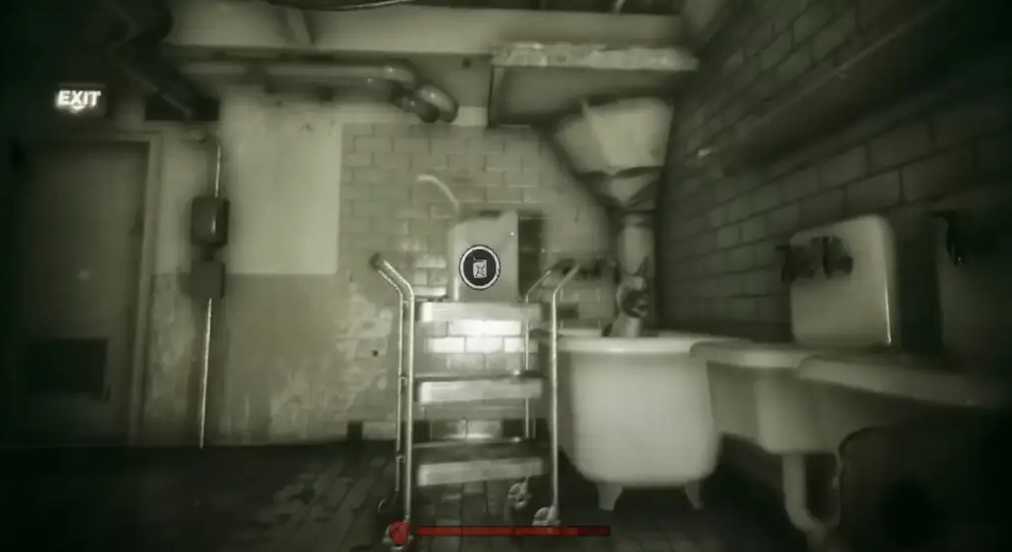
Reach the Security Room: Once inside the police station, you can follow any of the several signs leading to the secure area. The security office is marked with an orange signboard, which can be found by following any signs.
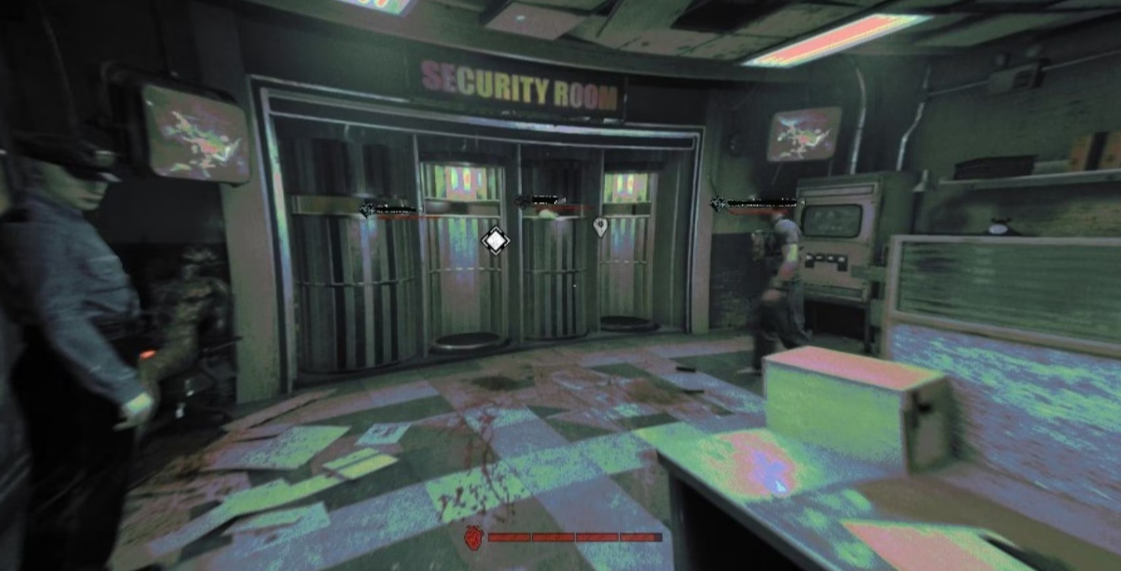
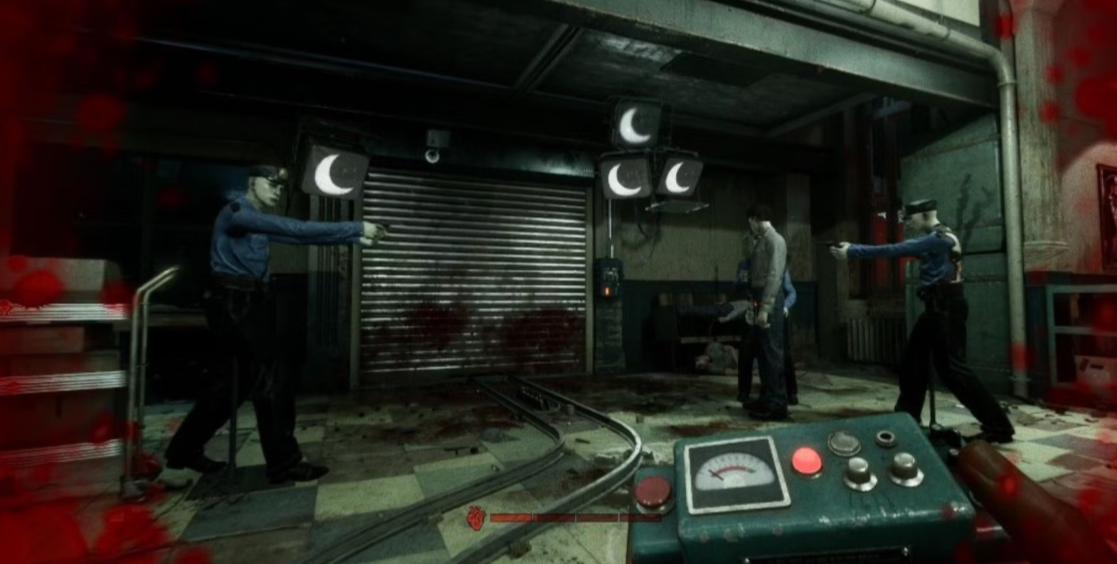
Get on the moving platform and enter the guard booth. You must push the red button in the safe room to complete the mission.
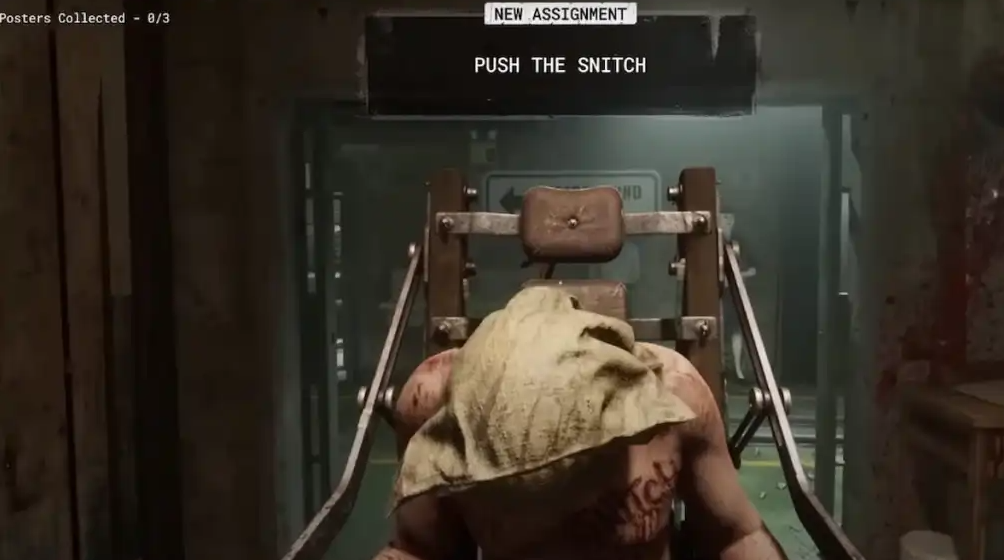
Get to the Snitch in the Cell Block: Following the sign posted outside the security room, you can exit the building and enter the detention facility. The Snitch may be found in the first cell on the right after entering the cell area, directly across from the signpost for the underground parking. He has a bloody “Snitch” symbol on his chest, so you can easily spot him.
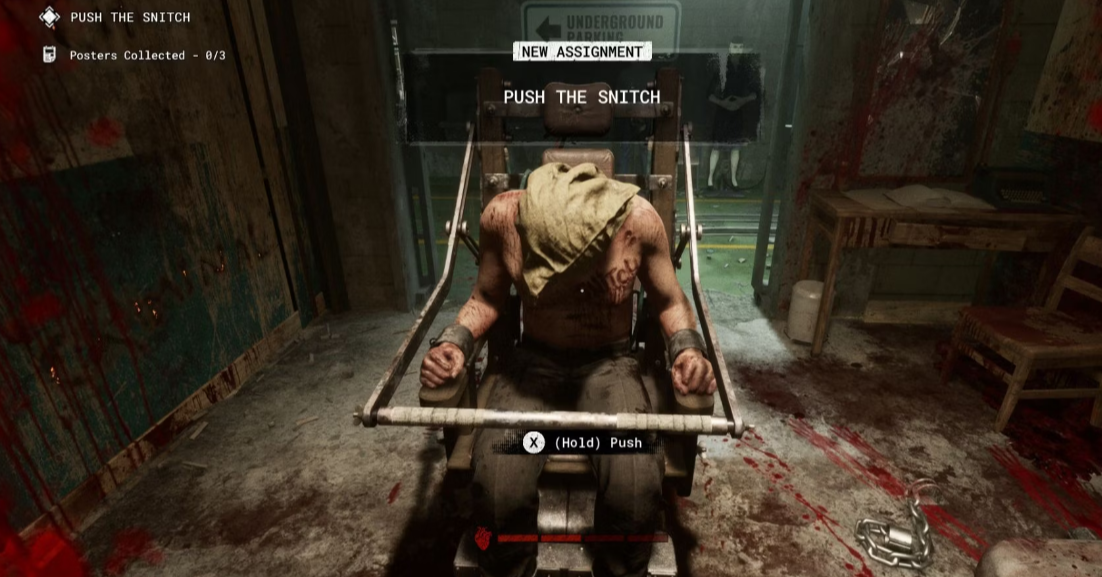
Push the Snitch: Get in a good push behind the Snitch and get him outdoors. When you reach a certain point in the game, the lights will go out and stay out until you reach the next goal.
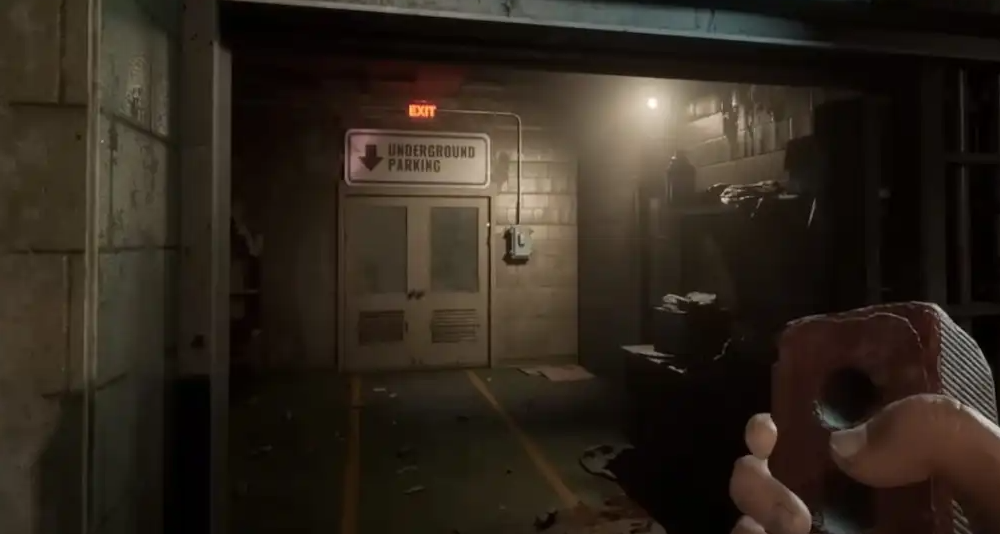
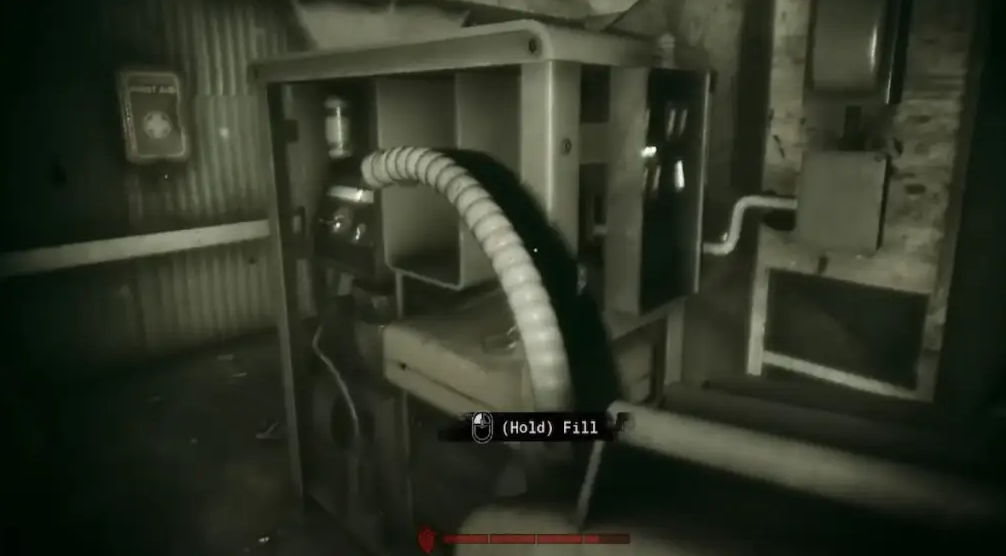
Start the generator in the basement: To get to the Basement from the underground parking, switch on your nightshade and follow the signage.
You’ll find a series of rooms when you first enter the Basement. Find the room with a danger signboard warning that it is the Generator Room.
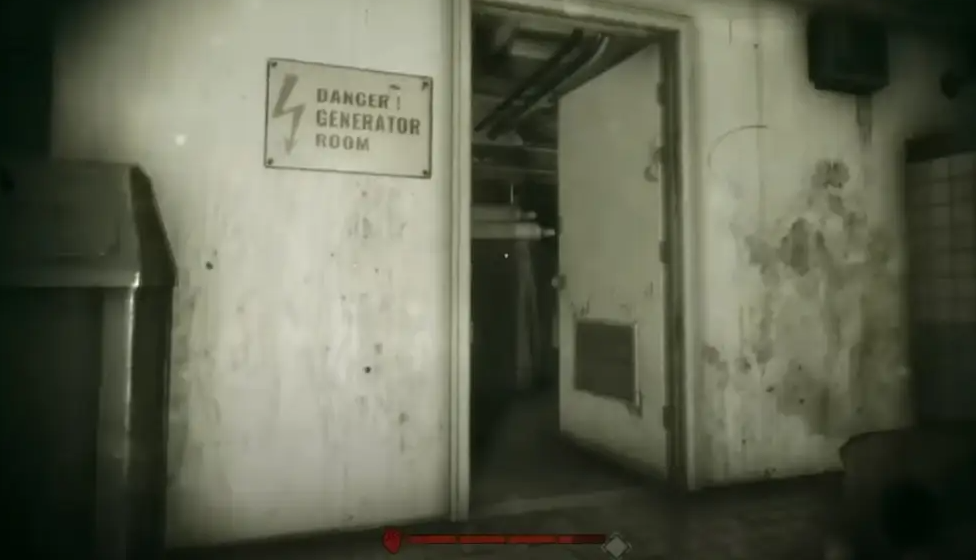
To refuel the generator, you must locate and transport a red fuel container. The gasoline storage tanks are located in one of the basement chambers.
After adding gas, turning on the generator requires touching both switches.

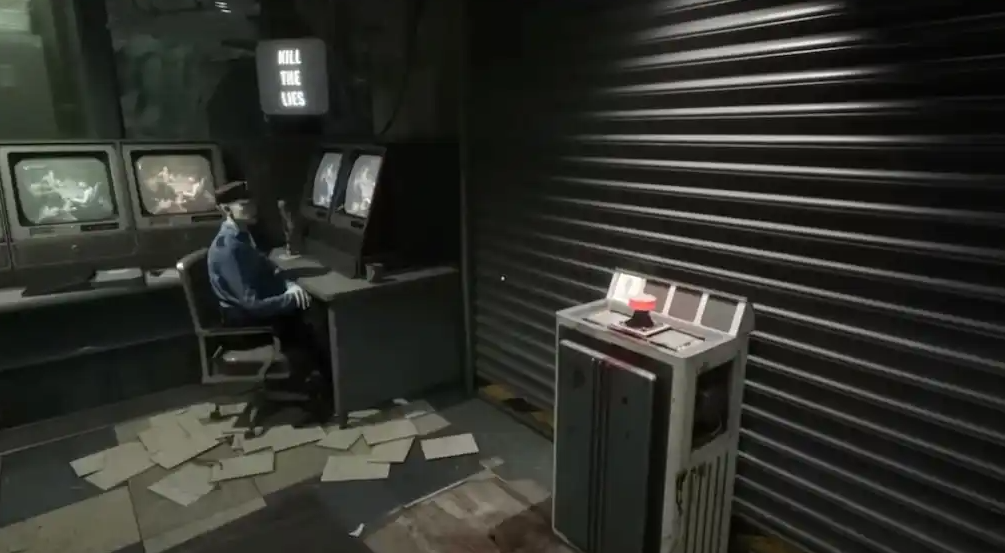
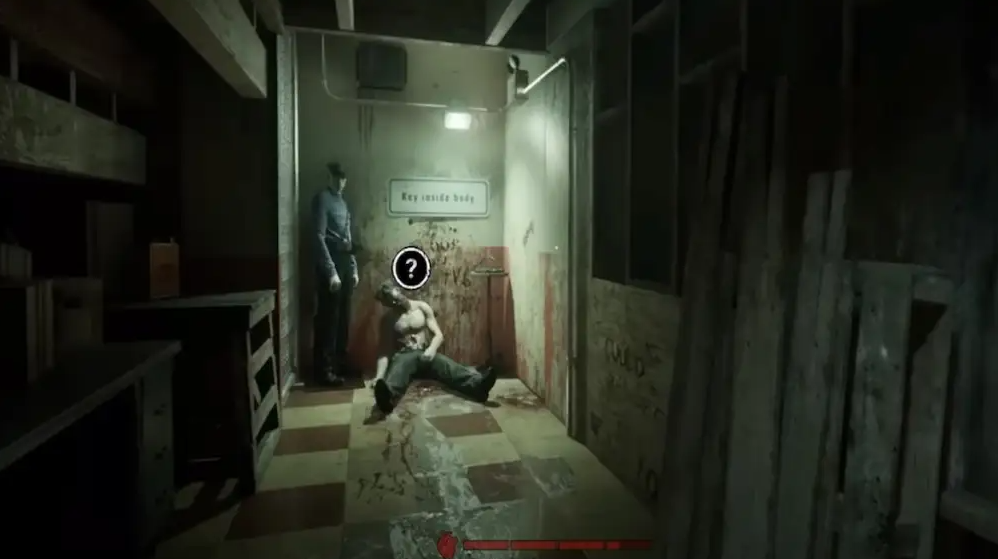
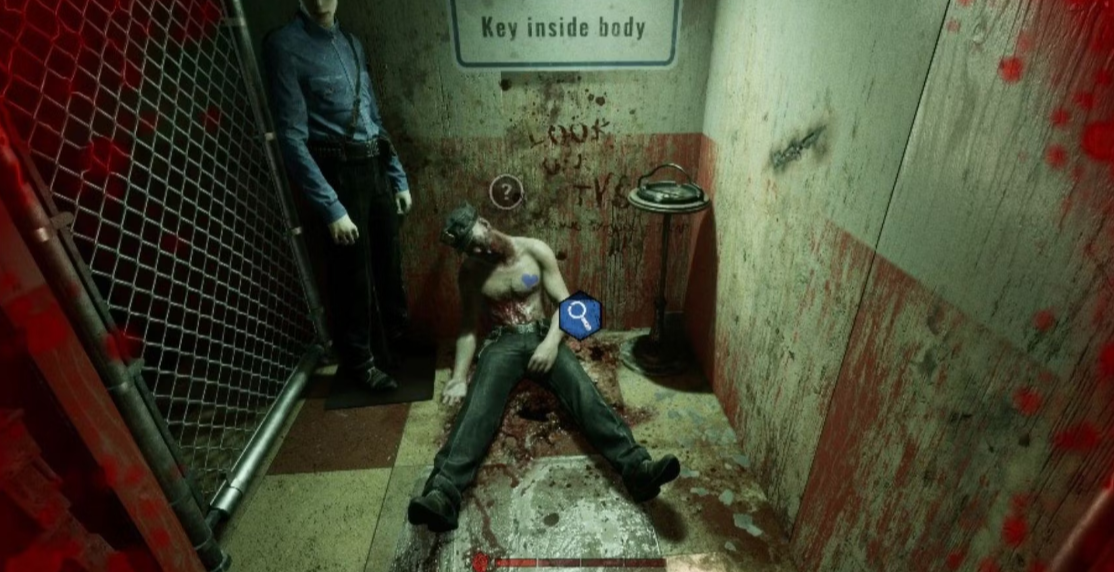
Return to the Snitch and find the keys: Leave the basement once the generators are running and report back to the Snitch. You should resume pushing him until you reach the steel exit. The game will now require you to locate a key to continue. Look at the right side of the TV for a possible hint about the key.
The emblem is nothing more than a clue that gamers need to find on one of the many bodies lying about. Find the body corresponding to your image by going to the room on the left side of the metal door with the inscription “name key.” Find the blue machine by the metal door, then insert the key.
Find the three keys: Once you’ve made it through the metal door, the game will have you search every TV in the neighborhood for three more keys. The first TV is in the cafeteria. Then the screens are in the medical center and the courtroom. The signboard labels each area to be easily found and accessed.
Once you’re familiar with the symbols, you’ll need to scour the entire room’s worth of corpses in search of three such keys. Finding each key will take a long time since you have to stay out of sight of the bad guys as you look for them. Nearly twenty minutes of my run were spent searching for televisions and bodies. So, don’t rush anything, and keep looking about.
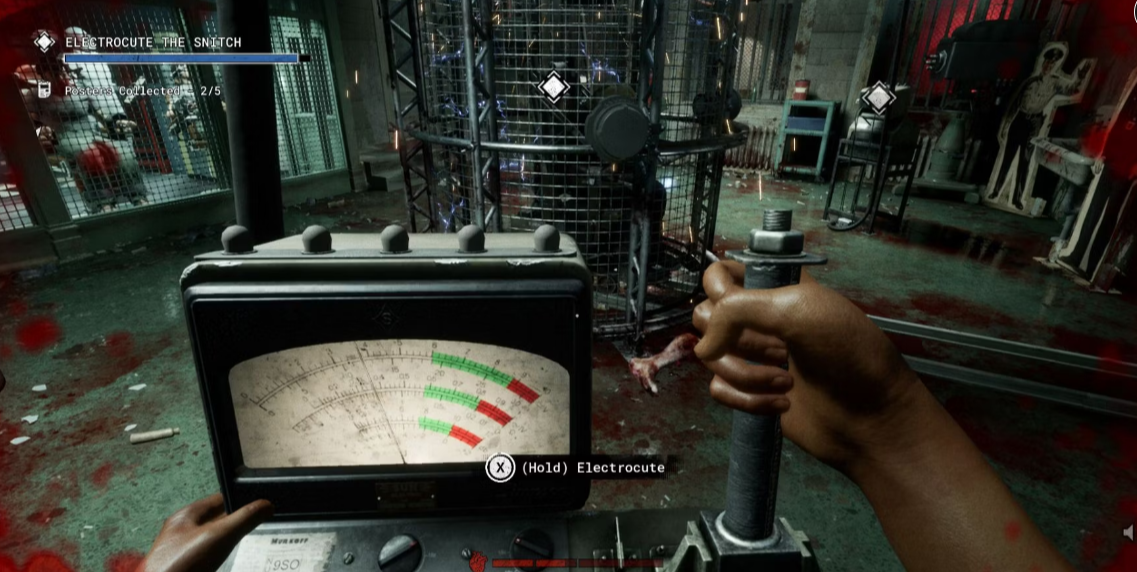
Kill the Snitch: You can now enter the electrocution chamber by pushing the Snitch from behind and using the newly discovered keys. Put the Snitch in the execution chamber and activate all the chairs’ associated computers. When the charge reaches 100%, the energy will be redirected to the chair, and the electrocute button will be pressed.
Exit the Trail: Players should exit the building and return to their starting location once the Snitch has been eliminated. To summon back the shuttle, use the red button. Get in the shuttle and proceed with the trial.
FAQs
Where is the snitch in The Outlast Trials?
After using the terminals in the Safety Room, players must exit the area and return using the same route. Pass the cup traps suspended from the ceiling, turn left into the corridor marked “Holding Cells,” and continue along the path until you reach the Snitch. He’s on a chair fastened to the rails, wearing a bag over his head.
Are there only 3 trials in outlast trials?
Except for Program X, all of the other programs include a total of fifteen trials. As The Outlast Trials progresses through Early Access, more environments, foes, and challenges may be introduced before the game’s final release.
How scary is Outlast trial?
When the terrors of the real world aren’t enough, turn to one of these games. While they may be stupid, they nevertheless frequently disrupt your objectives and force you to scramble to the nearest hiding area, thus the difficulty of The Outlast Trials isn’t quite over yet.

Vampire Crawlers Coin Farming Guide

Forza Horizon 6 Performance: Why 60 FPS Is Still the Console Standard

Yoshi and the Mysterious Book (2026) – Full Completion Guide, Rewards & Secret Ending

How to Get Free Pets in Adopt Me: A Guide for Players

Roblox Username Generator – Create a Cool & Unique Username in Seconds
How to Get Free Pets in Adopt Me: A Guide for Players
Roblox Username Generator – Create a Cool & Unique Username in Seconds
Yoshi and the Mysterious Book (2026) – Full Completion Guide, Rewards & Secret Ending
Forza Horizon 6 Performance: Why 60 FPS Is Still the Console Standard


