Guide
How to Format an SD Card
After a period of time, the SD card in your camera may get overburdened with photographs and movies, its file system may become damaged, or the SD card may become infected with a virus, all of which can be disastrous. It’s simple to resolve these difficulties if you know how to format an SD card, which removes all of the files on the card and replaces them with a new SD card for your camera.
It is beneficial to format your SD card for a number of different reasons. It’s a convenient method of removing obsolete and useless files from a storage format in a hurry. As a result, the card remains clean and ready to be used on a variety of different devices. But, more specifically, how do you format an SD card?
Read Also: How To Fix A Corrupted SD Card Without Formatting
How to Format Camera SD Card
The most expedient method of formatting the camera SD card is to use the camera itself. The formatting method used by the camera reduces the likelihood of mistakes.
1. Back up the files on the SD card to your computer or to a cloud storage service like Dropbox or Google Drive.
2. Check to see that the camera’s battery is completely charged.
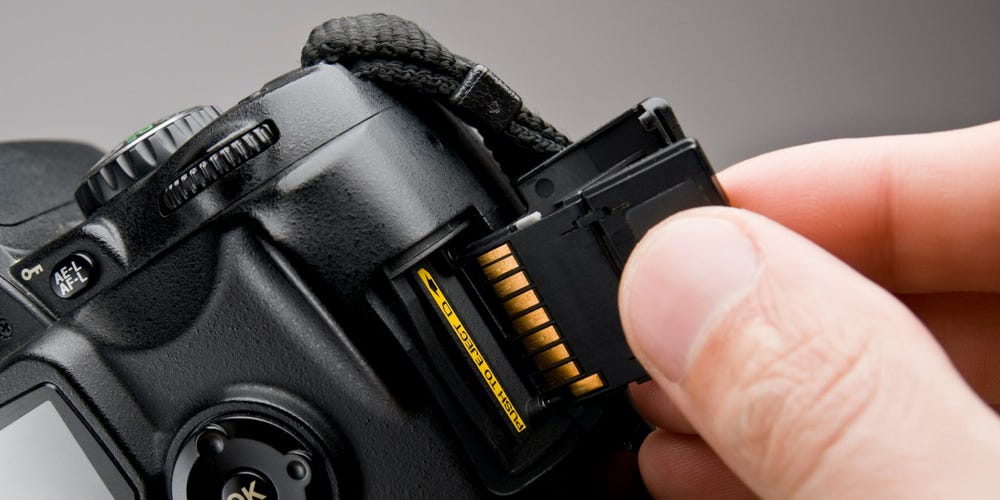
3. Start by turning off the camera and placing the SD card in the appropriate slot.
4. Make sure the camera is turned on.
5. To access the menu on the camera, press the Menu button.
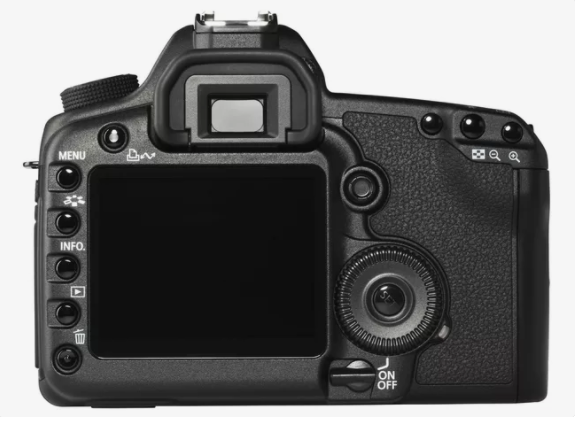
6. Select the Setup menu from the camera’s display and then Format, Format Memory Card, or something similar from the drop-down menu.
7. Select OK from the camera’s menu.
8. Wait for the camera to finish formatting the SD card. It may take a few minutes for the card to be formatted.
9. Switching off the camera once the SD card has been formatted is not a bad idea.
How to Format the SD Card in Your Android
MicroSD cards are available in a variety of Android devices, including smartphones, tablets, and cameras. If your SD card begins to show signs of wear and tear, format the card using your Android device.
1. Go to Settings > Device Care and choose your device.
2. Select Storage from the drop-down menu.
3. Toggle the Advanced button.
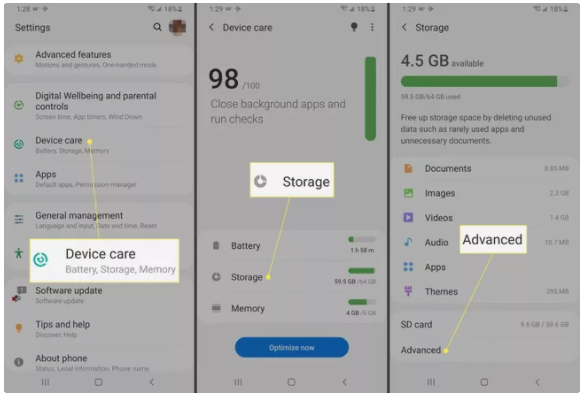
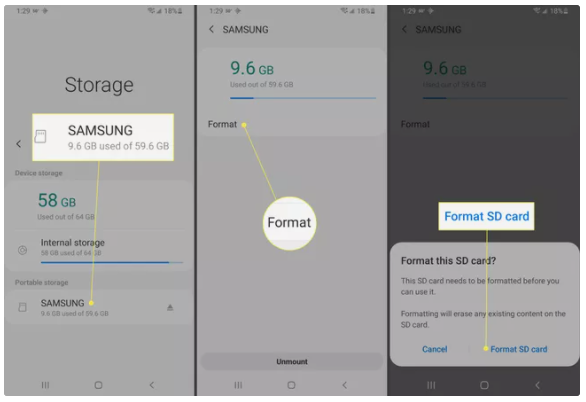
4. Under Portable storage, select your SD card.
5. Tap Format.
6. Tap Format SD card.
How to format an SD Card on a Windows PC
If you’re working with a Windows desktop or laptop computer, you’ll format your SD card using the File Explorer programme.
Before you begin, make a backup of all of the information you intend to save. Make sure your laptop is plugged in or has enough battery life to last a short while, especially if you’re working on it.
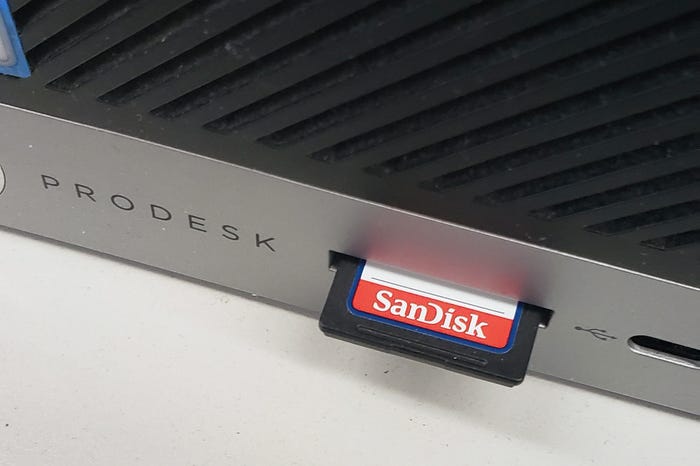
1. Insert your SD card into the SD card reader built into your computer or an external USB card reader.
2. After you’ve successfully installed the SD card, launch the File Explorer (in other words, open any folder). Select either “This PC” or “My Computer” from the column on the left-hand side of the screen — both perform the same function but are referred to by different names in various versions of Windows.
3. Select the SD card from the device list by clicking on it. This will cause it to be opened on your computer.
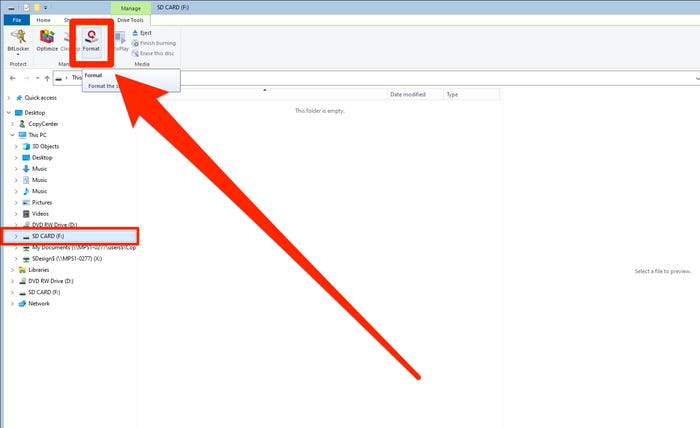
4. At the top of the File Explorer window, select the “Manage” option, then select “Format.” There will be a pop-up window that appears.
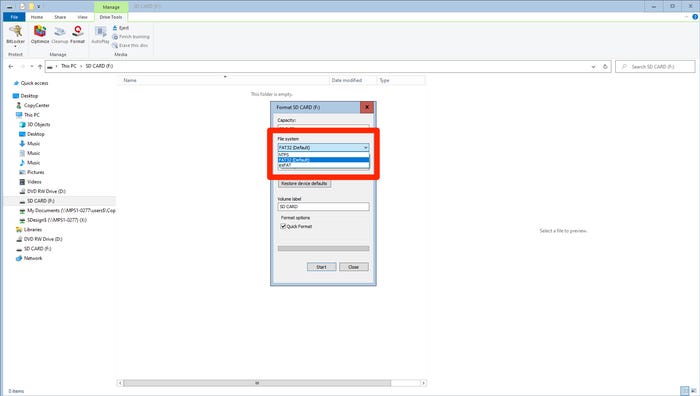
5. In the pop-up window that appears, select “File System” from the drop-down selection that appears. NFTS is the only choice if you only want to use this card on Windows-based PCs, as indicated by the asterisk. If you want to use it on a variety of different devices, choose “FAT32.”
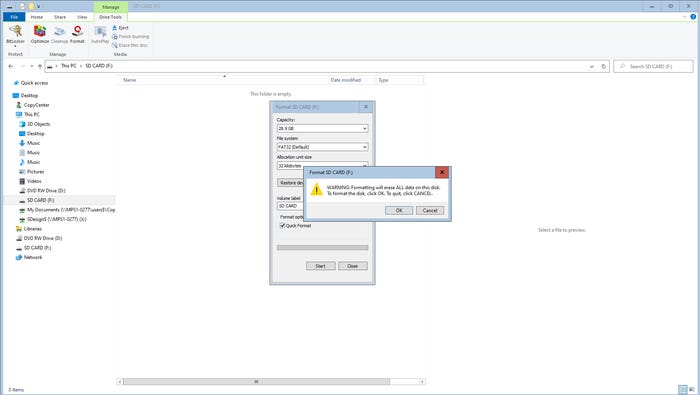
6. Make sure that the checkbox next to “Quick Format” is left unchecked if you’re formatting the SD card for the first time in this manner. If you’ve already formatted this exact SD card, you can leave the Quick Format checkbox selected.
7. Click “Start” when you’re ready to begin formatting your document.
8. There will be one or two additional pop-up windows to emerge. To proceed, click “OK” in each of the following boxes.
9. You may now extract the SD card from your computer, and the reader will automatically unplug itself.
How to format an SD card on a Mac
To format your SD card on a Mac, you’ll need to open the Finder application. Make sure you’ve backed up and saved any data you wish to save from the card, and that your laptop is properly connected if you’re using one.
1. Insert the SD card into the SD card slot or USB card reader on your Mac and start the machine if you haven’t previously done so.
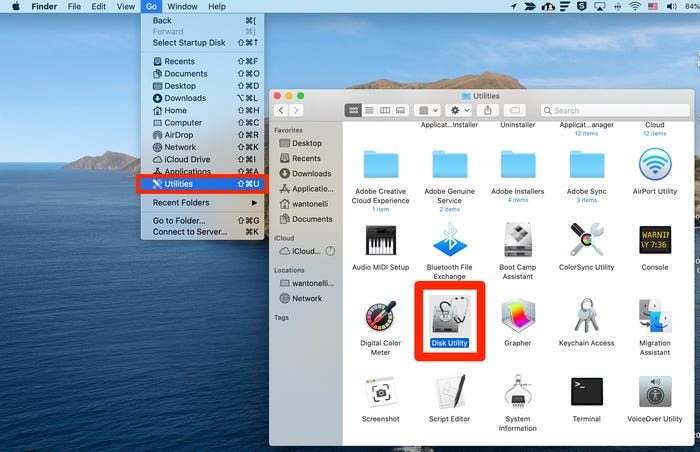
2. Open “Finder,” then select the “Go” option from the drop-down menu. Select “Utilities” from the “Utilities” sub-menu.
3. “Disk Utility” will appear in the window that comes when you double-click on it. A new window will be shown.
4. Locate the SD card in the left-hand column and click on it. It should be listed underneath the “External” header in the HTML code.
5. In the upper-right corner of the window, click the “Erase” button to clear the selection.
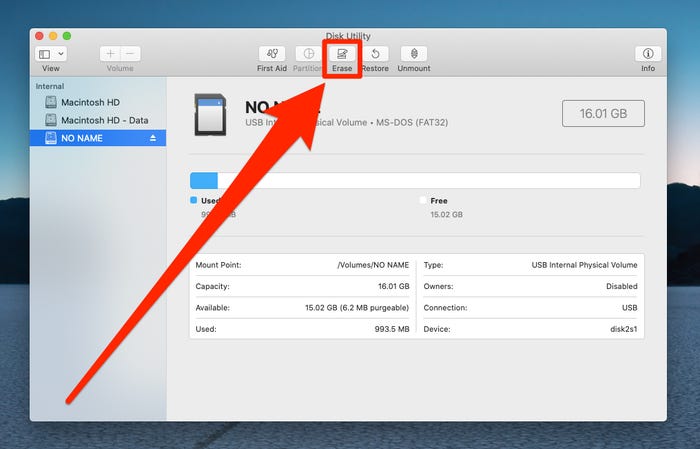
6. Select “Format” from the drop-down menu that appears. If your SD card has a capacity of 64 GB or more, select “ExFAT.” If your hard drive is 32 GB or lower, choose “MS-DOS (FAT).”
7. To format the SD card, select “Erase” from the Format menu.
Video

Roblox Username Generator – Create a Cool & Unique Username in Seconds

Grow a Garden Recipes in Roblox: Guide to Cook (Donuts, Sushi, Pie, Pizza & More!)

Job Opportunities in Dubai – 2026

Mr Bit at the SBC Awards Europe 2025: The Bulgarian Brand Setting New Standards in the European Gaming Industry

Dennis Rodman Net Worth 2026 – Everything You Need to Know

Bloxburg Neighborhood Codes 2026
Grow a Garden Recipes in Roblox: Guide to Cook (Donuts, Sushi, Pie, Pizza & More!)
Job Opportunities in Dubai – 2026
Dennis Rodman Net Worth 2026 – Everything You Need to Know


