Guide
How to Create a Distribution List in Outlook

In the event that you use Outlook to connect with your coworkers, you’ve undoubtedly desired to send a series of emails to a certain group whose membership changes on a regular basis. For example, you may need to email all of your customer care representatives on a daily basis, yet the list may vary often owing to high turnover.
Alternatively, you may manually input each person’s name or email address into every email you send, but this can rapidly become inconvenient as the group grows in size. Not only that, but you also face the danger of accidentally forgetting someone, which might result in a tense situation at the office. It is at this point that a distribution list or contact group is useful!
Read Also: How To Recall an Email in Outlook
How to Create a Contact Group in Outlook Online
The process of creating a contact group in the Outlook web version is straightforward.
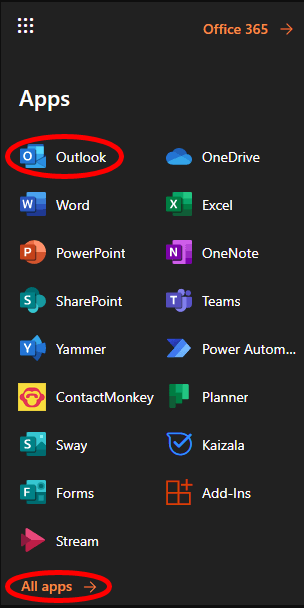
1. If you’re already connected into Microsoft 365, go to outlook.com and sign in with your account information, or pick Outlook from the app launcher. If you don’t find Outlook in the app list (you will), click All applications to bring up the list of all available apps.
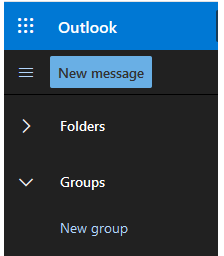
2. Select New group from the Groups drop-down menu on the left-hand side of the screen.
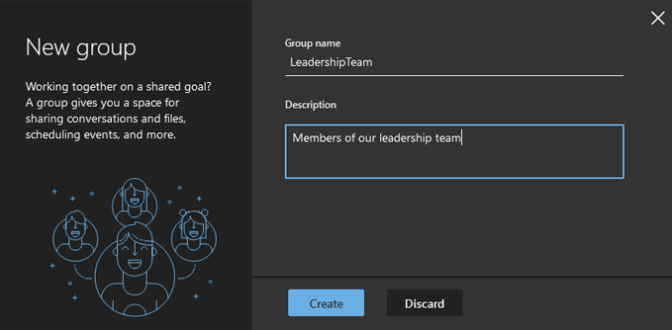
3. Give your new group a name and a description in the popup window that appears, and then click Create. It is possible that you may be required to create an email address for the group if your company has permitted it. In such case, for the sake of simplicity, attempt to make the email address the same as the group name.)
4. Now it’s time to add people to the group. People can be found by searching for them by name or by email address. When you choose the search result for the person you wish to include in the group, they will show under the heading “This person will be included.”
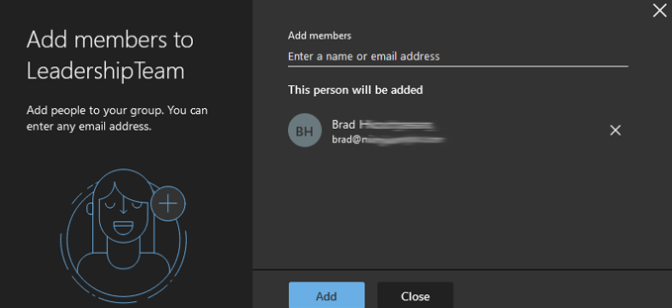
5. Step 4 should be repeated as many times as necessary until you have added everyone you want to the group. After that, click on the Add button.
6. Click on the Close button.
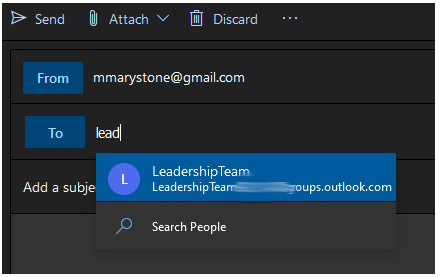
7. By choosing New message, you may send an email to the group that you’ve formed.

8. Begin entering the name of the group you established in the To area, and then choose it from the drop-down list that appears when you finish typing.
How to Edit a Contact Group in Outlook Online
When editing a contact group, Microsoft has made it simple to do so without ever having to leave the Outlook Online interface. Depending on how your business has set Microsoft 365, some of the stages may alter somewhat, but the general process shown below should get you where you want to go.
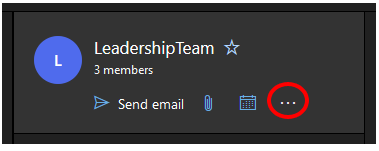
1. Select the group you wish to edit from the Groups drop-down menu on the left-hand side of the screen.
2. Select the More (three dots/ellipsis) icon from within the group’s entry box.
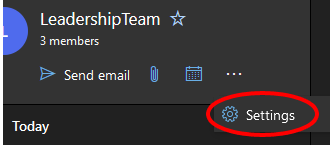
3. Make a selection from the Settings menu. In some cases, you may be able to add members directly from the More icon, depending on how Outlook is configured for your business.
4. Select Edit group from the Group Settings window that displays on the right side of the screen.
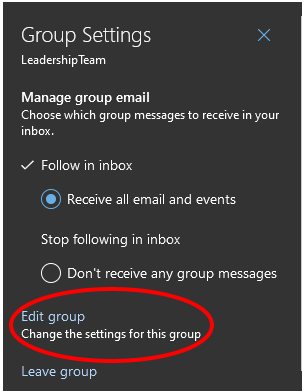
5. Select the Members option from the drop-down menu.
6. From there, you can either add new members to the group or remove existing members by choosing the X symbol next to the entry for the individual you wish to remove from the group.
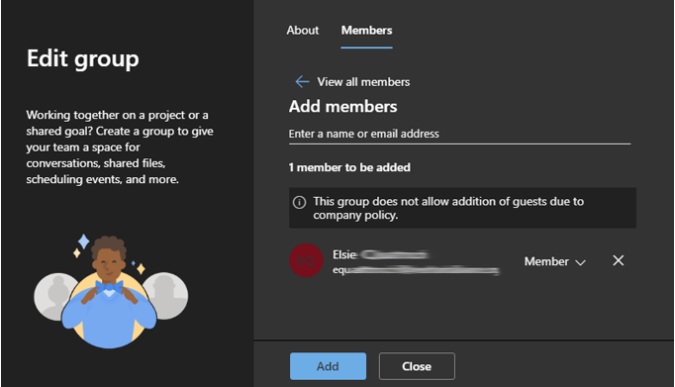
7. If you’ve added members to the group, select the Add button. Otherwise, choose Close.
Video

Vampire Crawlers Coin Farming Guide

Forza Horizon 6 Performance: Why 60 FPS Is Still the Console Standard

Yoshi and the Mysterious Book (2026) – Full Completion Guide, Rewards & Secret Ending

How to Get Free Pets in Adopt Me: A Guide for Players

Roblox Username Generator – Create a Cool & Unique Username in Seconds
How to Get Free Pets in Adopt Me: A Guide for Players
Yoshi and the Mysterious Book (2026) – Full Completion Guide, Rewards & Secret Ending
Vampire Crawlers Coin Farming Guide


