Guide
How to Hook up a Nintendo Switch to a TV

This article goes into great detail on how to connect your Nintendo Switch or Nintendo Switch (OLED model) to your television set, so pay attention. Already, it has been announced that the Nintendo Switch Lite would not include a television mode.
Read Also: How to Create a Nintendo Account
What You’ll Need
To connect your Nintendo Switch to your television, you’ll need the following materials. Everything in the box, with the exception of the television, should have been included when you purchased your Switch.
- Nintendo Switch gaming console with Joy-Con controllers
- Nintendo Switch docking station with an AC adapter
- HDMI cable (High-Definition Multimedia Interface)
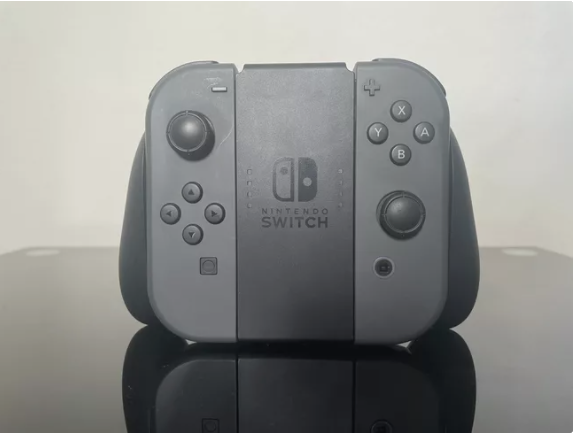
- Wrist straps or a Joy-Coy grip are two options (optional)
- TV that is HDMI-compatible
How to Connect Your Nintendo Switch to Your TV
Once you’ve gathered all of the necessary components, connecting your Switch to your television will take no more than a minute.
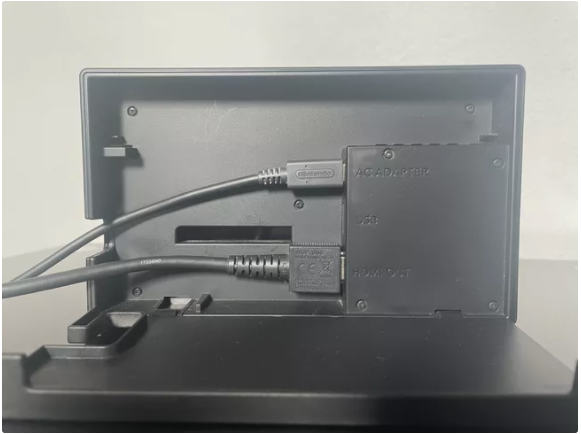
1. Maintain a sturdy surface close to the television where you will be placing your Nintendo Switch dock. Open the dock’s rear cover to get access.
2. If the AC adapter is not already connected to the AC Adapter port, connect it to the port and plug it into a power outlet.
3. The HDMI cable should be connected to the HDMI Out connector on the back of the dock and the other end should be connected to the HDMI port on the back of your television.

4. Close the dock’s rear cover while guiding the cables through the gap on the bottom.
5. Remove the Joy-Con controllers from the Switch’s docking station. To remove a Joy-Con, press the button on the rear of the controller and slide it upward. Carry out the same procedure with the second Joy-Con.

NOTE: In order to use the controllers, you can either leave them as-is, connect the wrist straps, or fit them into the Joy-Con grip, depending on your preference. You might also make use of a Joy-Con Charging Grip, which you may already have in your hands in this situation.
6. To use the docking station, simply place your Nintendo Switch in it. It is important to ensure that your screen is oriented such that the Switch logo can be seen on the front of your docking station.
7. Make certain that both the switch and the television are turned on. Check to be that the input on your television is set to the appropriate HDMI port that you used during the installation.
8. When the Switch is docked, the screen on the Switch is turned off, but the Switch’s screen should now be visible on your television. As a result, you should be ready to begin playing!
Once you have completed playing on your Nintendo Switch, detach it from your television by following the steps given above in reverse order, as described above. If everything has been completed successfully, you may plug in the dock to an electrical outlet, reconnect the Joy-Cons, and place the unit back into the dock to recharge both the Nintendo Switch and its controllers. Please keep in mind that this treatment is not recommended.


