Apple
How to Loop a Video on iPhone

The term “looping” refers to a component of computer programming that causes a section of code or video to be repeated a predetermined number of times until the intended procedure is finished. At this point in time, a great number of people are uploading looping videos to social media platforms such as Facebook, Instagram, Snapchat, and TikTok, amongst others. These videos that loop are not only entertaining us but also fascinating and enjoyable to watch. Because of this capability, users are able to construct short-form GIF videos that play back-and-forth repeatedly, which makes it more enjoyable to watch them.
The idea behind a loop, which is a common component in photography and particularly in music videos, is that the action being captured by the camera gives the impression of miraculously repeating itself an infinite number of times, wherein each repetition corresponds to a new set of images or frames. They could also simply repeat a sequence for a predetermined amount of times before stopping it. You can use them to add flair to straightforward motions or emphasize key points in instructional video by repeatedly displaying them in the clip.
Let’s move on to the next topic, which is how to loop a video on an iPhone for Instagram and other platforms with and without an app.
Read Also: How to Play iMessage Games on an iPhone
How to Loop a Video on iPhone
Still, there are some people who aren’t familiar with how to create looping videos. This is the reason why we are going to explore how to loop a video on your iPhone with and without the Looper app, as well as how to create a short looping movie using Boomerang in this article. Without the need of an app, this section will teach you how to loop a video on your iPhone. First things first.
Loop Video on iPhone Using Repeat Slideshow
Slideshow films are an excellent way to pique people’s attention in the subject you’re presenting. People congregate around a television to watch old home movies and reminisce about the happier moments in their life. You will learn how to loop videos on your iPhone by following the steps in this guide.
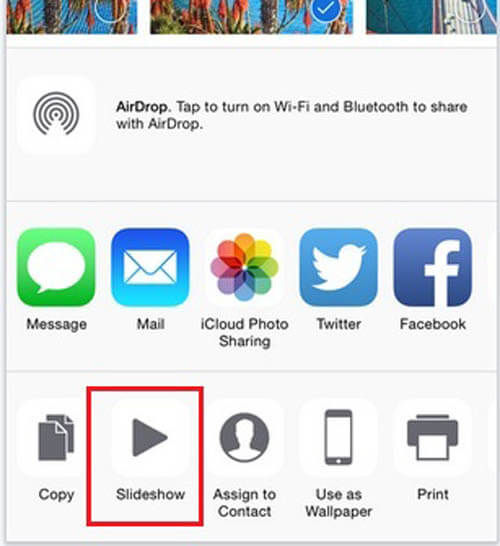
- To get started, navigate to your gallery and pick a video or photo to use as the basis for your slideshow.

- Place the video in an album inside of your gallery, and rename the album anything you’d like.
- Now, navigate to “Settings” and locate the “Photos” area of the menu. Under that section, select the “Repeat Slideshow” option.
- Now, launch the video and sit back to watch it.
- That video will start playing in an endless loop unless you manually stop it.
How to Create Loops of Live Photos on iPhone
You can change your images with Live Photos by choosing a frame that you individually like and using that to make limitless looping videos that play back-and-forth between two points in time. Before you begin constructing a loop, check to see that the Live Photos on your iPhone have been successfully saved.
- Launch the Photos app on your iPhone to see all of the Live Photos you’ve captured and stored on your device.
- Click the “Albums” tab.
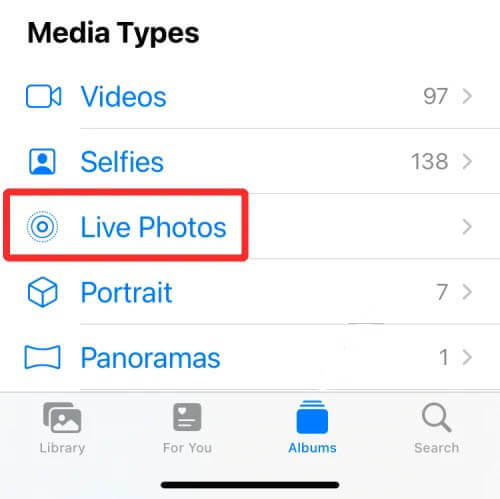
- Tap Media Types.
- Choose “Live Photos” from the menu.
- On the screen that follows, you will now be able to view all of the photographs. Choose images from this list to create a loop in your presentation.
- The picture will open up on your screen at this point, and you may press and hold anywhere on the picture to check how it plays.
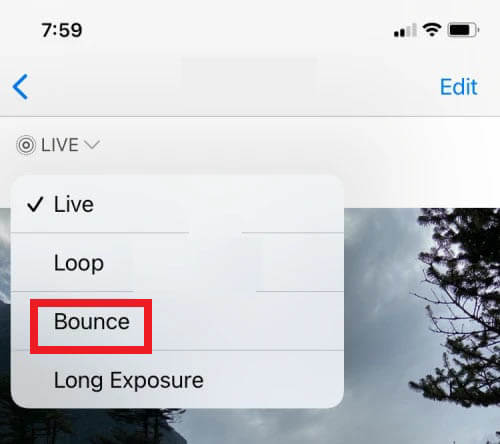
- You’ll notice an option labelled “Live” in the upper-left corner of the screen. If the photograph you’ve chosen is good for making a looping video, you can select the “Live Photos” option or move on to another picture.

- To produce a clip that moves in both directions, select the “Bounce” option. The Live Photos will begin to play in a looping fashion similar to a GIF when the Bounce effect is applied. (Since selecting the “Loop” option will rearrange the sequence of frames in a one-way manner, the final product of the video may not be what you had envisioned.)

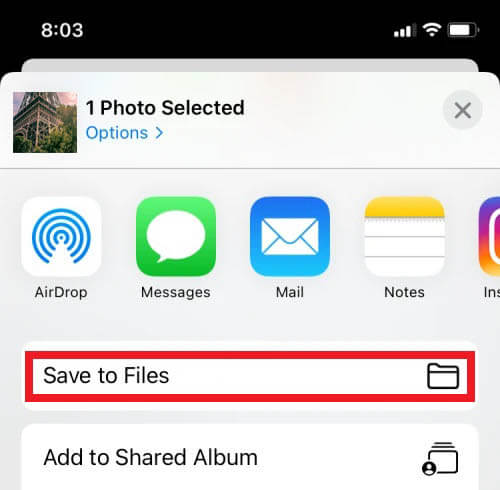
- To share the content, select the “Share” icon located in the bottom left corner.
- Choose the option that says “Save to Files.”

- To complete the operation, save the video of the loop.


