Apple
How to Edit MP4 on Mac

It might be for school, a presentation, or a profession that users would like to go on, but there are a lot of different reasons why we need to conduct some editing on our MP4 files. This might also be a pastime for you, and if you enjoy making films and sharing them with your loved ones, we are happy to assist you in learning how to edit MP4 on a Mac. In this post, we will provide you with several different possibilities from which you can select.
The fact that a lot of individuals are making a decent amount of money from their vlogs or video blogs requires those people to edit their videos in some way. This has led to an increase in the popularity of editing music and videos. To edit means to add certain effects, whether they be sound or visual effects, to remove or trim some content, to enhance the quality of the video by doing things like increasing its brightness, and to do many other things in order to make their movies interesting for the viewers.
Read Also: How to Install PIP on a Mac
How to Edit MP4 on Mac
Part 1. How Do I Edit MP4 Video on Mac?
The fact that you have an MP4 file despite the abundance of other possible media file types suggests that there must be a justification for this decision. Although this has most likely been supported by the majority of platforms and websites, the one drawback is that it can be difficult to alter an MP4 file.
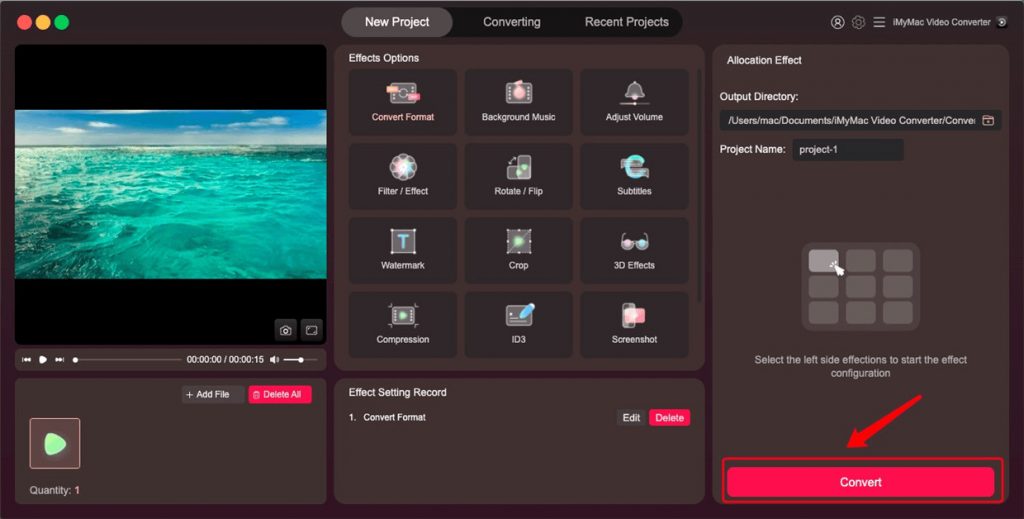
So how exactly do you edit MP4 files on a Mac? How do you make free edits to MP4 files on a Mac? We strongly suggest that you edit your MP4 file using the best free video editor for Mac, which is iMyMac Video Converter. Below, we have listed some of the most important reasons why you should use this programme.
- User-Friendly interface. It is very easy to understand how to use the commands that beginners can do some advanced skills like editing by using iMyMacVideo Converter
- It has a lot of categories that you can use from converting different kinds of file types since it supports various media file types
- It could enhance your media files especially for video files since it allows you to do some editing like lighten the dark spots of the video, improve its visual by adjusting the lighting, and also adding some watermark.
Now that you are familiar with iMyMac Video Converter, the finest free video editor for Mac computers, we will move on to discussing how to edit MP4 files on a Mac using this programme.

Background Music
You have the option of selecting various music clips to serve as your custom background music.
Filter/Effect
To improve your ability to visualize things, this is the section where you can adjust the lighting, hue, brightness, and contrast.
Crop
You can use this to eliminate certain parts of the media file. For instance, if the media contains certain grey areas, you can use this to remove such areas while keeping the part of the video that is focused on the presentation. On a Mac, you may crop videos quickly and effectively by using this tool.
Rotate/Flip
If you wish to change the view of the file, for example, you can quickly rotate the file with iMyMac Video Converter. The file was originally recorded in landscape format.
Watermark
If you want to safeguard your project without violating any copyrights, you can apply watermarks to it. This is very useful when working on sensitive files.
Subtitle
There may be certain parts of the file that are in other languages, which means that you can place subtitles on it. Adding subtitles is for the purpose of facilitating a better understanding on the part of the audience.
Adjust Volume
You have the ability to normalize the volume of the video.
With the help of iMyMac Video Converter, you now know how to edit MP4 files on a Mac, and the programme also enables you to convert all types of video files, including MP4. Having numerous applications installed on your Mac may not be necessary if you use this utility.
Part 2. How Do I Edit MP4 in QuickTime Player?
If you are using a Mac and have the most recent version of macOS, in addition to free software for editing videos on a Mac, the QuickTime app is already already installed on your Mac. This is because Apple includes QuickTime as one of the default programmes on every Mac. On a Mac, QuickTime is most commonly used to play music and films; however, this application also gives you the ability to conduct some fundamental editing work in audio and video format.
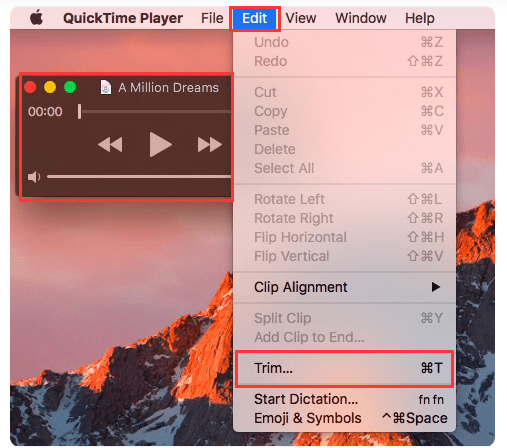
How can I cut unwanted parts out of an MP4 file using a Mac? The following instructions will walk you through the fundamentals of using QuickTime on a Mac to edit MP4 files.
How to Trim the Middle of a Video on QuickTime
- QuickTime will open the file automatically if it is a video file, but if it is an audio file, you will need to launch the QuickTime App to open it.
- You can either use the Command-click shortcut or right click and select Open with QuickTime.
- Choose Edit and then click the Trim button.
- You will see instructions on how to browse the Trimming section of the file in a new window.
- When you are finished, go to File, then click Save. This will save the file with the changed version, but it will also keep a copy of the file in its original state.

How to Combine Two or More Files on QuickTime
- Start by opening the first file in order to combine two or more individual files into a single media source.
- Place the other files that you want to mix on the QuickTime Window.
- It is possible to combine many files into a single one by dragging and dropping them.
- Choose the file that you want Trim to add to the file that you have selected.

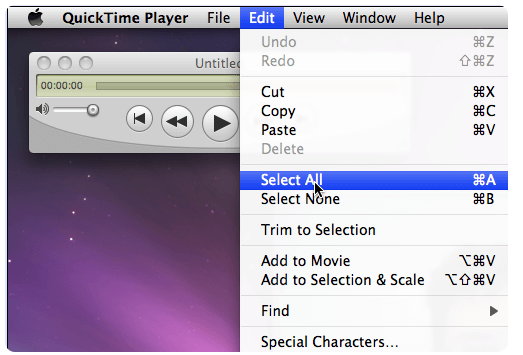
The exact same thing applies when you modify the audio file; utilizing combine enables you to incorporate sound effects into the video presentation or use music as background score. You can also change the dimensions of the files using QuickTime in order to reduce their overall size.


