Guide
How to Add New Shortcuts to the “Send To” Menu in Windows 11
In Windows, the “send to” menu is a convenient context menu option to have at your disposal. When you right-click a file or folder, you may choose from a “send to” submenu that has a number of different destination possibilities for the file or folder. When you choose to transmit an item from that menu, it will be copied to the place you choose. As a result, this submenu provides a convenient way to copy files and directories rapidly.
The “send to” menu has only a few standard options by default. You may, however, expand the number of shortcut options available to you. As shown in the next section, you may customize the “send to” submenu in Windows 11 by adding additional shortcuts.
Read Also: How to Check Your PC’s Specs on Windows 11
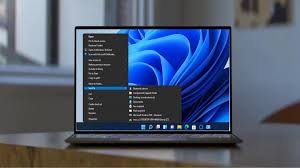
The Windows 11 Context Menu
The context menu in Windows 11 has received a number of significant modifications. Microsoft has updated the look and feel of that menu to give it a more contemporary appearance. The choices to Cut, Copy, Rename, and Delete are now accessible via buttons at the bottom of the menu.
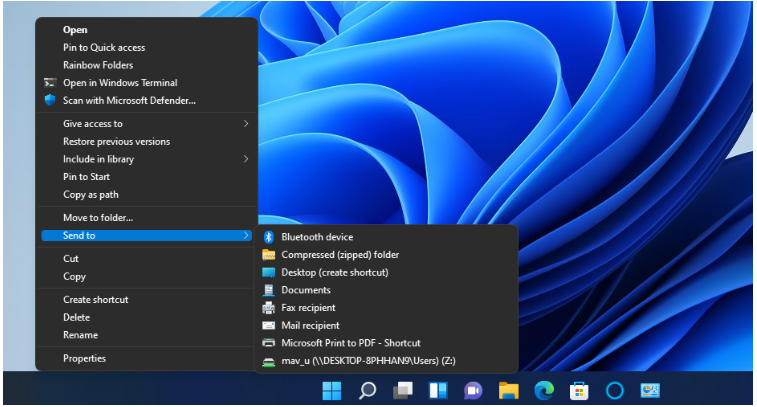
The “send to” menu has been removed from the newly styled context menu in Windows 11. However, you can still access that submenu in Windows 11 using a conventional context menu that has been retained (the old one). To do so, right-click on a file or folder and choose Show additional choices from the context menu. After that, you may select Send to and select an item from the drop-down menu.
How to Add Shortcut Options to the “Send To” Menu
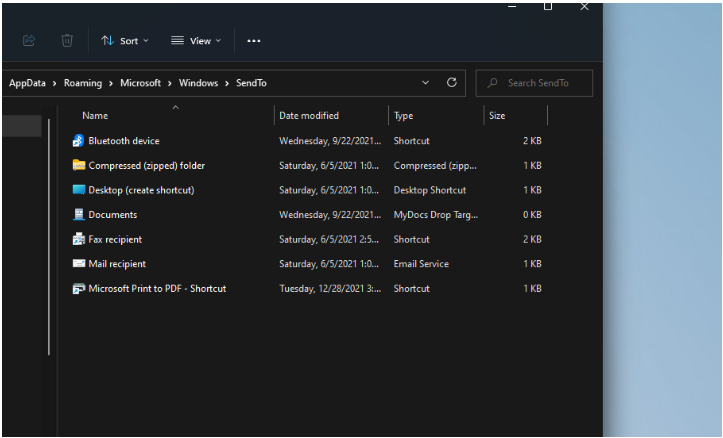
To modify the “send to” option, you must first access the SendTo folder in your Documents folder. Then you may add additional shortcut choices to the folder containing that menu. This article describes how to add folder and application shortcuts to the “send to” menu in Windows 11.
1. To open Run, use the Windows key plus the R key combination on your keyboard.
2. In the Run window’s Open box, type shell:SendTo.
3. Click OK to open the SendTo folder, which is presented just below the main window.
4. Create a new folder by selecting New from the context menu of the SendTo folder.
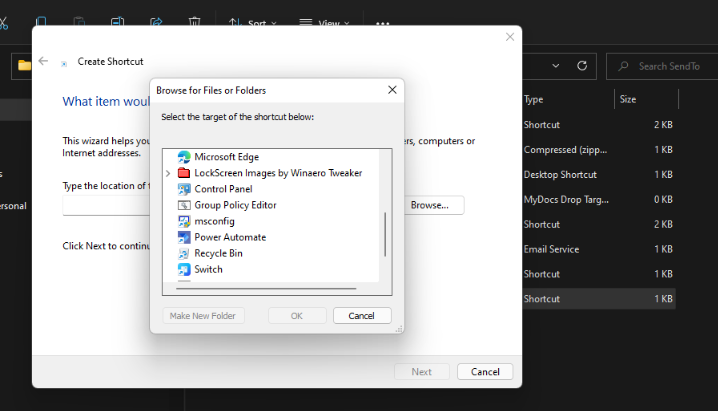
5. Once you’ve done that, pick the Shortcut option to bring up the window shown below immediately.
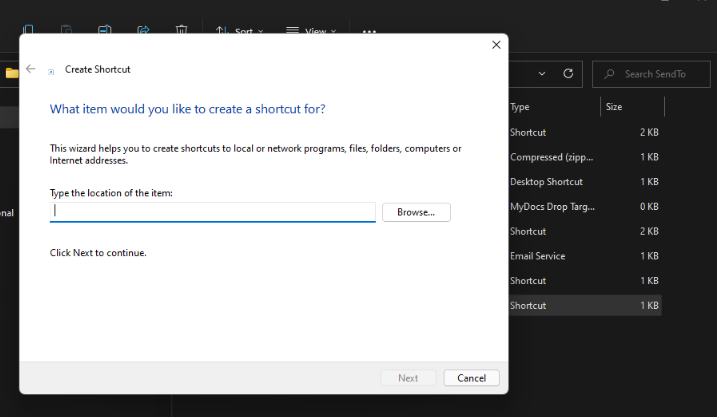
6. To open a folder selection window, pick Browse from the drop-down menu.
7. To add a folder or software item, choose it from the drop-down menu and press the OK button.
8. To go to the last stage, press the Next button.
9. Enter a title for the shortcut and then hit the Finish button.
Now, when you right-click a file, the “send to” menu will appear. You’ll see that it contains the newly created folder or programme shortcut that you just created. Using the Create Shortcuts tool, you may add both conventional folders and cloud storage folders (such as Google Drive, OneDrive, and iCloud) to the “send to” option in a similar manner. For their folders to be available for selection inside File Explorer, cloud storage apps must first be installed on your computer before they can be accessed.
Another method of adding objects to the “send to” menu is by dragging and dropping folders and desktop shortcuts onto the “send to” menu. Folders and shortcuts may be added to the SendTo folder by dragging and dropping them into it from within File Explorer or from the desktop. To drag an item into that folder, left-click it, hold down the left mouse button, and drag the folder or desktop shortcut into the SendTo folder on the left-hand side of the screen.
Video

Vampire Crawlers Coin Farming Guide

Forza Horizon 6 Performance: Why 60 FPS Is Still the Console Standard

Yoshi and the Mysterious Book (2026) – Full Completion Guide, Rewards & Secret Ending

How to Get Free Pets in Adopt Me: A Guide for Players

Roblox Username Generator – Create a Cool & Unique Username in Seconds
How to Get Free Pets in Adopt Me: A Guide for Players
Yoshi and the Mysterious Book (2026) – Full Completion Guide, Rewards & Secret Ending
Vampire Crawlers Coin Farming Guide


