Apple
How to Avoid Notification Overload on Apple Watch
This post will show you how to restrict the notifications that appear on your Apple Watch so that you are not inundated with messages and alerts. If you read this article, you will learn how to do this. We will go through the following topics: how to choose the applications from which you want to receive push notifications; the different sorts of notifications that you will receive; and how to choose the applications. The following information is applicable to all of the many Apple Watch models that are currently on the market.
Read Also: How To Get Snapchat on Apple Watch
How to Choose Notification Indicator and Privacy Settings
You may take charge of the Notifications settings on your watch by selecting the apps from which you want to receive notifications and the kind of notifications you want to receive.
Your Apple Watch does not perform any of the necessary procedures that are required to manage alerts when it is on your wrist. Instead, the Watch app on the iPhone is responsible for handling all of the settings related to notifications.
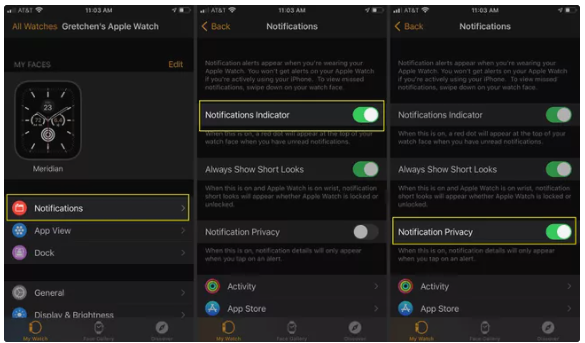
1. On your iPhone, launch the Apple Watch application.
2. Select the Notifications option.
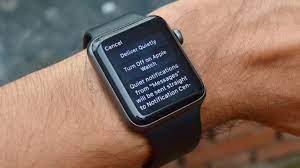
3. To activate the Notifications Indicator, move the toggle to the On position, which is represented by the colour green. When it is turned on, a little red dot appears at the very top of the screen of the Apple Watch to indicate that there have been notifications.
4. If you are concerned about maintaining your privacy, make sure that the toggle switch is set to the green “On” position. This will enable the notification privacy setting. The Apple Watch will display the entirety of any notifications it receives by default. When you get a text message, for instance, the message’s contents will appear on your screen as soon as they are received. When Notification Privacy is turned on, tapping the alert will show you the text of the notification.
How to Apple Watch Notification Settings for Built-In Apps
After making your selections, you may use the built-in apps on your iPhone to manage the notifications that are sent to your Apple Watch from your iPhone. These are the pre-installed apps on the Watch, and you will not be able to remove them.
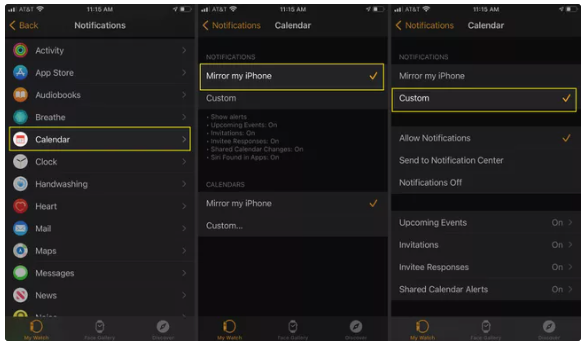
1. On the screen for Notifications, scroll down until you reach the first section of apps, and then select the icon of the app whose notification settings you wish to modify. For the purpose of this illustration, we’ll use Calendar.
2. The majority of apps provide users with two different configuration choices: Mirror my iPhone and Custom. Tap the Mirror my iPhone button, which should be the default setting, to make the app’s notification settings mirror those of the app on your phone.
3. Tap the Custom button, and then choose from the extra options provided by the app, which will vary from app to app. Doing so will allow you to create preferences for your Apple Watch that are distinct from those of your phone.
How to Apple Watch Notification Settings for Third-Party Apps
Scroll down to the last section of the Watch app Notifications screen to see the third-party apps installed on your iPhone that have Apple Watch components. The choices here are to either mirror the iPhone’s notification settings on the Apple Watch or get no notifications on the watch for that app at all.
- Move the toggle next to an app to the On/green position if you want to receive notifications on your Apple Watch mirrored from the iPhone.
- Move the toggle next to an app to the Off/white position to prevent all notifications from that app from appearing on the Apple Watch.
The more apps you move to the Off/white position, the fewer notifications you receive on the Apple Watch.
The Apple Watch-iPhone Notification Connection
It is no longer necessary to remove your phone from your pocket and unlock it in order to view your incoming voicemails, text messages, Twitter mentions, or sports scores. To check your notifications on your Apple Watch, you simply need to look at your wrist. Even better, when a notification has to be checked, you’ll feel a vibration on your wrist thanks to the haptic feedback feature of the Apple Watch. If such is not the case, you are free to concentrate on the other things that require your attention.
When you have a lot of notifications coming in, your Apple Watch doesn’t have to vibrate every time anything happens on Twitter or when a new text message is received if you don’t want it to. If you have your iPhone set up to receive notifications, you will continue to get these alerts on your device.
Video

Vampire Crawlers Coin Farming Guide

Forza Horizon 6 Performance: Why 60 FPS Is Still the Console Standard

Yoshi and the Mysterious Book (2026) – Full Completion Guide, Rewards & Secret Ending

How to Get Free Pets in Adopt Me: A Guide for Players

Roblox Username Generator – Create a Cool & Unique Username in Seconds
How to Get Free Pets in Adopt Me: A Guide for Players

Grow a Garden Recipes in Roblox: Guide to Cook (Donuts, Sushi, Pie, Pizza & More!)
Roblox Username Generator – Create a Cool & Unique Username in Seconds
Yoshi and the Mysterious Book (2026) – Full Completion Guide, Rewards & Secret Ending


