Apple
How to Change Sleep Settings on a Mac

Macs include a sleep mode that goes into effect after a certain amount of inactivity to conserve power and protect the hardware from damage.
However, you have the option of customizing the amount of time your Mac waits before shutting down. You have the option of putting your Mac to sleep immediately to conserve battery life or to protect your privacy, or you may delay its sleep time to allow you to download files or listen to music uninterrupted for extended periods of time.
Read Also: How to Clear System Storage on Mac
How to Put your Mac to Sleep Manually
Placing your Mac into sleep mode rather than shutting it down can help you save time and save needless wear and tear on your computer.
There are several ways to put your Mac into sleep mode. The first is to restart it.
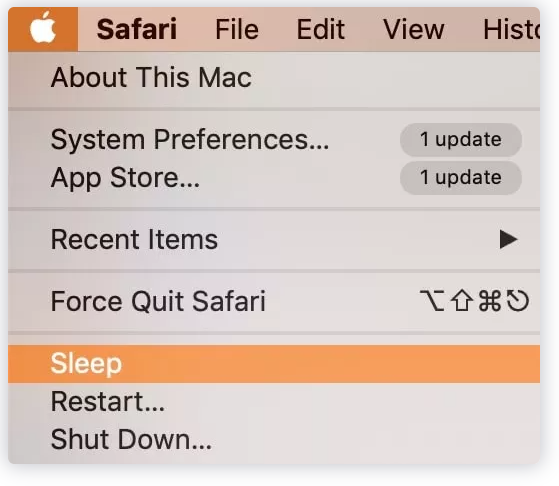
- Open the Apple menu and select the Sleep option from the drop-down menu.
- After tapping the power button, select Sleep from the drop-down menu.
- If you have a portable Mac, all you have to do is close the lid and it will go to sleep.
If your Mac is equipped with an infrared receiver, you may also use an Apple Remote to put your machine to sleep or wake it up, like follows:
- Simply press and hold the Play/Pause button for five seconds to put your Mac into sleep mode.
- To bring your Mac to life, simply push any button on the remote.
How to Change your Mac’s sleep settings
Automatically putting your Mac to sleep after a certain length of time is possible with Apple software (between one minute and three hours). You may even select to prohibit your Mac from going to sleep at all times.
To change the sleep settings on your Mac, follow these steps:
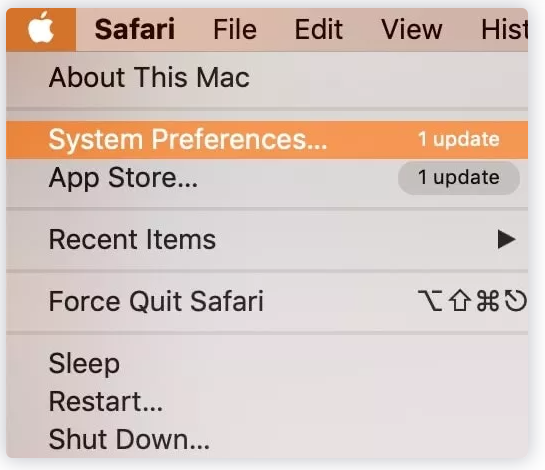
1. In the upper-left corner of your screen, locate the Apple icon and choose it.
2. Select System Preferences from the drop-down menu.
3. Select the battery option.
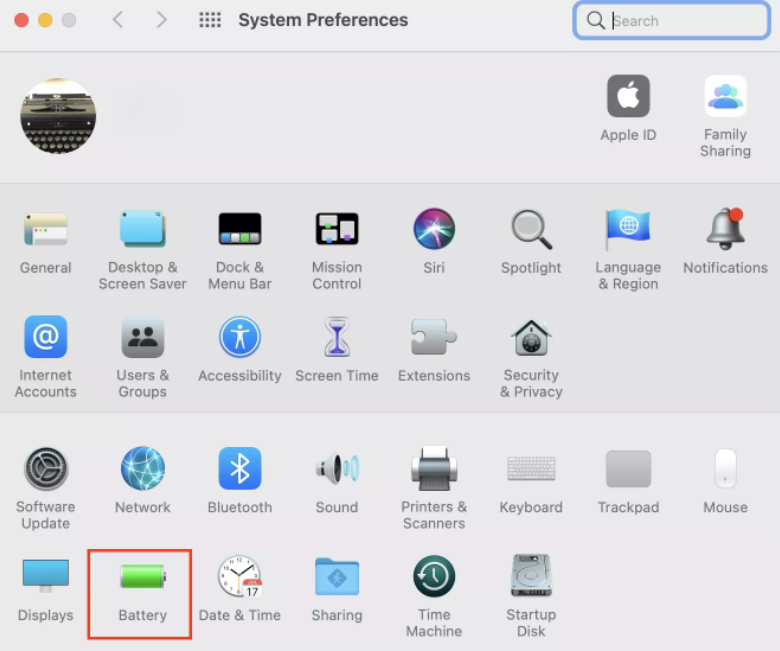
4. You may adjust the energy-saving settings for your Mac while it is powered by the battery or the power adapter from this section. We’ll go through each of your options in further detail below.
In the Battery section, you’ll find:
1. To choose how long your MacBook should wait before putting its display to sleep, adjust the Turn display off after slider to your preference (from one minute up to three hours). By sliding the slider all the way to the right, you can prevent the display from ever going to sleep again.
2. Below the slider, configure the following other sleep-related options:
When using battery power, dim the display a little bit: This option is excellent for conserving energy.
Enable Power Nap when using battery power by following these steps: This enables your Mac to periodically wake up from sleep in order to complete duties such as checking for fresh emails or performing system maintenance. If preserving battery life is your first goal, it’s preferable to leave this option unchecked.
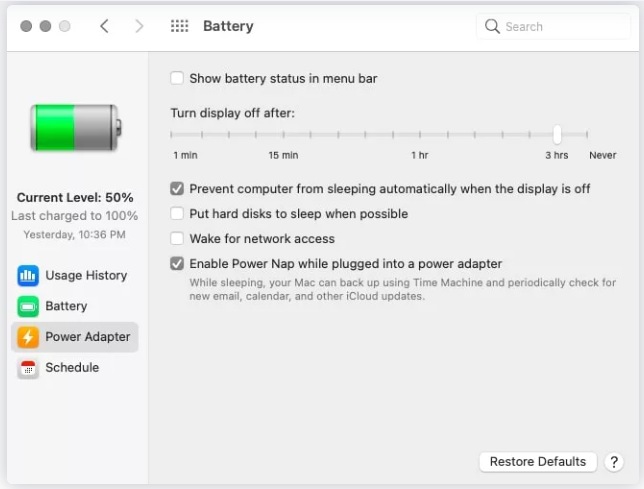
In the Power Adapter tab:
1. Use the Turn display off after slider to select the amount of time you would like to wait before the display is turned off automatically. If you don’t want the display to turn off for whatever reason, you may move all the way to the right and leave it there permanently.
2. Below this slider, configure the following other sleep-related options:
- Prevent the computer from automatically going to sleep when the display is turned off by doing the following: You will be able to close the lid without putting your MacBook to sleep in this manner.
- Wake up in order to gain network access: Specify whether or not your Mac should wake up when your Wi-Fi is turned on or when an app asks access to the internet.
- Enable Power Nap when connected to a power adapter by doing the following: Allowing your Mac to rouse from sleep to complete certain activities, like as checking for emails, is recommended.
Video

Vampire Crawlers Coin Farming Guide

Forza Horizon 6 Performance: Why 60 FPS Is Still the Console Standard

Yoshi and the Mysterious Book (2026) – Full Completion Guide, Rewards & Secret Ending

How to Get Free Pets in Adopt Me: A Guide for Players

Roblox Username Generator – Create a Cool & Unique Username in Seconds
How to Get Free Pets in Adopt Me: A Guide for Players
Yoshi and the Mysterious Book (2026) – Full Completion Guide, Rewards & Secret Ending
Vampire Crawlers Coin Farming Guide


