Apple
How to Change Your Home Address in Apple Maps on Your iPhone
Using Apple Maps, you won’t have any trouble navigating your way about town or finding your way back to your house after you’re done. There is also nothing that is more convenient than telling your map app to bring you home with a single click; that is, unless the app has you registered at the incorrect home address. Changing your home address on your iPhone is the solution to that problem, and here’s how to accomplish it. So let’s get started:
Read Also: How to Add Music to Alarm on an iPhone
How to Change Your Home Address in Apple Maps on Your iPhone
Apple Maps will determine your location based on the address that is recorded as your primary residence on your Contact Card. As a result, this is the area in which you will need to make any necessary adjustments.
1. Begin by opening the Apple Maps application that is located on your iPhone.
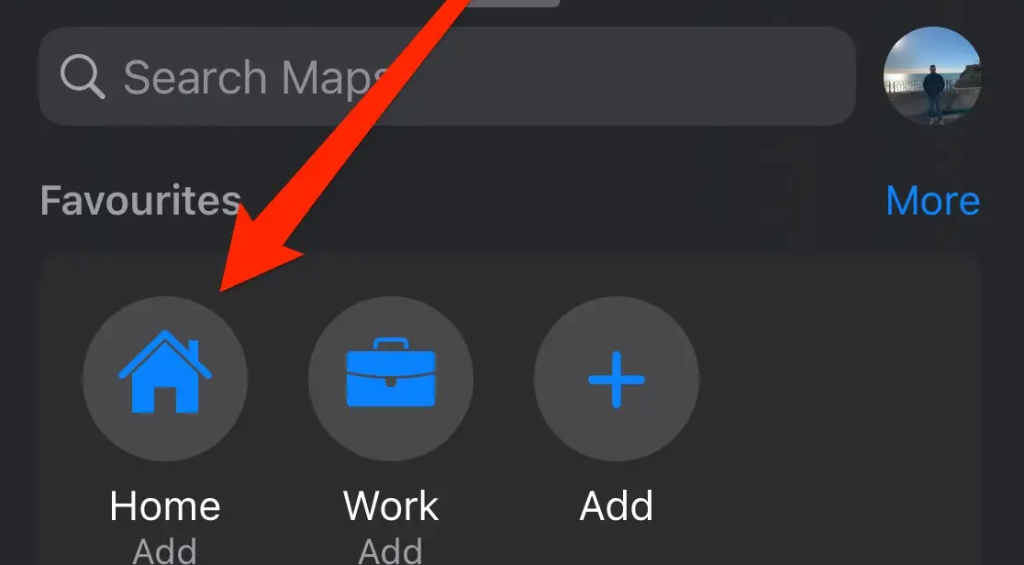
2. Under Favorites, tap Home.
3. From the menu, select the option to Open My Contact Card.

4. Navigate all the way to the bottom of the page until you discover the information about your home address, and then make any required modifications to ensure that it accurately reflects your actual home address.
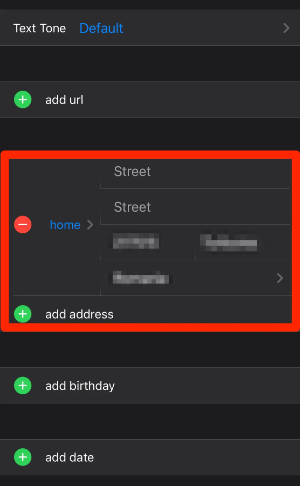
5. In the upper right hand corner of the screen, select the word Complete.
Apple Maps will automatically update itself to reflect the most recent version of the location of your residence. You need to close the software and then start it back up again if the location of your home address does not change as soon as you click the button.
FAQs
What do I do if Apple won’t let me change my billing address?
If you are unable to modify or update your billing address through the settings on your phone or through email, you will need to log into the App Store, open your user profile, then select Manage Payments and choose the credit or debit card that is associated with your account. You can do this by selecting the card from the drop-down menu that appears after you select Manage Payments. After you have selected the Billing Address that is connected to your card, you can make any necessary adjustments to the information that is provided there.
How do I change my Apple ID rescue email address?
If you are using two-factor authentication, you will not have the option to use a rescue email; however, if you are not using 2FA, this is how you can add or alter the rescue email. Sign into your Apple ID on appleid.apple.com and go to the Sign-In and Security > Rescue Email menu option (you may be asked to enter your Apple ID password or answer security questions). You can set up a new rescue email by selecting the Add email option, or you can input a new email address to replace the previous one. In either scenario, Apple will send a verification email to the address that you have supplied. After receiving the email, you will be prompted to input the verification code and then click Continue.

Vampire Crawlers Coin Farming Guide

Forza Horizon 6 Performance: Why 60 FPS Is Still the Console Standard

Yoshi and the Mysterious Book (2026) – Full Completion Guide, Rewards & Secret Ending

How to Get Free Pets in Adopt Me: A Guide for Players

Roblox Username Generator – Create a Cool & Unique Username in Seconds
How to Get Free Pets in Adopt Me: A Guide for Players

Grow a Garden Recipes in Roblox: Guide to Cook (Donuts, Sushi, Pie, Pizza & More!)
Roblox Username Generator – Create a Cool & Unique Username in Seconds
Yoshi and the Mysterious Book (2026) – Full Completion Guide, Rewards & Secret Ending


