Guide
How to Clean a Laptop Fan

You will learn how to clean a laptop fan using compressed air, as well as a more manual, hands-on cleaning method in this article.
Read also: How to Find Your Laptop Model
How Do I Clean My Laptop Fan Without Taking It Apart?
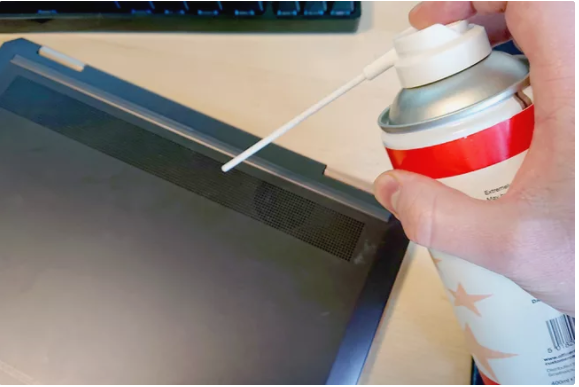
Compressed air is the most effective technique to clean a laptop without having to disassemble it. It’s inexpensive, widely accessible, and one of the safest and most convenient methods to clean a laptop of dust and grime without disassembling it.
1. Start by turning off your computer and unplugging it from its charger. Remove the battery from the laptop if at all possible.
2. Find the fan intake vent(s) on your laptop and close them. They are often found on the underside of laptops, however this might vary depending on the manufacturer and model. If you’re still not sure, check your handbook or the manufacturer’s website.
3. Concentrate on the vent with the compressed air nozzle, but don’t push it too far inside; instead, give it a quick burst of air. Target another vent and do the same. If possible, direct pressurized air onto the fan blades itself if you have the ability to do so.
4. Compressed air can be blown through the exhaust vents of your laptop if the fan is exceptionally dusty or blocked with dust. Although it varies by model, they are normally located on either the side or the back of the laptop.

When you switch on your laptop the next time, you may notice some dust being expelled from it as a result of the compressed air loosening it. Close the computer and repeat the procedures outlined above for a more thorough clean.
How to Clean a Laptop Without Compressed Air
If you don’t have access to compressed air, or if you don’t want to generate more trash in the form of empty cans, you can clean a laptop fan without it. However, keep in mind that this procedure is considerably more hands-on and requires removing the laptop, which may void your warranty and put your computer at danger of being irreparably damaged. Only proceed if you are working on a computer that does not hold any sensitive data or if you are quite confident in your ability to repair it.
Close your laptop and disconnect it from its charger in the same manner as described earlier. Remove the laptop’s battery if at all possible.
1. If at all feasible, look for a deconstruction guide for your laptop on a website such as iFixit or similar. Alternatively, see your motherboard manual or the manufacturer’s website for instructions on how to disassemble your computer.
2. Locate and remove the screws that are located on the underside of the laptop.
3. Remove the underneath panel, being careful not to damage any ribbon wires in the process (detach them first if necessary). It is possible that you may need to use a heat source to release any adhesive.
4. Locate the laptop fan and, if it is accessible, wipe it down with a lint-free cloth to remove any dust that may have accumulated.
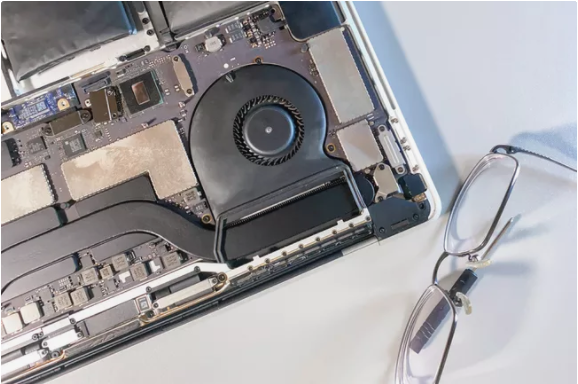
5. If your laptop has a heatsink that can be accessed, use the same cloth to wipe any excess dust from it.
6. The rear panel, along with all of the associated screws and wires, must be replaced.
How Often Should You Clean a Laptop Fan?
If you’re utilizing compressed air, a brief blast every six months should be plenty to keep your laptop cool and running at optimal performance. In order to eliminate the possibility of damage or complications while putting it back together, only take it apart when it is absolutely essential.
What Is the Easiest Way to Clean a Fan?
Compressed air is by far the quickest and most effective technique of cleaning a laptop fan, albeit it is not the only one.
Video

Vampire Crawlers Coin Farming Guide

Forza Horizon 6 Performance: Why 60 FPS Is Still the Console Standard

Yoshi and the Mysterious Book (2026) – Full Completion Guide, Rewards & Secret Ending

How to Get Free Pets in Adopt Me: A Guide for Players

Roblox Username Generator – Create a Cool & Unique Username in Seconds
How to Get Free Pets in Adopt Me: A Guide for Players
Yoshi and the Mysterious Book (2026) – Full Completion Guide, Rewards & Secret Ending
Forza Horizon 6 Performance: Why 60 FPS Is Still the Console Standard


