Gaming
How to Clean the Dust From a Noisy PS4: A Step-by-Step Guide
Learn how to open your PS4, remove the cover, and clean the PS4’s fan and other components to keep it running well.
If you have had a PlayStation four for a while, probabilities are that it runs loads louder than it did while you got it. Like maximum devices, dirt has a tendency to accumulate over the years in the device.
To preserve your PS4 going for walks at its best, it is smart to easy your device each as soon as in a while. To quiet it down and take away all that nasty dirt buildup, observe our manual to cleansing your PlayStation four. We’ll take you via the whole lot you want to know, such as what screwdriver you want to open the PS4 and a way to easy the PS4’s fan.
Step 0: What You’ll Need for Cleaning a PS4
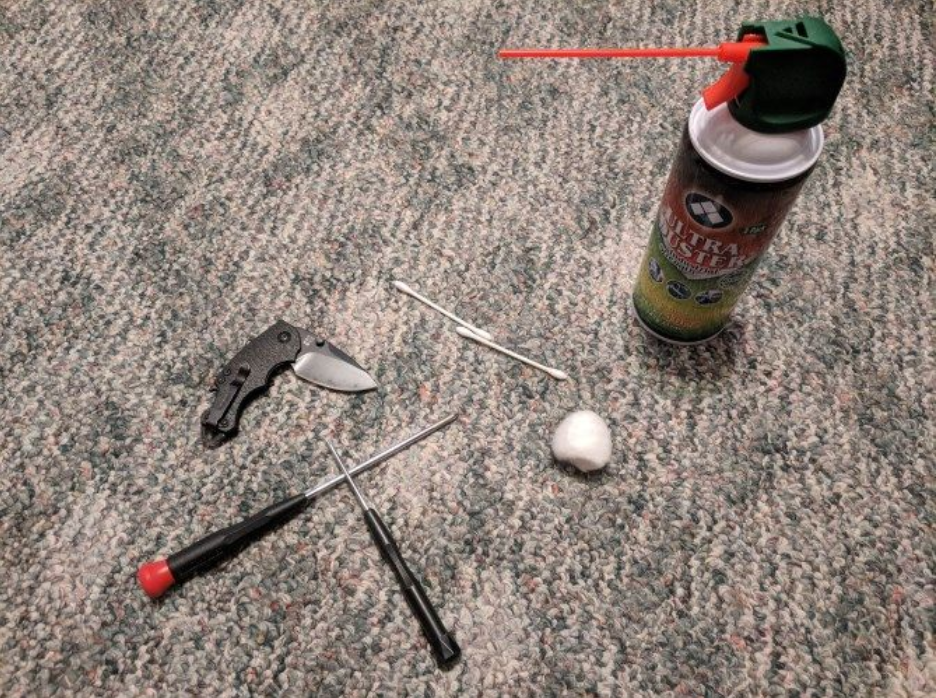
PS4 cleansing is a quite sincerely job, however does require some materials
- A TR9 Torx safety bit screwdriver. The PS4 makes use of TR9 safety screws. A TR8 screwdriver may also paintings, however you have to use a TR9 for great results. Make positive you get a screwdriver with a safety bit, which has a tiny hollow with inside the center.
- If you do not have one, you may get a TR9 safety screwdriver for reasonably-priced on eBay. If you have already got a Torx set or pc beginning toolkit, it probable has the bit you want.
- A fashionable Phillips-head screwdriver. There are some screws with inside the PS4 that require this screwdriver to cast off. A smaller screwdriver will paintings great here.
- A knife or different sharp object. You’ll need this to peel off the stickers overlaying the PS4’s rear screws.
- A can of compressed air. You’ll want this to blow out the dirt. You can buy those on-line or at shops like Walmart.
For a extra cleaning, you could additionally need to apply those elective materials
Cotton swabs and/or cotton balls. If you would like, you may use those that will help you cast off a number of the dirt. A cotton swab additionally facilitates you maintain the fan from spinning. If you need to head above and beyond, strive making a few cleansing putty and the usage of that instead.
A flashlight. It may be hard to look wherein the dirt hides; a flashlight makes it less complicated to spot.
A paper towel or piece of tape to keep the screws. You do not need your PS4’s tiny screws to head missing, so it is properly concept to have someplace to maintain them. When putting off the screws, you could need to location them with inside the equal sample you eliminated them, so that you understand which is going wherein.
A cleansing brush or antique toothbrush. Dust caked onto the PS4’s fan is tough to cast off, because the blade gaps are so small. A brush can scrape off regardless of the canned air can not clean out.
Note: that when you have an unique version PS4, beginning your console and cleansing it’s going to void your assurance (that’s legitimate for 12 months after purchase). However, you may cast off the duvet from the PS4 Slim and PS4 Pro fashions with out voiding the assurance. Chances are that if you have had your PS4 for lengthy sufficient that dirt buildup is an issue, your assurance has probable expired anyway.
We’ll display steps for cleansing the unique PS4 on this guide (considering the fact that it is the only I have, and the maximum complicated). At the end, we’re going to point out the variations for the opposite fashions.
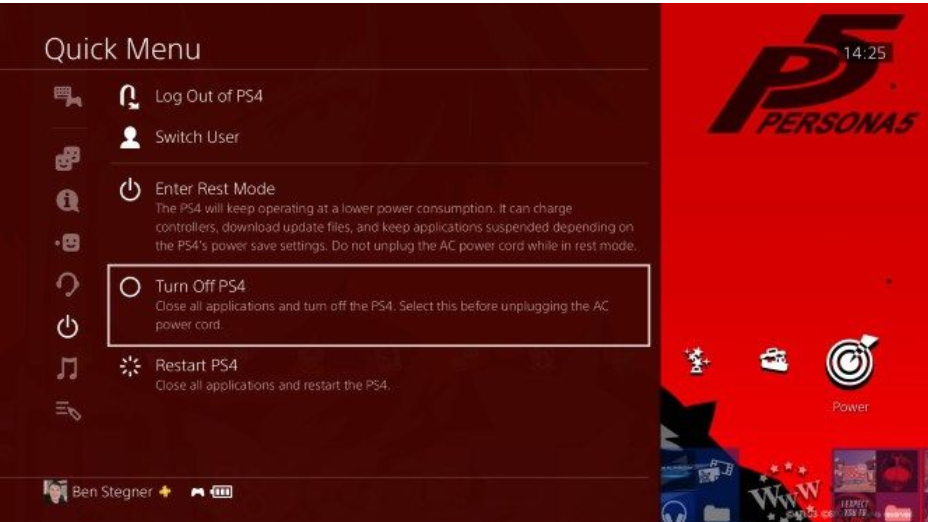
Step 1: Shut Down Your PS4 and Unplug Everything
Before you begin cleansing your PS4, ensure the console is became off. It must don’t have any lighting fixtures at the top; in case you see an orange light, then it is in Rest Mode (a low-energy state) and you will want to close it down fully.
To absolutely close down, flip your PS4 on, then press and maintain the PlayStation button to your controller to open the Quick Menu. Head to Power > Turn Off PS4. Wait till all lighting fixtures to your PS4 flip off, then unplug the electricity cable, HDMI cord, and some thing else linked to it (like USB devices).
Bring your PS4 to a place where you have some room to work. Since you’ll be removing small screws, you should have a safe place to set them.
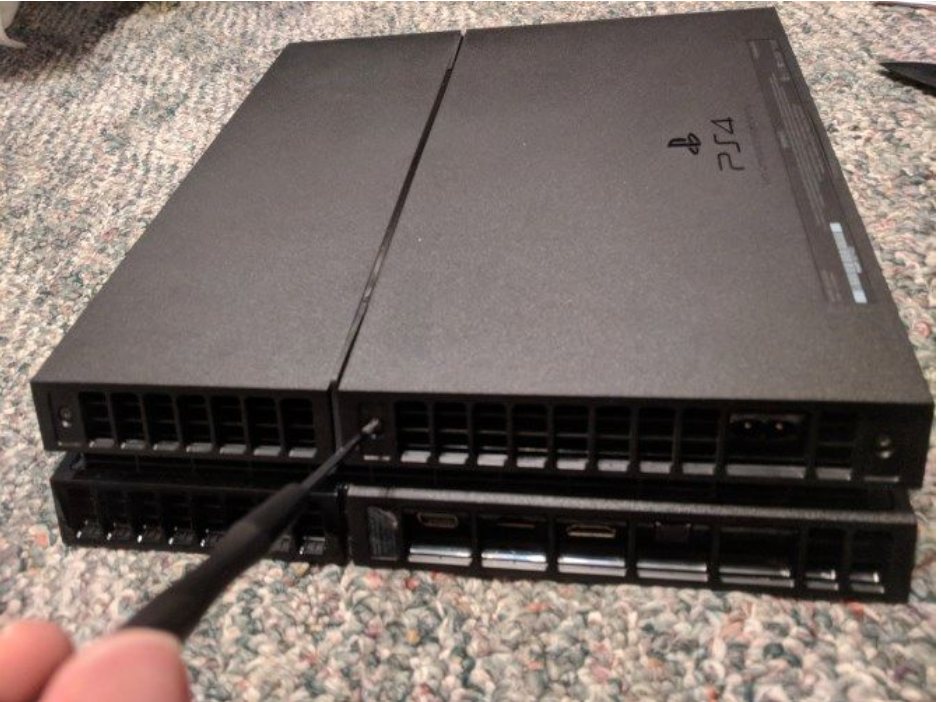
Step 2: Remove the Back Stickers and Screws
Now which you’ve were given your PS4 geared up to work, flip it round so the lower back is dealing with you, then turn it upside-down. You’ll see 3 stickers alongside the “top” (that’s in reality the lowest of the system, in keeping with the port for the energy cable) which you have to remove.
Note that when you have the marginally revised version of the authentic PS4, you will simplest see one decal and screw right here with inside the middle.
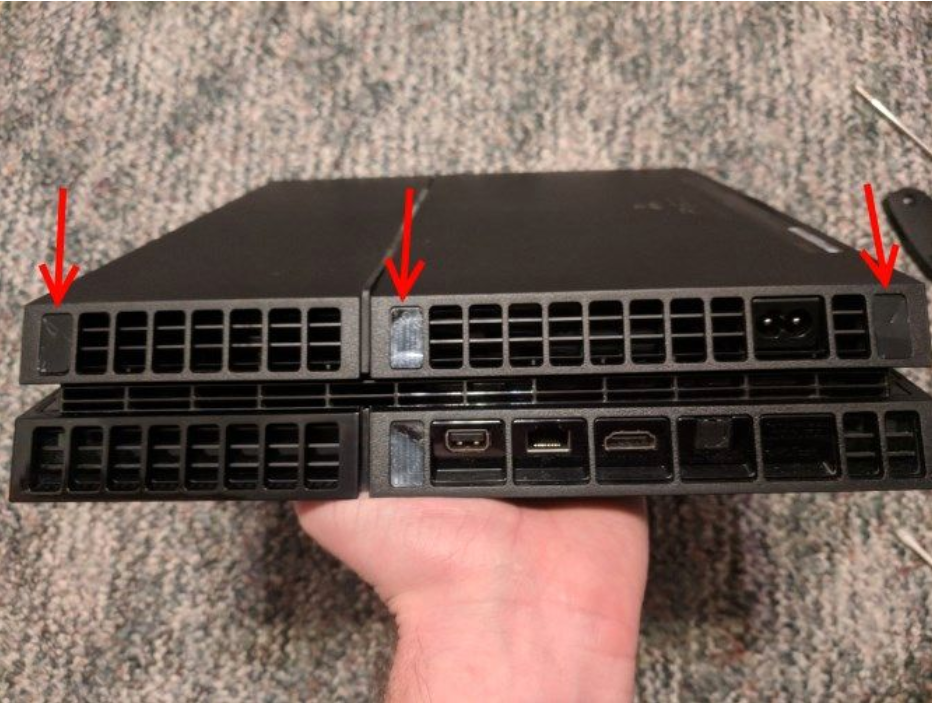
The center one has a unique guarantee sticky label that damages itself while you do away with it. The different are a chunk thicker and can require a chunk of more paintings to peel off. Use your knife or any other pointed device to peel again a nook of the stickers, then they must come off easily. Be cautious now no longer to scratch your device at the same time as you do away with them.
Set them apart in case you need to re-practice them later, or throw them out in case you do not care. Once you have eliminated the stickers, use your TR9 screwdriver to get rid of the screws underneath. They’re short, so that they should not require plenty effort. Take care now no longer to strip them, and set them apart in a secure place.
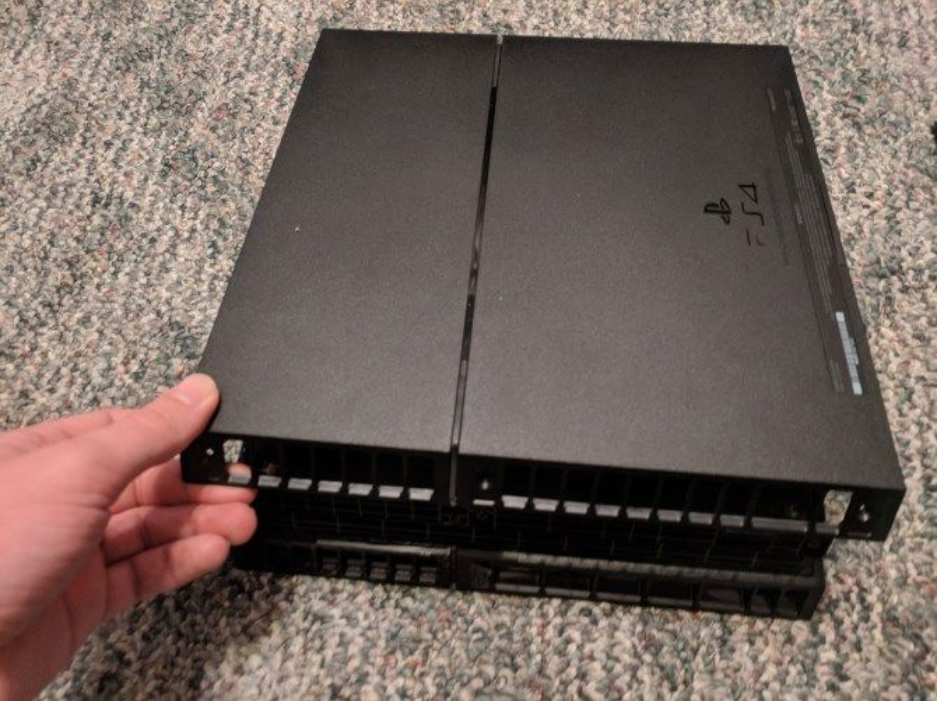
Step 3: Remove the PS4’s Cover
Now that you have eliminated the screws(s) protecting the quilt in place, you may pop it off. Start on the back (the component with the screws, dealing with you) and gently pull up at the edges. Don’t use a ton of force; as you figure your manner across the PS4, the quilt ought to come free. Tug it up and take away it.
At this point, you could study the quilt you simply eliminated and smooth any dirt inside. Your compressed air will make quick paintings of it; that is additionally a terrific vicinity to apply a cotton ball to dab any closing particles out. After cleansing the quilt, set it apart for now.
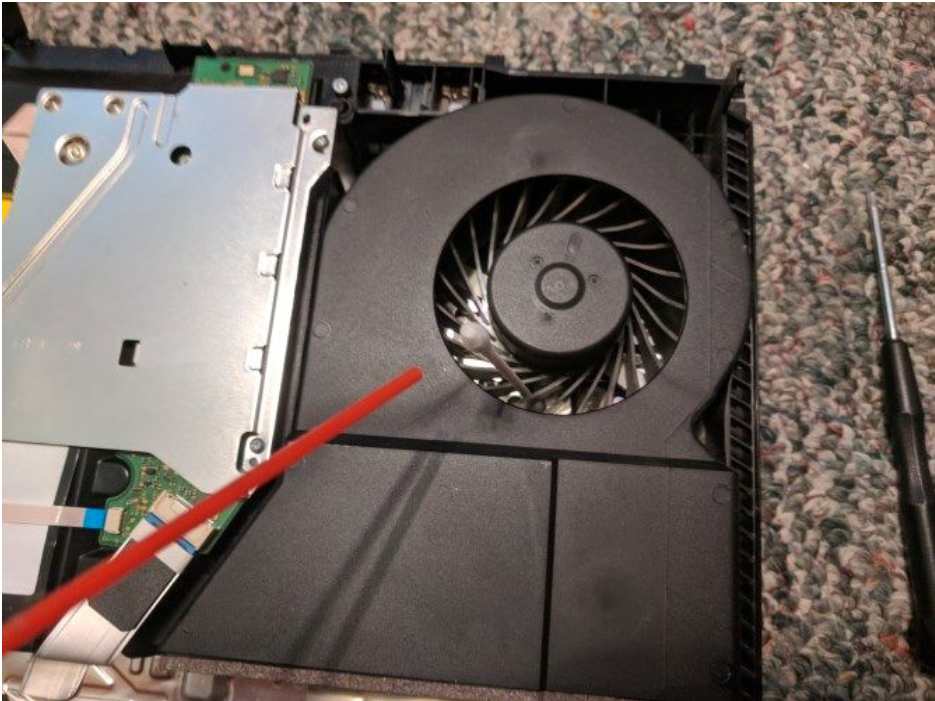
Back at the gadget, you could now see the PS4’s fan, which acts as a very good indicator of ways dusty your gadget is overall. However, there is one greater issue to do away with first.
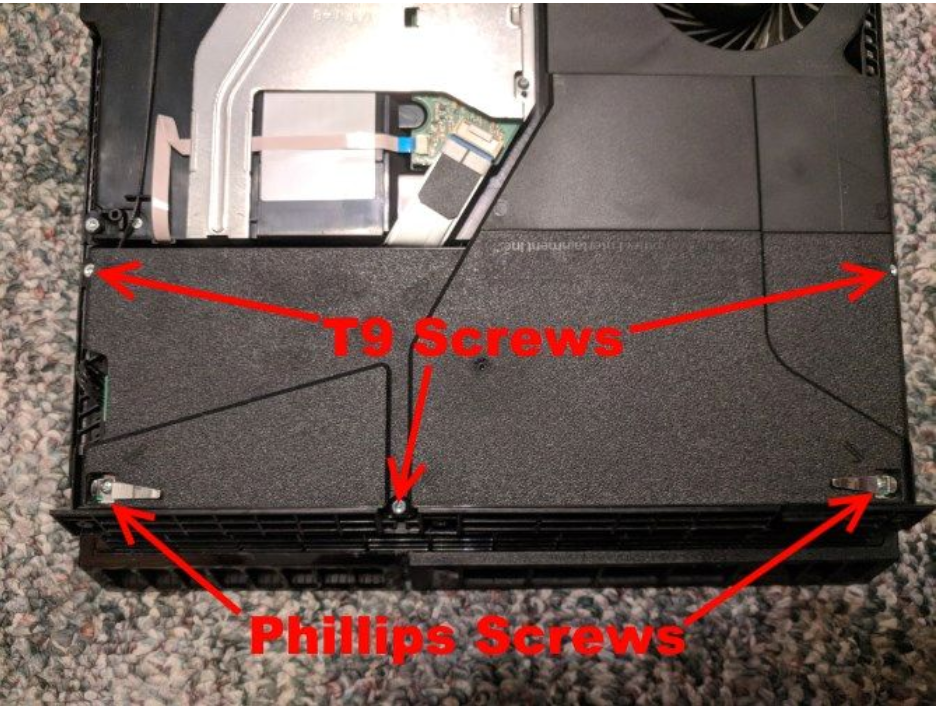
Step 4: Remove the Power Supply
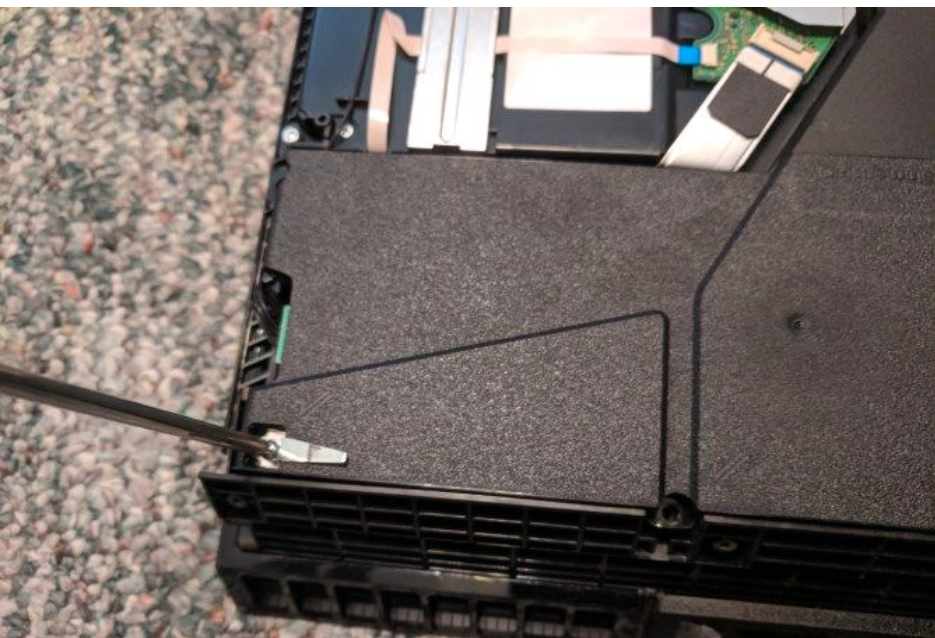
You’re almost there! Now you simply want to do away with the electricity deliver unit (PSU) so that you can advantage get right of entry to to the warmth sink and carry out the maximum thorough cleaning. There are 5 screws retaining the PSU in place. Three of them use the identical TR9 safety screws because the lower back cover, and the opposite are preferred Phillips head screws.
With the PSU at the aspect closest to you and the fan with inside the upper-proper corner, the 2 Phillips head screws are at the threshold of the system, to the a ways left and a ways proper of the PSU. Use your TR9 screwdriver to do away with the opposite 3 screws.
Note that in case you are the usage of the marginally made over version of the authentic PS4, you may see one screw in a distinct vicinity here. The TR9 screw with inside the upper-left of the beneath picture graph might be some inches above the TR9 screw at the lowest instead.
The Phillips screws are longer than the others and are a piece more difficult to dispose of, so that you may also want to slip your knife or any other skinny item beneath Neath the clips to drag them up. Take care to now no longer bend the clips while doing this.
Now you could dispose of the PSU. There’s a cable connecting it to the motherboard underneath, that you do not want to dispose of and do not need to by accident unplug. Carefully clutch the PSU via way of means of each facets and raise it up evenly. It may also take a piece of wiggling to return back free.
Once you have got it lifted up, gently “flip” it over the left facet so it rests carefully, whilst staying plugged in.
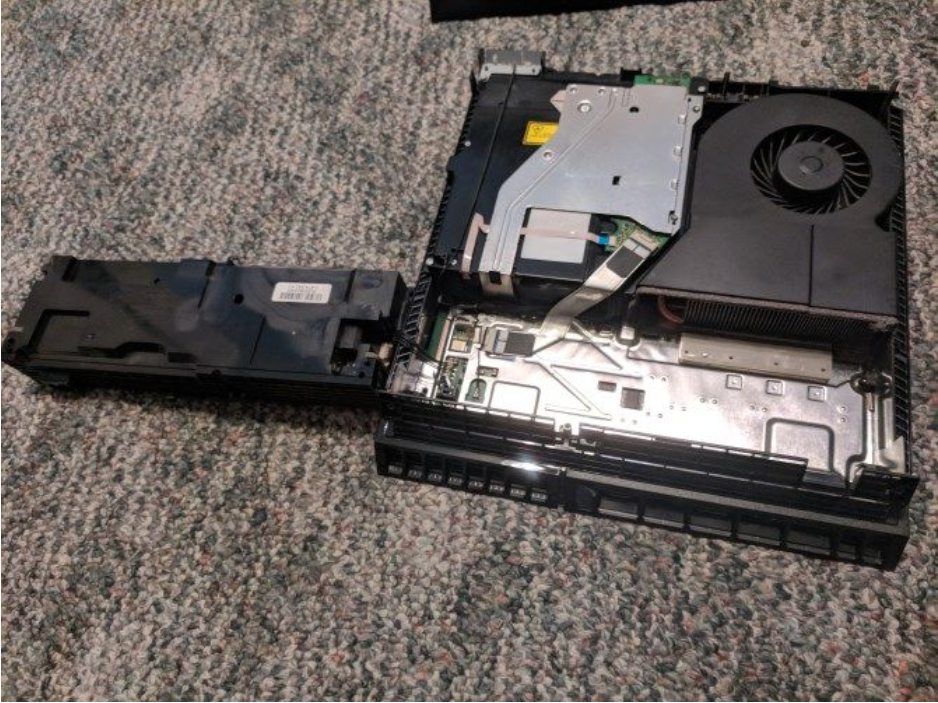
Step 5: Blow the Dust Out of Your PS4
Finally, you’ve got got get right of entry to to the PS4’s warmth sink and fan. Now we are able to provide an explanation for the way to easy your PS4’s fan and get rid of dirt that is deep with inside the gadget.
Take your can of compressed air and, if it has one, insert the straw for extra targeted cleaning. Spray some blasts of air far from your PS4 first, in case there is any liquid with inside the tip.
Now, use your canned air to blow quick bursts of air all round your PS4, removing the dirt. Make certain to test the corners for hidden dirt (your flashlight can assist here), and take care to blow it out of the gadget as opposed to in addition in. You also can use your cotton swabs or cotton balls that will help you get rid of any dirt the air might not reach.
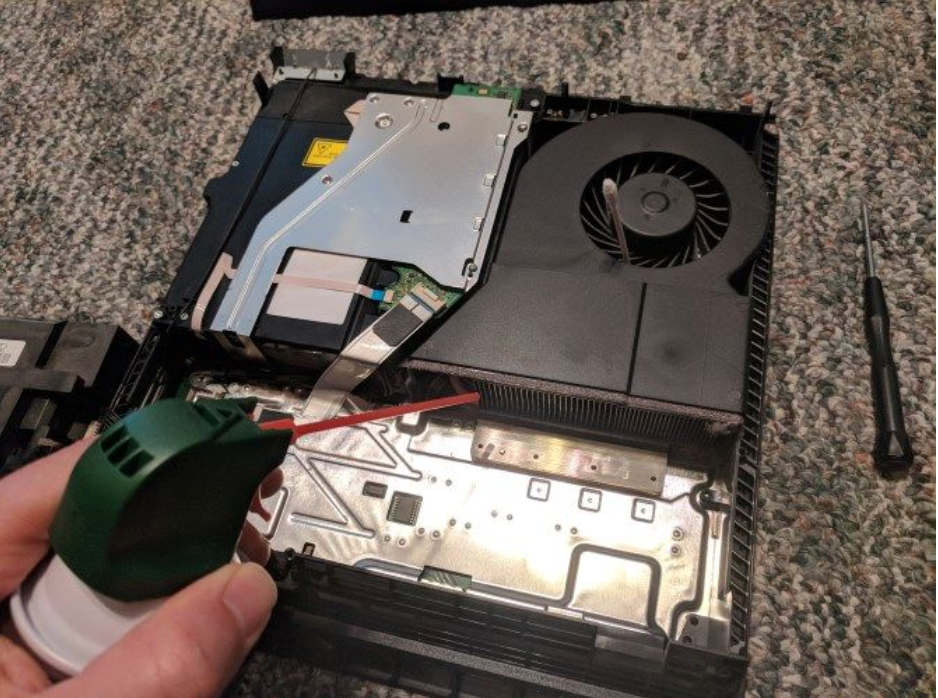
Focus specially at the fan, warmth sink, and outdoor edges of your PS4 while searching out built-up dust, as those are not unusual place places for it. If you are now no longer familiar, the warmth sink is the metallic set of “bars” that the straw is pointing at with inside the above picture.
- Note a few important warnings when using canned air:
- Never, ever keep the can upside-down. This will pressure the liquid in the can out and will harm your PS4.
- Do now no longer spray compressed air immediately into the fan. Spinning the PS4’s fan at an excessive pace should harm the circuitry. Before you blow air close to the fan, ensure you are both keeping it with a finger or have jammed it with a cotton swab.
- Use compressed air in ventilated regions only. Canned air can hassle your pores and skin and different frame parts, and it is risky to respire it in for an prolonged time.
- Spray in bursts. Holding a constant spray of air will fast cool the can, making it tough so that it will handle.
Step 6: Reassemble Your PS4
Once you’re satisfied with your work cleaning out your PS4, it’s time to put everything back together in reverse order.
First, carefully “flip” the power supply over and put it back in its spot. You’ll notice two prongs in the bottom-left corner; make sure those line up with the gap in the PSU.
Replace the five screws holding the PSU in place. Remember that the two on the bottom-left and bottom-right are the longer Phillips head screws with clips. The other three are TR9 security screws.
Next, snap the quilt returned into place. Start from the the front of the gadget (make certain you’ve got got do not have the quilt backwards). Lightly press down all round the rims to the gadget to make certain it is secure. When done, it should not wiggle.
Now, update the TR9 screws at the returned of the PS4. Take care now no longer to harm them whilst screwing them returned in. If you made a decision to preserve the sticky label(s) that cowl the returned screws, update them now. The guarantee sticky label will seem scratched; that is through design.
Now your PS4 is all wiped clean out and placed returned together, however there may be an extra spot you would possibly need to quick check
FEATURED Video
Conclusion
There you have it, a way to clean a PS4. But there are a few more things you may need to know to keep your console running great.
For one, you should always clean your console before and after using it. That means wiping the disc tray and the exterior of the system. If you’re not sure where to find these buttons, just look for the arrow symbols on the console.
Secondly, it’s a good idea to wipe your hard drives once a month. You can do this by taking out the hard drive from the console and wiping it down with a microfiber cloth.
Lastly, make sure to unplug all cables before you start cleaning your PS4 and never use water or chemicals to clean your console.

Vampire Crawlers Coin Farming Guide

Forza Horizon 6 Performance: Why 60 FPS Is Still the Console Standard

Yoshi and the Mysterious Book (2026) – Full Completion Guide, Rewards & Secret Ending

How to Get Free Pets in Adopt Me: A Guide for Players

Roblox Username Generator – Create a Cool & Unique Username in Seconds
How to Get Free Pets in Adopt Me: A Guide for Players

Grow a Garden Recipes in Roblox: Guide to Cook (Donuts, Sushi, Pie, Pizza & More!)
Roblox Username Generator – Create a Cool & Unique Username in Seconds
Yoshi and the Mysterious Book (2026) – Full Completion Guide, Rewards & Secret Ending


