Apple
How to Crop a Screenshot on Mac
Taking a screenshot of an app while it’s running, but you don’t want the menu bar or dock to be included, you’ll need to know how to crop a screenshot on a Mac. Learn how to crop a screenshot in this tutorial. For taking screenshots on a Mac, there are a variety of solutions available, including built-in tools and both commercial and free third-party applications.
These include ways that allow you to crop off undesired exterior sections of your image, touch up your image using filters, or make more complicated alterations to your photograph. On a Mac, you may crop a screenshot by following the steps outlined in this article.
Read also: How to Disable the Pop-Up Blocker in Safari on Mac
Essential Keyboard Shortcuts for Taking Mac Screenshots
First and foremost, you may need to understand how to snap a new screenshot before you can learn how to crop it afterwards.
When it comes to capturing a screenshot on the Mac, there are various techniques to choose from, but the easiest is to utilize one of the keyboard shortcuts. If you’re running macOS Mojave or later, you may use a built-in screenshot cropping tool to crop screenshots as you capture them, which is particularly useful when taking many pictures at once.
If you’re not sure how to snap screenshots, you can use the following keyboard shortcuts:
- Take a screenshot of the whole screen: Shift + Command + 3
- Capture part of the screen: Shift + Command + 4
- Capture a window or menu: Shift + Command + 4 + Space bar
How to Crop a Screenshot on a Mac
Take a screenshot and crop it using one of the ways listed below when you’ve finished editing it.
Using the Built-In Screenshot Cropping Tool
For cropping screenshots on the Mac, the new, built-in screenshot cropping tool may be the most effective option available.
When you take a screenshot on macOS, you’ll notice a floating thumbnail in the bottom-right corner of your screen immediately after capturing the screenshot. A thumbnail of your screenshot; when you click on it, the cropping tool is displayed on the screen. If you don’t click on the thumbnail within a few seconds, it will vanish and you will be unable to access the tool anymore. Unfortunately, there is no method to extend the amount of time until it disappears.
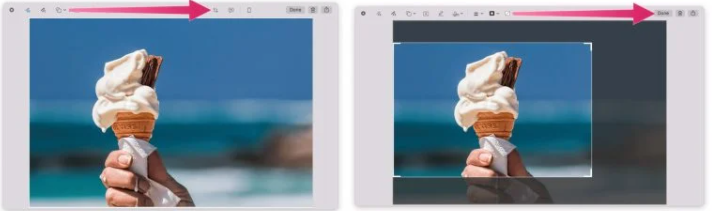
To crop using this tool:
- Press the Crop icon (top-right) after taking your screenshot.
- Select the area in your screenshot you want to keep.
- When you’re finished, press Done.
Using Preview
When you double-click a picture on Mac OS X, the Preview programme is launched automatically as a result. You may use this tool to crop your screenshots in a matter of seconds.
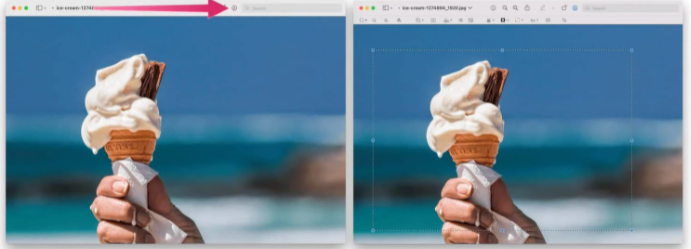
To crop a screenshot using Preview:
- Double-click on an image in Finder to open the Preview app.
- Select the Show Markup Toolbar icon (top-right—shaped like a pencil.)
- Use click and drag to select the area you wish to keep.
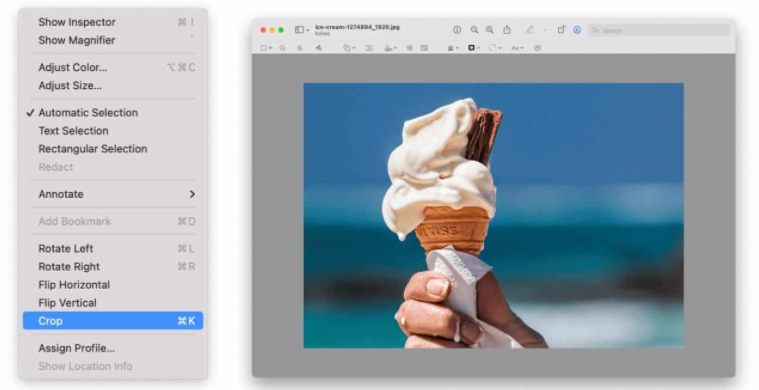
- From the menu bar, press Tools.
- From the drop-down, select Crop.
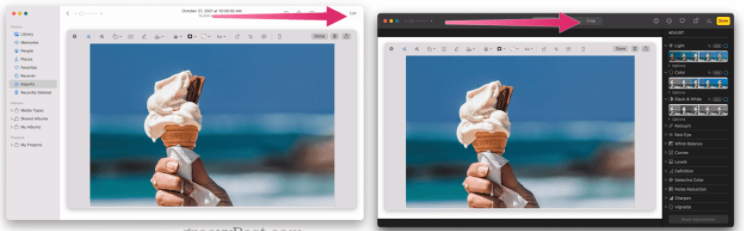
Using the Photos app
On macOS, the Photos programme is the default tool for organizing and managing your photographs. Moreover, it may be used as a rudimentary picture editing application on a Mac, allowing you to rapidly crop screenshots.
Before you can do this, you’ll need to save your screenshot to your computer’s hard drive.
To use the Photos app to edit screenshots:
- Open Photos, then press File > Import.
- Select the screenshot you want to edit.
- Press Import.
- Double-click the image you imported, then press Edit (top-right).
- At the top, select the Crop button.
Third-Party Solutions
There are a variety of third-party applications available that allow you to edit photographs; you may find them by searching for “Photo & Video” in the App Store.
Adobe Lightroom, Polarr Photo Editor, Pixel style Photo Image Editor, and other popular photo editing programmes are among those available. Similar programmes are also available for download on the internet. When it comes to cropping, each third-party photo-editing service behaves somewhat differently from the others.
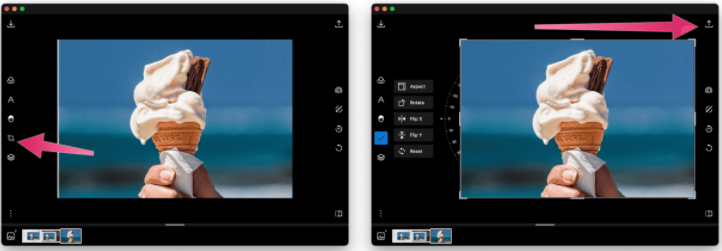
Allow us to demonstrate how Polarr Photo Editor handles cropping with the help of an example. To edit screenshots in Polarr Photo Editor, follow these steps:
- Press File > Open.
- Select the photo you wish to edit.
- On the left, press the crop icon.
- Select the area you wish to save.
- Press the Save Photo icon to save the image.
Video

Vampire Crawlers Coin Farming Guide

Forza Horizon 6 Performance: Why 60 FPS Is Still the Console Standard

Yoshi and the Mysterious Book (2026) – Full Completion Guide, Rewards & Secret Ending

How to Get Free Pets in Adopt Me: A Guide for Players

Roblox Username Generator – Create a Cool & Unique Username in Seconds
How to Get Free Pets in Adopt Me: A Guide for Players
Yoshi and the Mysterious Book (2026) – Full Completion Guide, Rewards & Secret Ending
Forza Horizon 6 Performance: Why 60 FPS Is Still the Console Standard


