Guide
How To Edit A Video On YouTube – Complete Guide
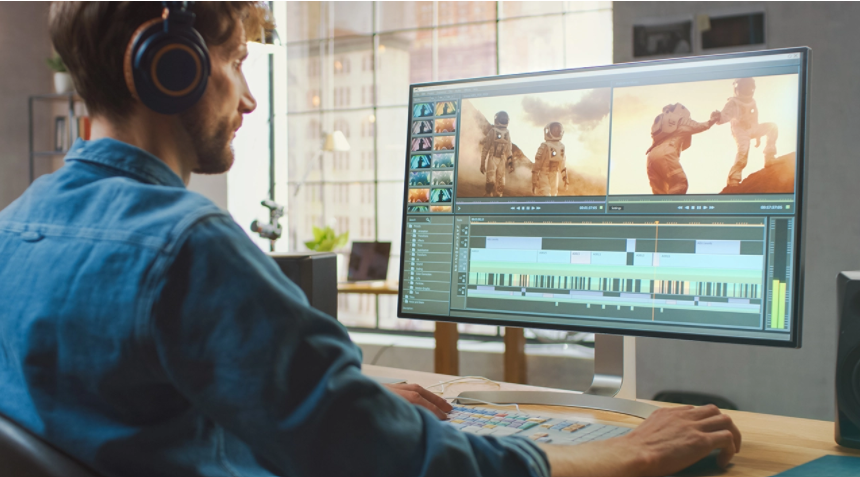
You’ve just finished filming a video that you’d want to share with the world on YouTube. In order to make your video more polished and professional-looking, whether you intend on sharing it with family and friends or using it as material for your YouTube channel, you’ll want to edit it. You have a number of possibilities for completing this job.
YouTube has its own built-in video editor, which allows you to trim and chop your videos, add music to them, and blur faces and other parts of the video. That may be sufficient for a straightforward film, but if you want to add titles, effects, and other embellishments to your work, you’ll need a more powerful editor to accomplish your goals.
Of course, you may acquire sophisticated video-editing software for your computer to use with your videos. However, there are a slew of free solutions available that you may want to investigate first. Users of Windows 10 may edit films using the built-in Photos programme, while Mac users can use Apple’s iMovie, which is available for download from the App Store. In any case, there are plenty additional alternatives to consider for both Windows and Mac.
For the sake of this article, we’ll assume you’ve already filmed your video and are looking for a means to edit it. Here’s how to edit your movie using YouTube Studio, Microsoft’s Photos software, and Apple’s iMovie, among other programmes.
YouTube Studio
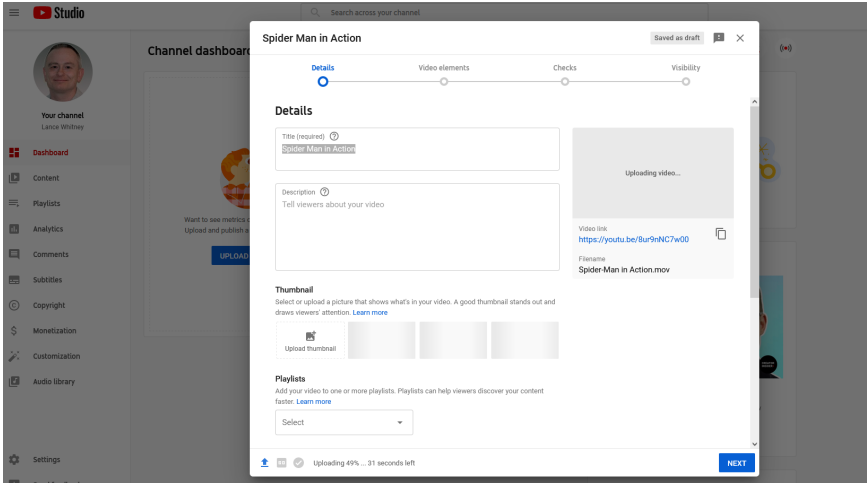
- In order to use YouTube’s built-in editor to make changes to your video, you’ll need to upload it to YouTube Studio first. Log onto your Channel dashboard and choose Upload Videos from the drop-down menu. Select your film from the Upload videos window, and then fill out any additional information that may be required in the Details window and following screens, if any.
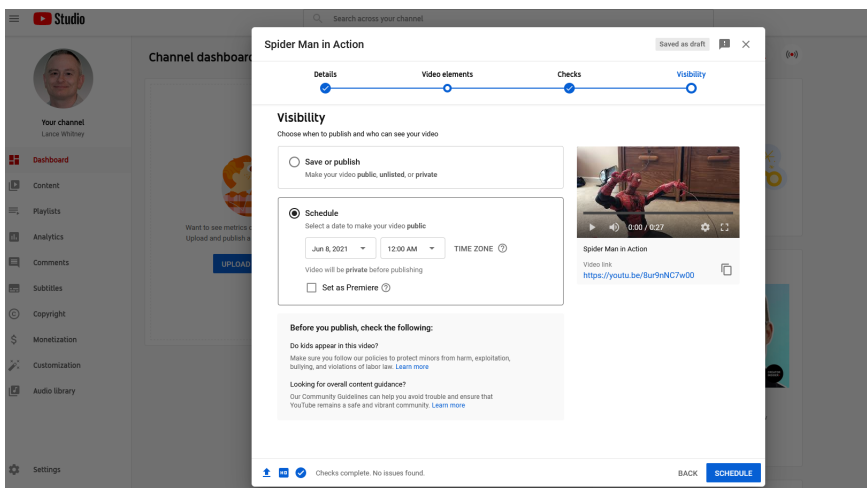
- You may choose whether you want your video to be secret, unlisted, or publicly visible from the Visibility screen. You may also choose a date for when your video will be made public so that you have enough time to edit it. Save your work or schedule it for later.
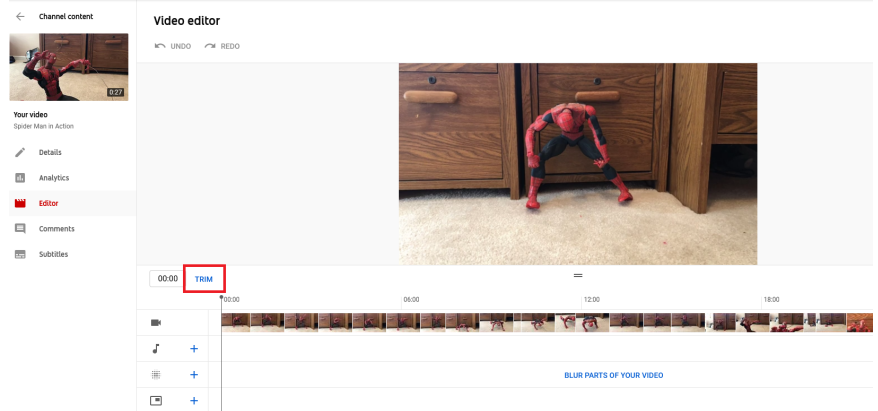
- To begin your video, drag the left boundary of the video timeline to the location where you want it to begin. You may terminate the video by dragging the right border to the point where you wish it to finish. For a preview of what the movie might look like after the trimming, choose the Preview command and then select Play on the video window in your editor. To make your changes effective, click the Save button.
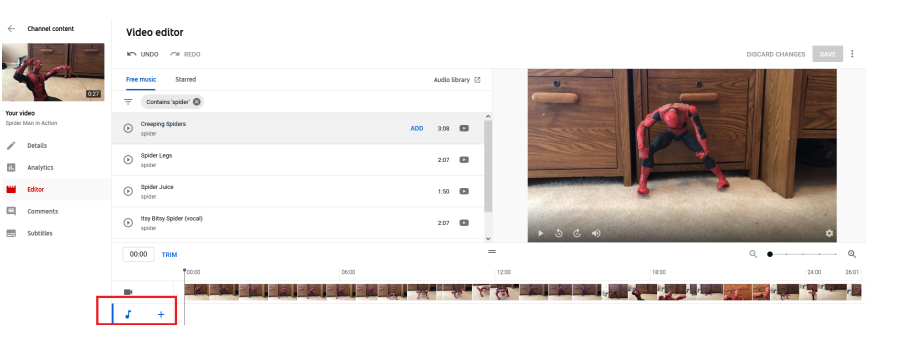
- Do you want to include music in your video? To add a track, click the + symbol next to the music note in the bottom left corner of the screen. To locate songs that are not protected by intellectual property rights, scroll down the list of tracks under free music.
- Click the Audio Library link to find more free music and sound effects. You can also search for music by title, genre, artist name, and other factors. Click the Play button next to any track to hear it. Click Add next to the track you want to insert.

Faces, objects, and backdrops that you don’t want your viewers to see may be blurred using YouTube’s editor, which you can find here. Select Face blur or Custom blur from the drop-down menu after clicking the Add blur symbol on the timeline. Face blur is a programme that automatically searches for any faces. When you use custom blur, you can specify the kind of blur that should be used as well as the region of the video where the blur should occur. When you’re done, click Save.
Read More: 5 Efficient Ways to Grow Your YouTube Channel
Video

Vampire Crawlers Coin Farming Guide

Forza Horizon 6 Performance: Why 60 FPS Is Still the Console Standard

Yoshi and the Mysterious Book (2026) – Full Completion Guide, Rewards & Secret Ending

How to Get Free Pets in Adopt Me: A Guide for Players

Roblox Username Generator – Create a Cool & Unique Username in Seconds
How to Get Free Pets in Adopt Me: A Guide for Players
Yoshi and the Mysterious Book (2026) – Full Completion Guide, Rewards & Secret Ending
Vampire Crawlers Coin Farming Guide


