Apple
How to Find Your iPhone’s IP Address

Your iPhone, iPad, or any other device that you use to browse the internet has a unique set of digits known as an IP address. This IP address is also known as internet protocol.
You probably won’t have to worry about changing your IP address very often; however, if you ever do need to do so in order to protect your privacy, assist in resolving issues related to your Wi-Fi connectivity, or gain access to content that is only available in other countries, the process can be completed in just a few simple steps.
Read Also: How to Listen to Audiobooks on Your iPhone
Why Find Your iPhone’s IP Address
You may need to know the IP address of your iPhone for a variety of reasons, the most important of which is that you are configuring IP-specific settings on your router, such as assigning a static IP address. You can provide your iPhone particular permissions on your network once you have determined the IP address that it uses.
When you have a problem involving an IP conflict, you could also find it useful to know the IP address of your phone. You may determine if your phone is generating any problems on the network by verifying its Internet Protocol (IP) address.
How to Find IP Address on your iPhone or iPad
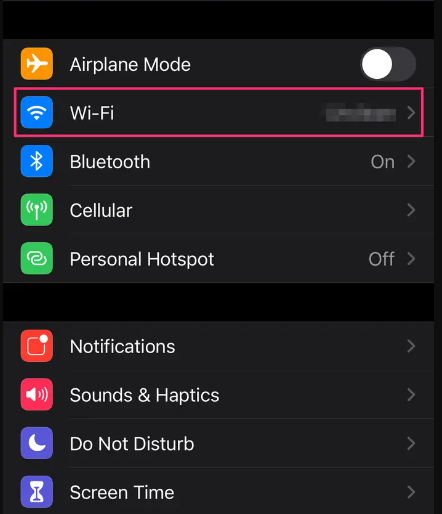
1. After the Settings app has been launched, select the Wi-Fi icon that is situated near the top of the page.
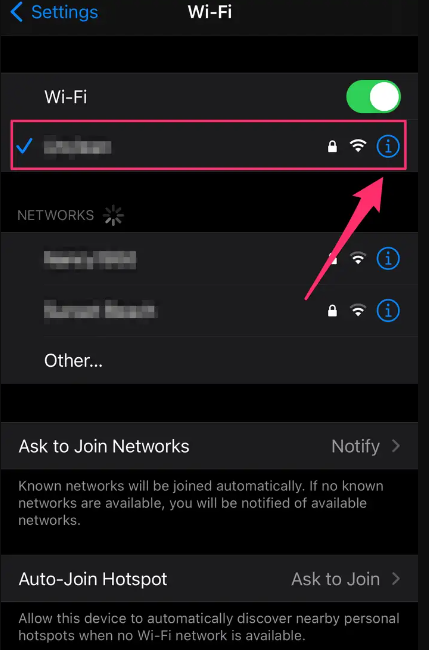
2. Either press the information icon or the name of the Wi-Fi network to which you are presently connected in order to access the Wi-Fi settings.
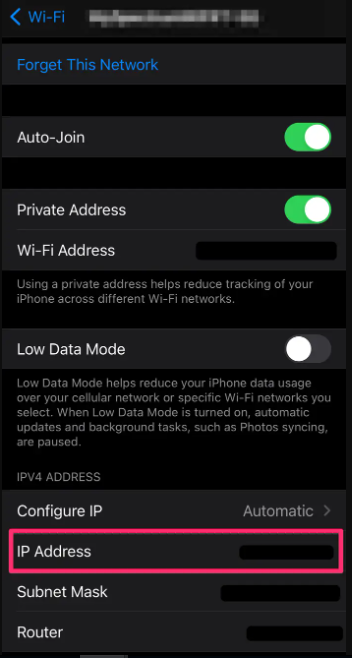
3. If you go to the page after this one, you will see that the space labelled “IPV4 Address” contains a statement that includes your IP address.
How to Change IP Address on your iPhone or iPad
Changing your IP address is a simple process that won’t take more than a few minutes, and doing so can help you protect your privacy while also resolving issues that are related to the connectivity of your computer.
Request a new automatic IP address
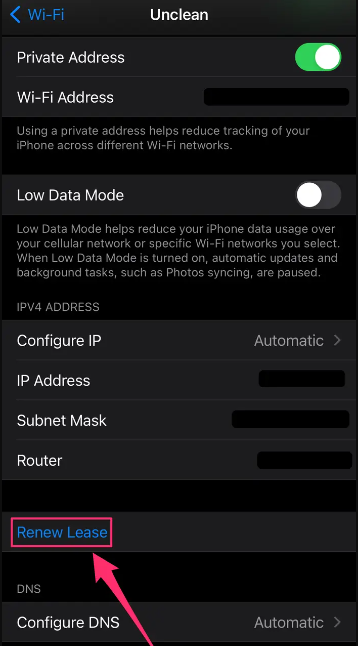
In the case that you are unable to connect to the internet, you can ask your router to update the IP address that is connected with your iPhone. This can be done by submitting a request to your router. It’s possible that this is the only thing you need if you don’t need to enter a specific static IP address. If that’s the case, then this is all you need.
1. Start the application, then go to the Settings menu.
2. Tap Wi-Fi.
3. Navigate to the Wi-Fi network to which you are currently connected and press the I icon that can be found in the top right-hand corner of the screen to access the network’s information.
4. When the pop-up window has finished appearing, go back to the menu that just appeared and choose Renew Lease once more.
Manually enter a new static IP address
1. Launch the app and select Settings.
2. Tap Wi-Fi.
3. Locate the Wi-Fi network to which you are currently connected and press the I icon that is located in the upper right-hand corner of the screen.
4. Select the Configure IP option.
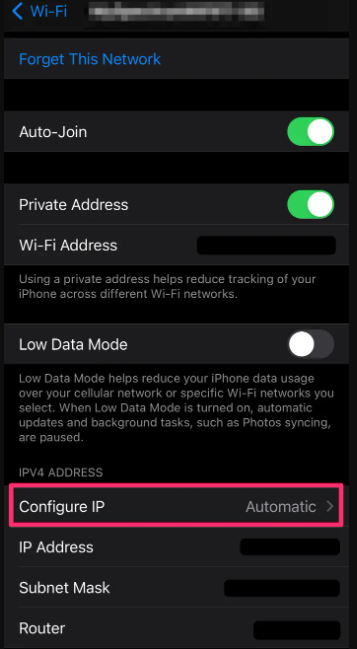
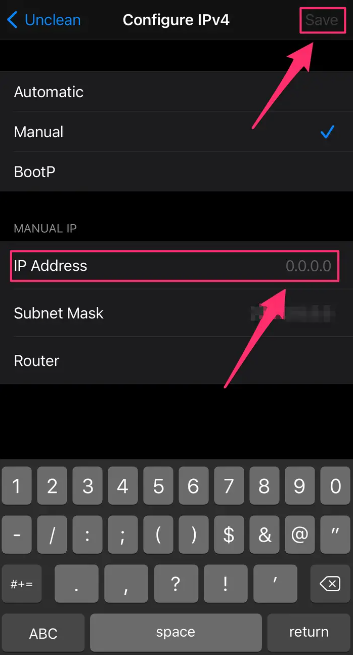
5. Select Manual from the drop-down menu on the Configure IPV4 page, and then enter the IP address information. When you are finished, touch the Save button to apply the modifications to your IP address.
