Guide
How to Fix Sticky Buttons on Xbox Controller
If you have ever been playing a game on your Xbox, then you know how frustrating it is when the buttons stick. For some reason, this sticky button problem seems to be more prevalent with the Xbox 360 controller. There are several ways to fix sticky buttons on xbox controller.
What causes an XBox controller’s buttons to get sticky?
If your buttons are sticky, the most common cause is dirt and dust. Sweat and oil from your hands may also make it stick. To fix this problem, clean your hands first. Try not to use a wet cloth because it will just spread the dirt around even more. You can also wipe off any crumbs or spills that got onto your controller with a dry cloth if possible.
How To Fix Sticky Buttons On Xbox Controller
If you’re wondering how to get rid of controller buttons that are sticky, there are a few tried-and-true techniques that may assist. Among them, which one to utilize is determined by how much the Controller buttons have been jammed and your level of comfort.
This mixture might help you if you are noticing stickiness. It is simple and non-invasive. You can try it.
- Check to see whether your controller is disconnected.
- Rub the cotton bud over any excess rubbing alcohol with a circular motion to remove it. You don’t want too much of it.
- Rub the cotton bud around the sticking button, and search for any loose threads or other obstructions. The alcohol will aid in the breakdown of any gunk that has collected.
- When the button is pushed, be sure to go around it several times so that the alcohol can work its way through the mechanism. It’ll also assist to loosen any remaining dust by pressing it.
Another way: Take the Xbox controller apart and clean
The second alternative to removing the sticky buttons on Gang Beasts Controls is to take the controller apart. This method is dangerous since you risk damaging the controller rather than repairing it. As a result, this approach should be attempted only if you have prior knowledge of opening up electronics because it’s the removal of a console’s motherboard, which necessitates meticulous attention and excellent eyesight. You’ll need several screwdrivers in various sizes as well as some other basic equipment that you may already have in your tool kit to do so.
Another method: Take the Xbox controller apart and clean
The second alternative option you have to fix the sticky buttons on Sticky Buttons on Xbox Controller is to take the controller apart. This method is risky, you might end up damaging the controller instead of fixing it.
So, it is advised that only go with this method if you have experience in opening up electronics as this is the process of removing the motherboard of a console which also requires great attention and super keen observation skills.
To do so, you will need several screwdrivers of different sizes and some other basic tools that you might already have in your tool kit.
Tools you need:
- Soldering iron
- Tweezers
- Spudger
- T6 Torx Screwdriver.
- T8 Torx Screwdriver
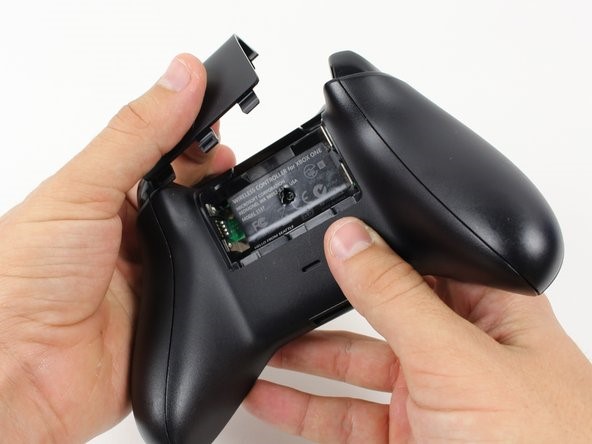
Step 1: Battery pack
- First, remove the battery cover and then remove the battery.
Step 2: Side handles
- Hold the controller strongly and remove the side handles, wedging a spudger in between a seam that is between the front and handles plates.
- Now pry the plate away by moving the spudger back and forth.

Step 3: Screws
- Use a screwdriver to punch a hole in the center of a label at the back of the controller.
- In this way, remove 5x screws. Using T8 Security Torx Screwdriver.

Step 4: Backplate
- Remove the backplate.

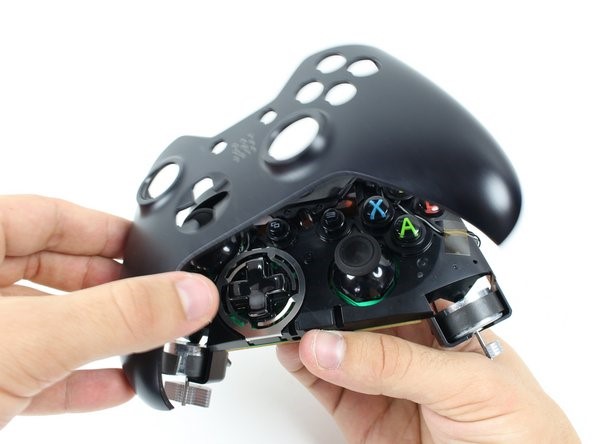
Step 5: faceplate
- Now, remove the faceplate.
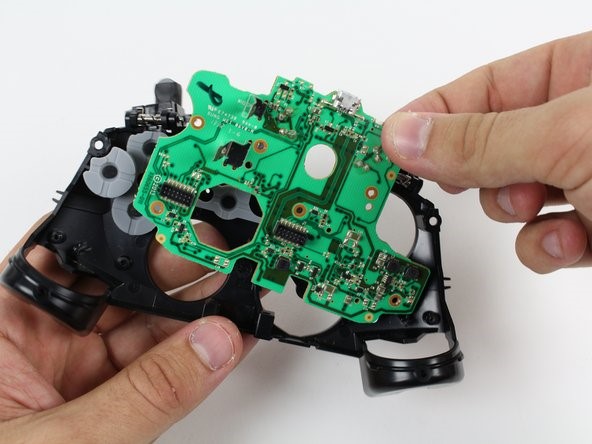
Step 6: Motherboard
- Now, hold the black and white wired down on the top motherboard and de-solder the soldered joints.
- You need to soulder the black and gray wires.
- After that, remove the rumble motors and place them aside.

Step 7:
- Now, unscrew the 2x 7mm T6 screw located near the rumble motor sockets.

Step 8:
- Strongly hold the side of the motherboard.
- Now, lift the motherboard upward while slightly wiggling the motherboard backward and forward.

Step 9:
- Now, remove the six T6 Torx Screwdrivers placed on the bottom motherboard.

Step 10:
- Now remove the bumpers, by taking them out pegs that are used to secure them, by using the spudger. These are placed on the back and front of the controller.

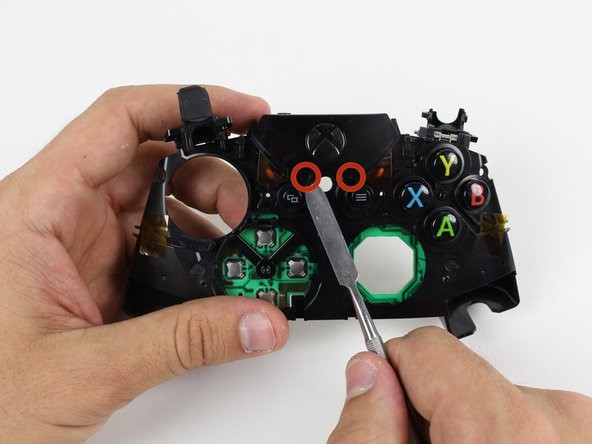
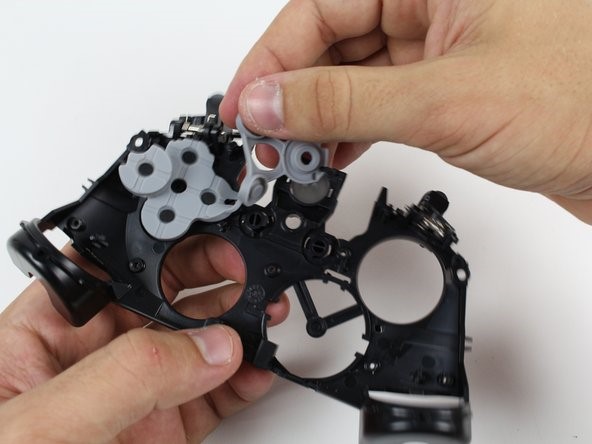
Step 11:
- Now, lift the surrounding piece the home buttons off from its pegs.
- Take them off the other side with the help of a spudger.
Step 12:
- Now remove the bottom motherboard.
Step 13:
- Remove the rubber-like material that backs the buttons.
Step 14:
- The buttons will be facing down, push them out from their place, and remove them.

Step 15:
- Now clean the buttons by using Q-tips or alcohol properly and then place everything back to its original position properly otherwise the controller won’t work.
That’s all and you are done cleaning the controller and its buttons.
Do and don’t while fixing sticky buttons of a controller
Do’s:
- Use a cotton swab and alcohol.
- Be gentle with the controller.
- Use the right tools.
- Trust a repair shop, they are professionals.
Don’t
- Never use water to clean.
- Don’t hold with excessive force.
- Don’t use a standard screwdriver.
- Don’t go for DIY if you don’t have any experience.

Vampire Crawlers Coin Farming Guide

Forza Horizon 6 Performance: Why 60 FPS Is Still the Console Standard

Yoshi and the Mysterious Book (2026) – Full Completion Guide, Rewards & Secret Ending

How to Get Free Pets in Adopt Me: A Guide for Players

Roblox Username Generator – Create a Cool & Unique Username in Seconds
How to Get Free Pets in Adopt Me: A Guide for Players
Yoshi and the Mysterious Book (2026) – Full Completion Guide, Rewards & Secret Ending
Forza Horizon 6 Performance: Why 60 FPS Is Still the Console Standard


