Guide
How to Group Objects in PowerPoint

You will learn numerous different ways to group items in PowerPoint, including both keyboard shortcuts and menu-based options, in the following article. The following techniques for grouping PowerPoint objects are compatible with all versions of Microsoft PowerPoint 2013, 2016, 2019, and 365.
Read Also: How to Make a Shape Transparent in PowerPoint
How to Group Objects in PowerPoint
When developing a presentation using Microsoft PowerPoint, it’s often advantageous to organise the objects in the presentation into groups. The ability to manipulate all of them as a single group is granted to you once you create groups. The specified ribbon options could seem somewhat different depending on the version you’re using, but the underlying technique is the same.
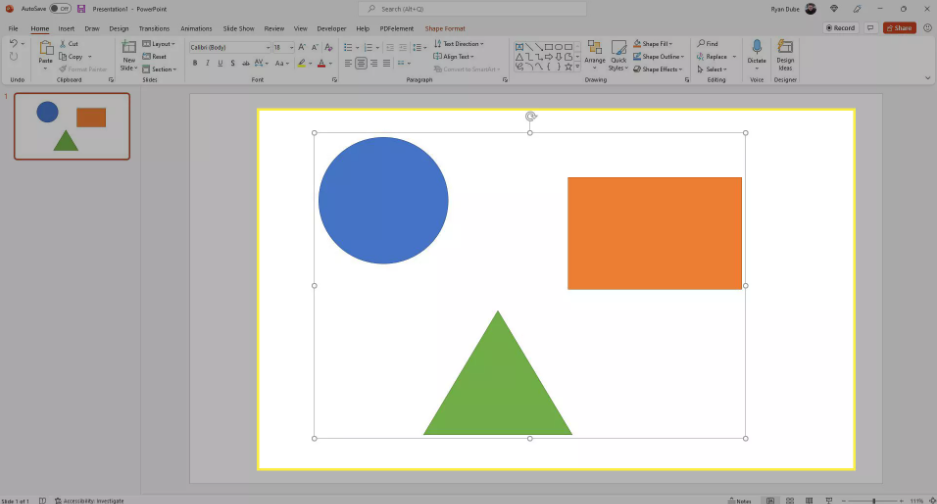
1. Using a keyboard shortcut is PowerPoint’s quickest method for grouping together many objects. To begin, press and hold the Ctrl key while using the mouse to pick each individual object that you wish to include in the group.

2. Once all of the objects have been selected, hit the Ctrl and G keys together. After selecting multiple items, those objects will be combined into a single object that can be manipulated in the same ways as a single object, including being moved, nudged, rotated, and so on.
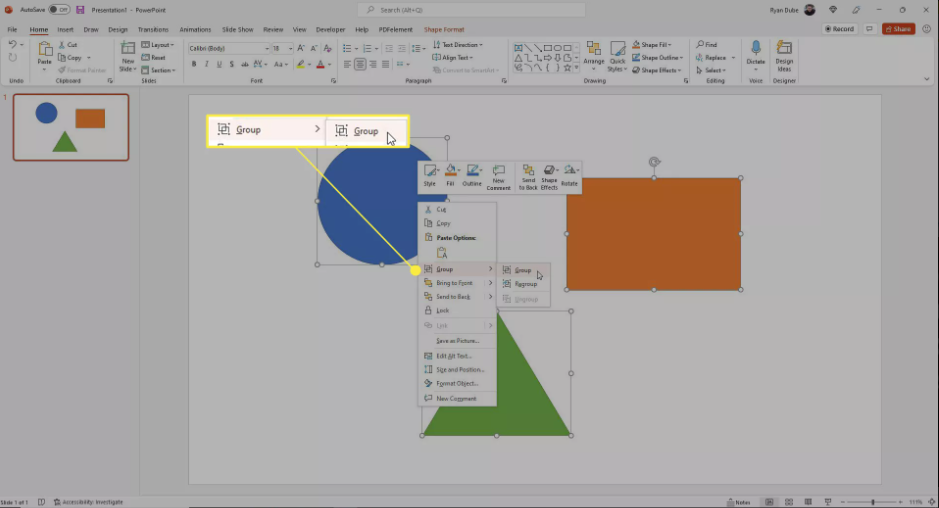
3. To choose all of the objects you want to group, follow the steps from the previous section. When that, select Group from the dropdown menu that appears after you right-click on one of the objects, and then select Group from the sub-menu that appears after that. When you do this, a single grouped box will be created around all of the objects that have been selected.
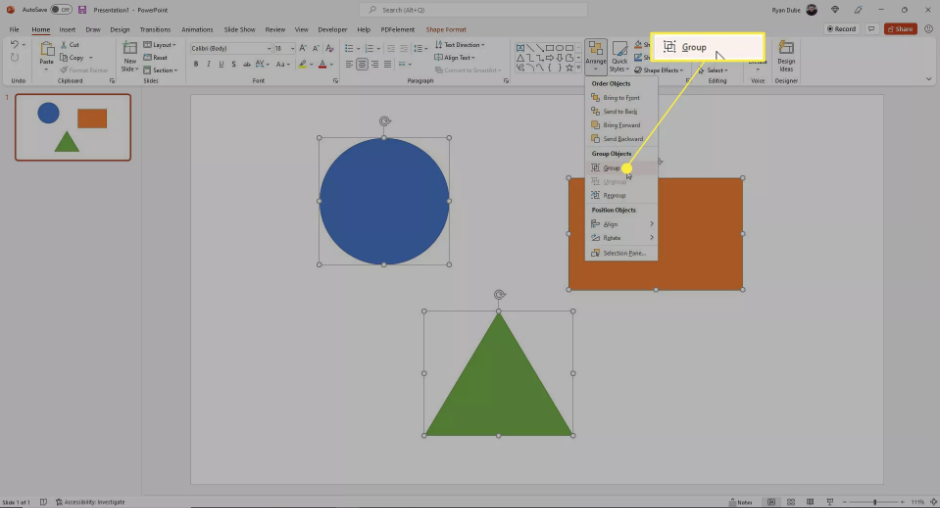
4. Within the ribbon, you will also discover the opportunity to combine together various objects. To accomplish this, pick all of the objects you wish to group together while holding down the Ctrl button. After that, from the menu, click Home, and then from the Drawing area of the ribbon, select Arrange. From the dropdown menu that appears, select Group.
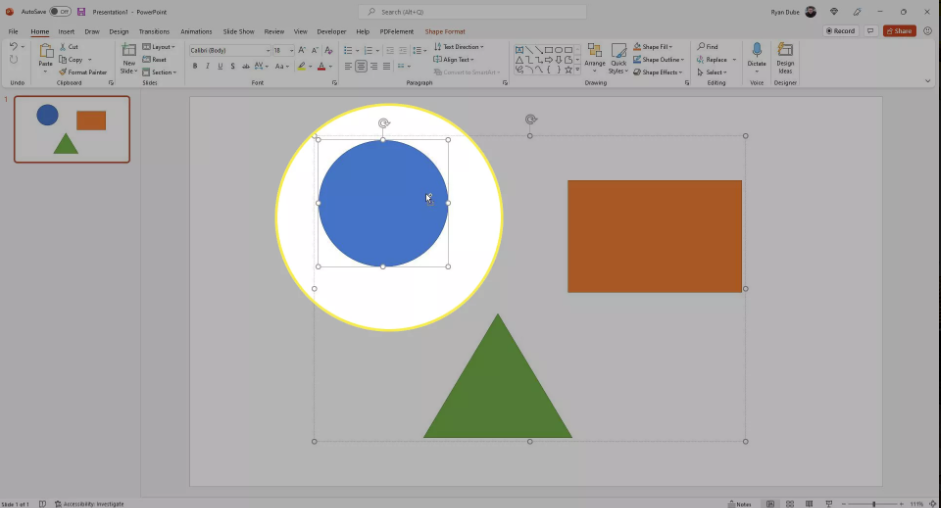
5. When you group things, you can continue edit or modify any individual object within the group even after you have grouped them. To accomplish this, press and hold the left mouse button while selecting the group. After that, you can select an item from within the group by clicking on it. You are now able to resize it, move it, or right-click on it to access a context menu that is exclusive to that object.
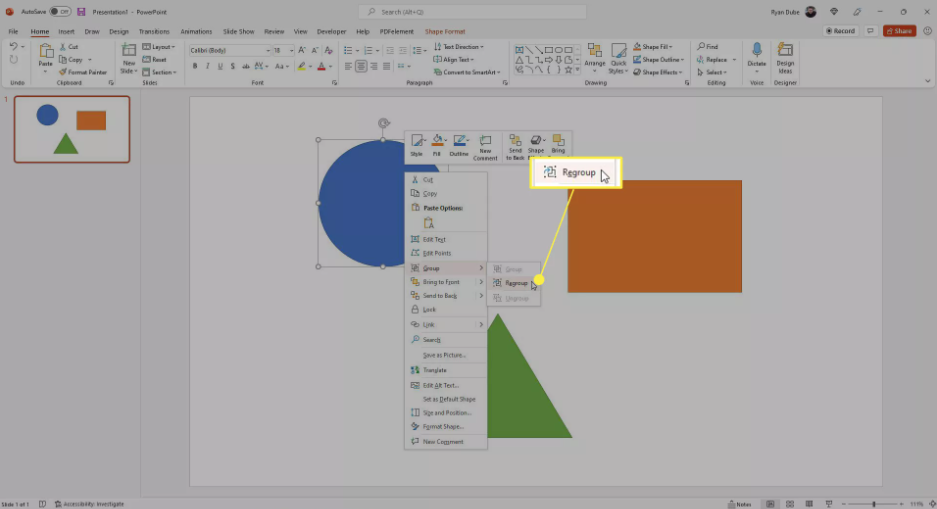
6. If you have previously created a group and then ungrouped its members using one of the techniques described above, you may easily re-create the group by following one simple step. Simply right-click any of the items that were included in the previous group, pick Group from the menu that drops down, and then select Regroup from the submenu that appears. PowerPoint will automatically replicate the last group you made with that object since it remembers the group you made with it the last time you used it.
FAQs
Does PowerPoint allow object grouping?
Each presentation that you create in PowerPoint can contain a number of different elements, such as photographs, shapes, and text boxes. You have the ability to organise the objects in any way that you see fit by aligning, ordering, grouping, and rotating them in different ways.
How do you connect two boxes in Smartart?
If you would like to add more connectors with boxes, you may pick the box, right-click it, and then select Add Shape. From there, you can choose Add Shape After, Before, Above, etc. to insert the boxes with connectors based on your preferences.
How do you connect shapes in SmartArt?
Choose Connector under the Home menu. Move your finger around the outline of a shape until you can make out the points of connection all the way around it. Choose a connection point, and then draw a line to a connection point on the shape you wish to connect to. a connection point. When the forms are successfully joined, the terminals of the connectors turn green.
Is there an app to merge two pictures together?
PicMerger will automatically combine all of your photographs into a single composite image, which can then be saved to your camera roll. PicMerger will automatically combine all of your photographs into a single composite image, which can then be saved to your camera roll. Using PicMerger, you can quickly and painlessly combine a number of photographs into a single image.


