Apple
How to Transfer Photos From iPhone to Mac – Complete Guide

There are a lot of reasons why you would want to transfer your iPhone images to your Mac. For example, insufficient storage space on the iPhone, replacing your iPhone with a new one, swapping, or even selling it are all possibilities. No matter what circumstance you find yourself in, you will want a foolproof way of transferring images from an iPhone to a Mac in order to complete the transfer. It’s possible that you don’t want to lose even a single memory that’s been captured in a photograph. So, here are six tried-and-true techniques for transferring images from your iPhone to your Mac in the most efficient manner possible while preserving all of your data.
How to transfer photos from iPhone to Mac Using Different Methods
Method 1: How to transfer photos from iPhone to Mac Using Commander One App
As a matter of fact, there are several methods for transferring photos from iPhone to Mac, as well as numerous tools that can aid you. Commander One is our top pick since it is both the greatest program for transferring images from an iPhone to a Mac computer and a fantastic file organizer. Your phone’s images may be simply transferred to your Mac using a simple USB connector, which can be found at any office supply store. You have the option of transferring numerous photos to the computer or a single image to the computer.
![]()
Using the Commander One’s panels to connect your iPhone to your Mac through a USB connection, you will be able to access the User / Media folder on your device, allowing you to swiftly transfer or view recently shot photographs and movies.
Detailed instructions on How to transfer photos from iPhone to Mac computer using Commander One are provided below:
1. Download and install Commander One on your Mac.
![]()
2. Connect iPhone to Mac using a USB cable.
3. Locate your iPhone in the Finder sidebar and click on it to open it
4. Click “Trust on this device” in the Finder window and then tap “Trust” on your iPhone.
![]()
5. Connect your phone to your computer once again using the USB cord.
6. Open Commander One. Your iPhone will be mounted as a local drive.
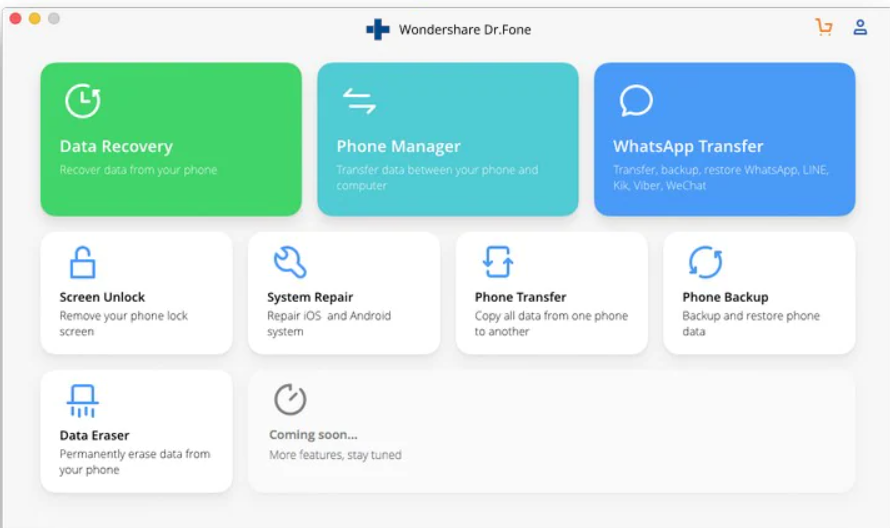
Method 2: Transfer Photos From iPhone to Mac Using Dr.Fone
The Dr.Fone iPhone toolkit is one of the greatest iPhone toolkits accessible on the open app market. This app is much more than a simple tool for transferring images from an iPhone to a Mac. It is handy for much more than that, as it functions similarly to a toolbox for the iPhone. The program, in addition to having a user-friendly but appealing design with little complexity for users, also delivers the most control over your iPhone available on the market. Dr.Fone is a program that may be used to recover deleted data from an iPhone. It may be used as a simple backup and restore tool, as well as an erase tool. It is capable of transferring images from an iPhone to a Mac as well as transferring data from an old iPhone to a new one. It also has the capability of removing the lock screen from an iPhone, repairing any iOS system-related difficulties, and even rooting your iPhone if necessary. Dr.Fone – Phone Manager (iOS) is also a great application for transferring images from an iPhone to a Mac without the need to utilize the iTunes software.
1. Download the Mac version of Dr.Fone software. Install the software on your Mac and launch it. Then choose “Phone Manager” from the main interface.
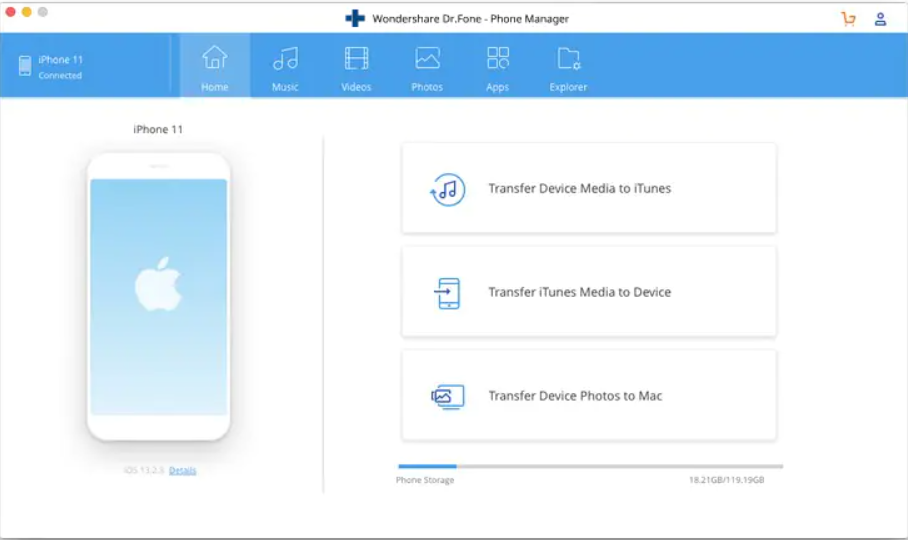
2. Connect your iPhone to your Mac by connecting it with a USB connection. Once your iPhone is connected, choose “Transfer Device Images to Mac” from the drop-down menu. This will allow you to transfer all of the photos on your iPhone to your Mac with a single click.
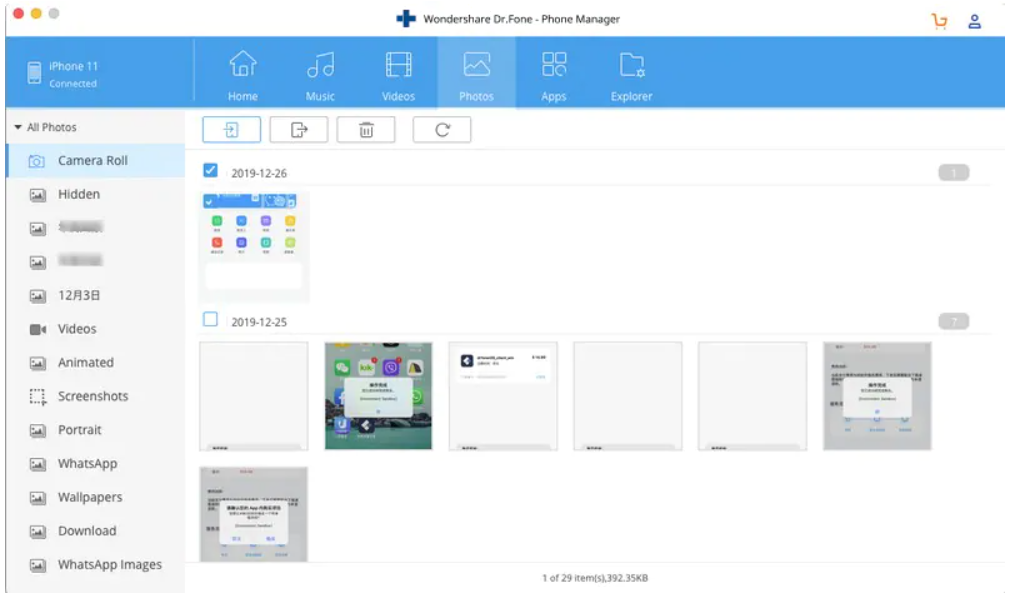
3. Using Dr.Fone, there is still another technique to selectively transfer images from your iPhone to your Mac computer. Navigate to the Photos tab at the top of the screen. Dr.Fone will organize all of your iPhone images into folders for easy access. Select the photographs you wish to export and then click the Export button on the toolbar.
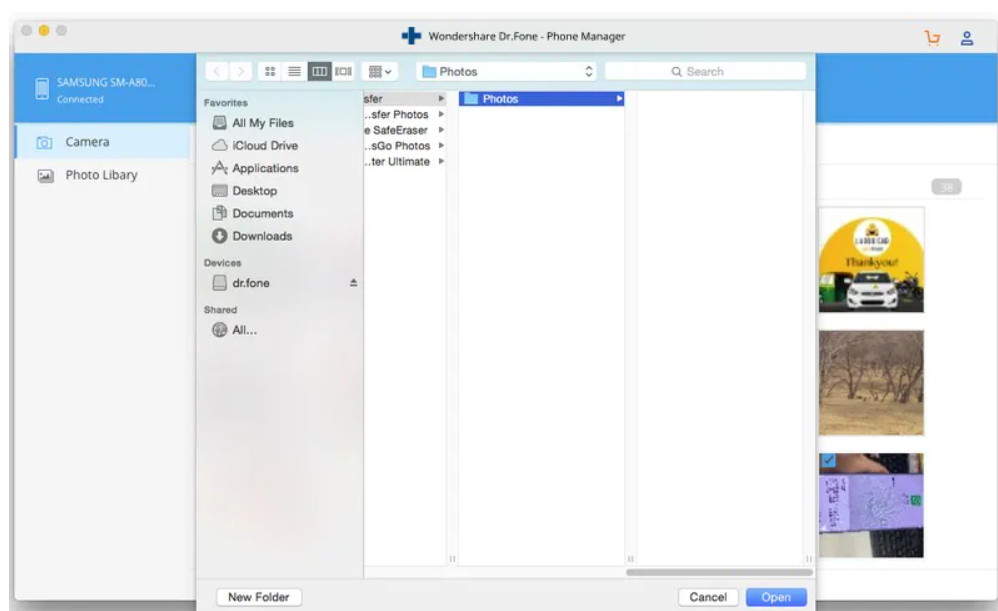
4. After that, choose a location on your Mac where you want to keep the exported iPhone images.
Method 3: Import photos from iPhone to Mac using iPhoto
Even though it is limited to copying photographs from your device’s camera roll folder, iPhoto is another app that iPhone users often use to transfer photos from iPhone to Mac as a simple alternative to the difficult iTunes. On Mac OS X, iPhoto is often preloaded, thus there may be no need to download and install it. The procedures for transferring images from an iPhone to a Mac using iPhoto are listed below.
1. Connect your iPhone to your Mac via USB connection; iPhoto should instantly run and show photographs and movies from your iPhone. If iPhoto does not open automatically, open it and choose “Preferences” from the “iPhoto” menu, then “General Setting,” then “Connecting Camera Opens,” and finally “iPhoto.”
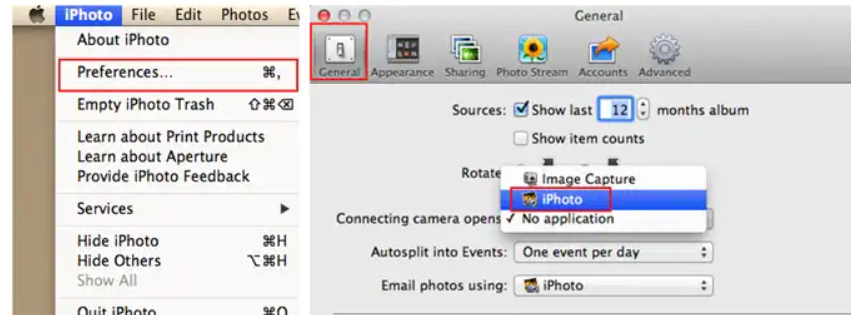
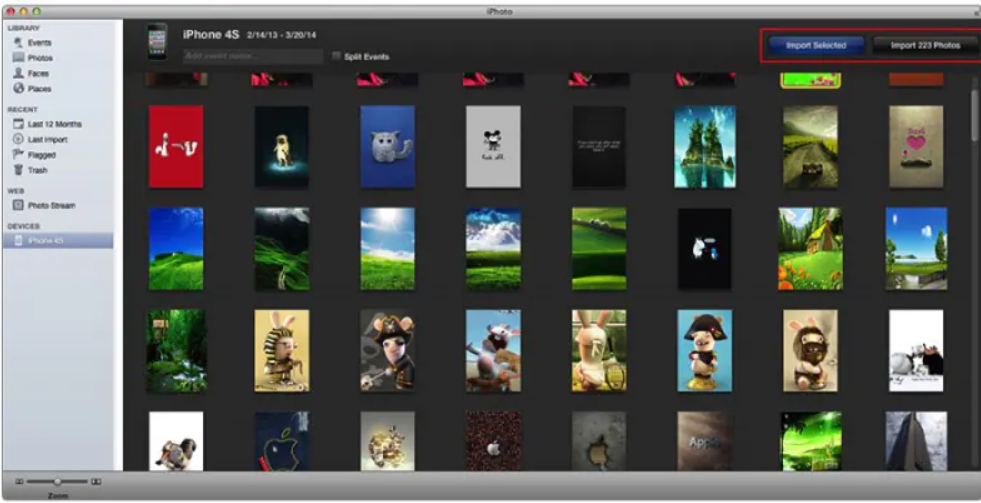
2. Select the photographs to be imported from your iPhone and tap “import selected” or “import all” after they have been presented.
Method 4: Transfer photos from iPhone to Mac using AirDrop
Another Apple-provided program that may be used to transfer photographs from iPhone to Mac is Airdrop. This app became available as part of the iOS 7 update and allows users to exchange files across iOS devices, as well as transfer images from an iPhone to a Mac.

1. Go to Settings on your iPhone and switch on Wi-Fi and Bluetooth as well. Switch on Wi-Fi on the Mac by clicking on the Menu bar and selecting Wi-Fi. Turn on the Mac’s Bluetooth as well.
2. Slide up to reveal “Control center” on your iPhone, then tap “Airdrop.” Choose between “Everyone” and “Contacts Only.”
3. Open the Finder on your Mac and pick “Airdrop” from the “Go” option in the Menu bar. To share, go to “Allow me to be found” and choose “Everyone” or “Contact Only,” just like you would on the iPhone.
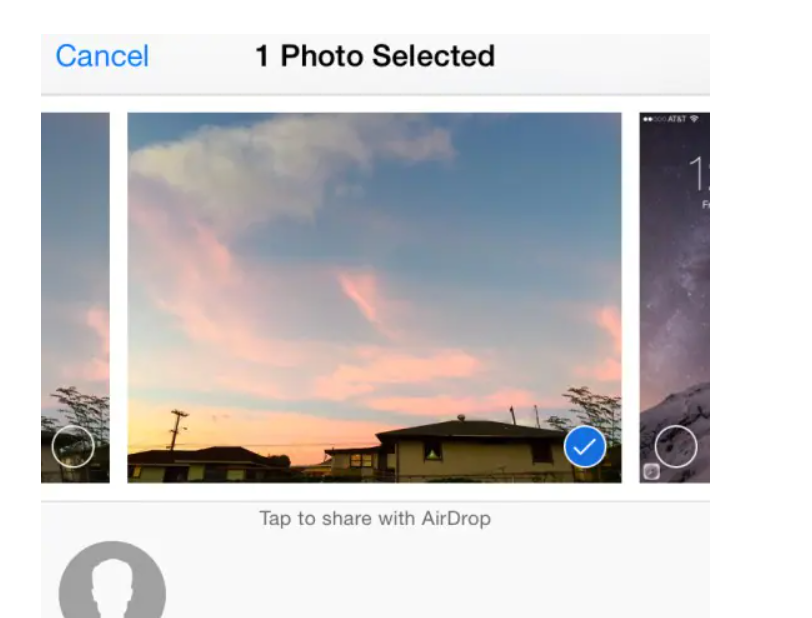
4. Navigate to the location on the iPhone where the picture to be transferred to Mac is stored, and choose the photo (or many photographs).
5. Pick “tap to share using Airdrop” from the Share menu on your iPhone, then select the name of the Mac to be transferred to. A popup to accept the transmitted file will appear on the Mac; click accept.
Method 5: Import photos from iPhone to Mac using iCloud Photo Stream
iCloud Photo Stream is an Apple iCloud feature that allows users to upload images to their iCloud account and access them from any Apple device at any time. Here’s how to use iCloud Photo Stream to transfer photographs from your iPhone to your Mac:
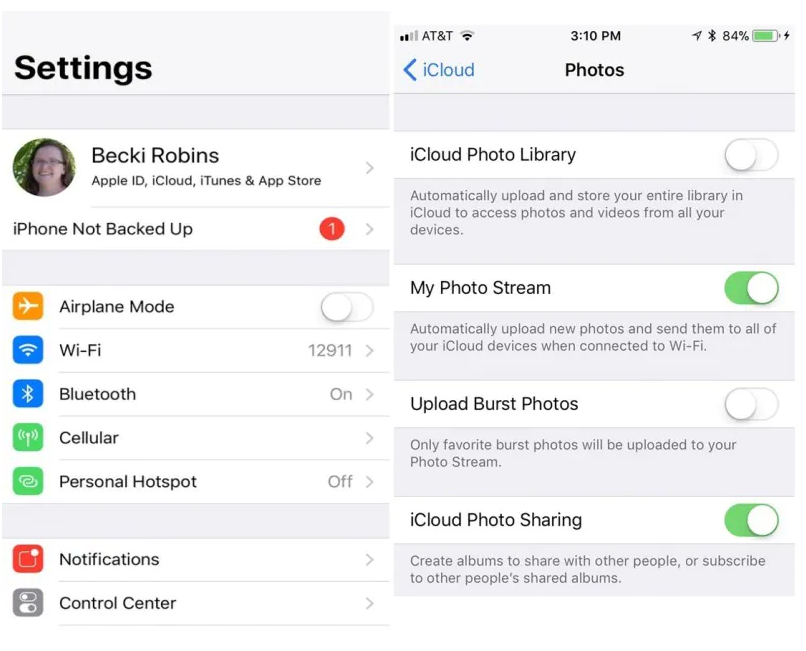
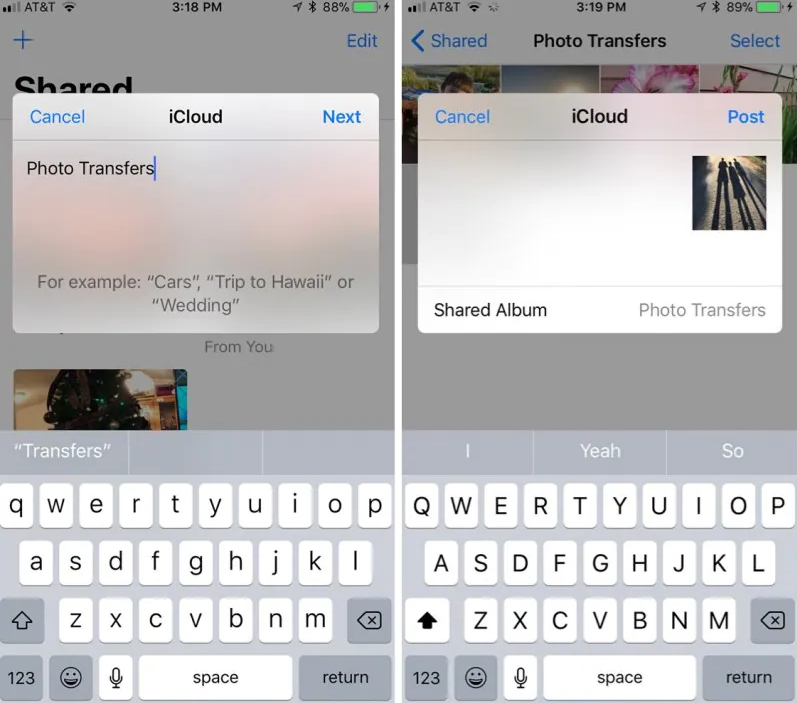
1. On your iPhone, go to Settings and choose your Apple ID or name. On the following screen, tap iCloud and select “My Photo Stream” from the Photos menu.
2. From the Photo app, create a shared folder and then choose Next. To add images to the newly created album folder, click on the “+” symbol and then pick “Post.”
3. Open Photos on your Mac and go to the “Photos” menu, then to “Preferences.” To bring up a settings window, choose iCloud. Make sure the option “My Photostream” is selected.
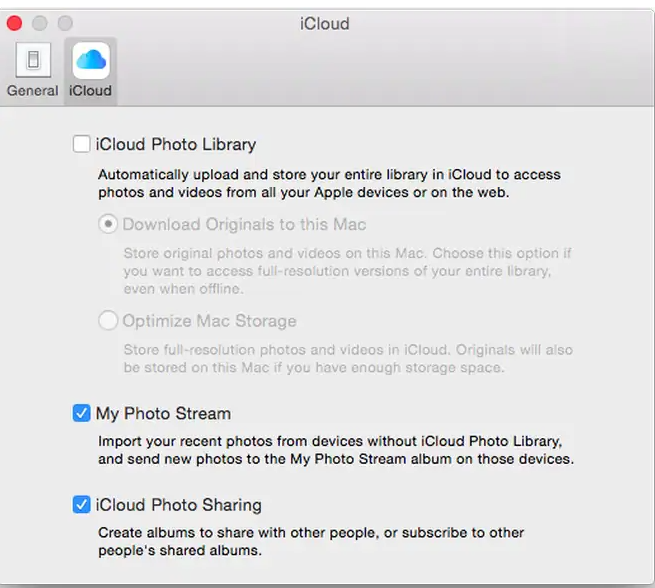
4. Albums that have been generated may be viewed and readily accessed and transferred to your Mac storage on the “My Photostream” page.

Method 6: Transfer photos from iPhone to Mac using iCloud Photo Library
iCloud Photo Library is very similar to iCloud Photo Stream, with the exception that iCloud Photo Library uploads all of the photographs on your smartphone to iCloud.
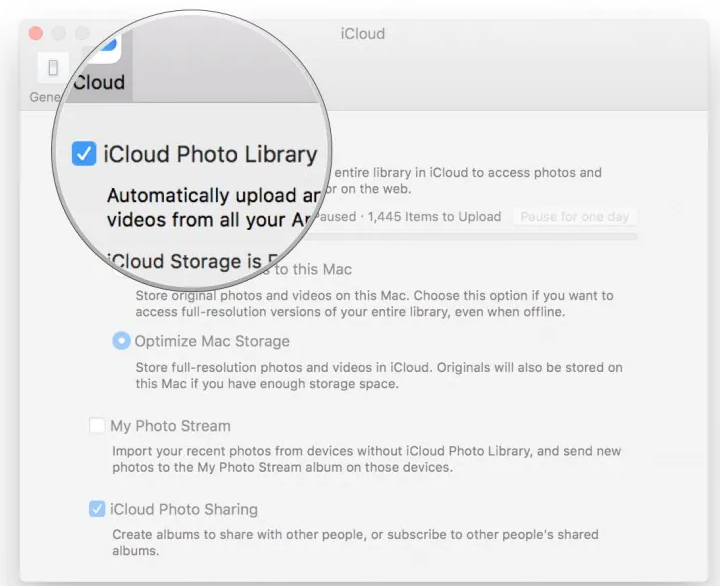
1. Open your iPhone’s Settings app, tap your Apple ID or name, tap iCloud, and check “iCloud Photo Library.” All of your images would begin to upload to the servers associated with your iCloud account.
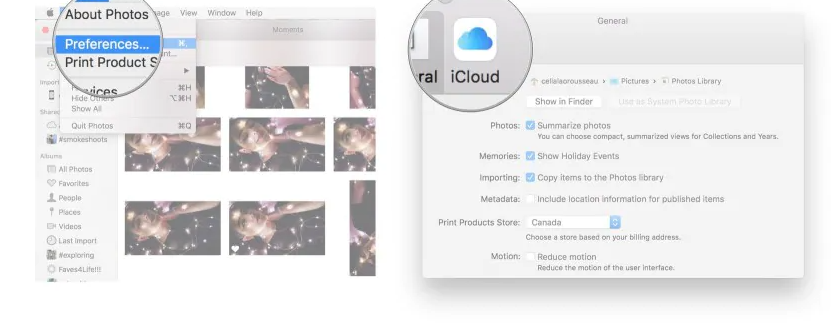
2. Open Photos on your Mac and choose the Photos tab. Select “iCloud” from the “Preferences” menu in the Options Menu.
3. On the new window, check the “iCloud Photo Library” option. You can now view all uploaded photos on your Mac and choose to Download.
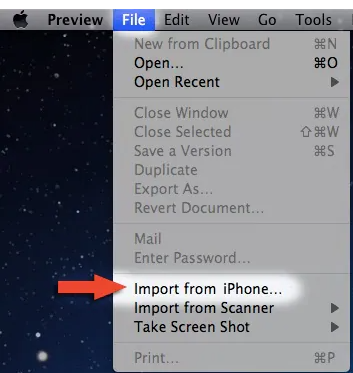
Method 7: Download photos from iPhone to Mac using Preview
Another built-in Mac OS tool that may be used to import images from an iPhone to a Mac is Preview.
1. Use a USB cord to connect your iPhone to your Mac.
2. Open the Preview app on your Mac and go to the file menu and choose “Import from iPhone.”
3. All photos on your iPhone would be displayed to be chosen from or click on “Import all.”
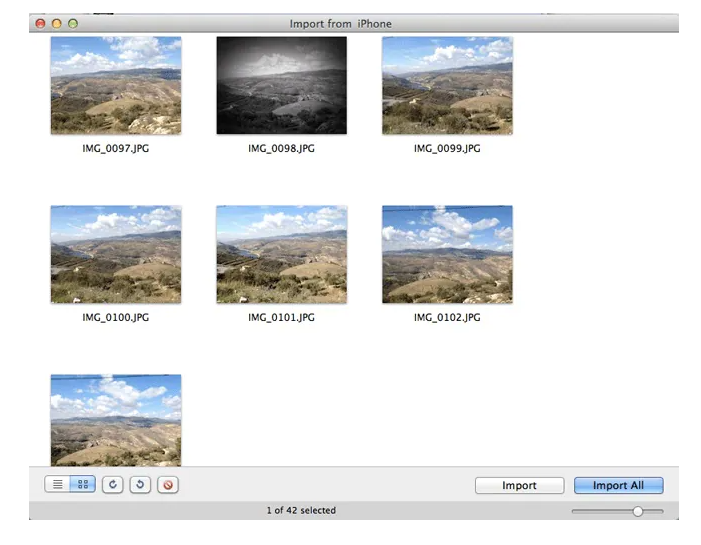
A new pop-up window would appear, asking for a destination place for the photographs to be imported to. Navigate to the chosen location and choose “choose destination.” Your photos would be imported right away.
There are many techniques and ways to transfer images from an iPhone to a Mac, all of which are easily accessible. It is usually a good idea to back up your device images from time to time in order to preserve photographic memories that may be difficult to recover if they are lost. Dr.Fone – Phone Manager (iOS) is the finest option for transferring images from iPhone to Mac because of its versatility and lack of limitations.
FEATURED Video
People Also Asked : How to screenshot on Mac Without Keyboard – Tips and Tricks

Vampire Crawlers Coin Farming Guide

Forza Horizon 6 Performance: Why 60 FPS Is Still the Console Standard

Yoshi and the Mysterious Book (2026) – Full Completion Guide, Rewards & Secret Ending

How to Get Free Pets in Adopt Me: A Guide for Players

Roblox Username Generator – Create a Cool & Unique Username in Seconds
How to Get Free Pets in Adopt Me: A Guide for Players

Grow a Garden Recipes in Roblox: Guide to Cook (Donuts, Sushi, Pie, Pizza & More!)
Roblox Username Generator – Create a Cool & Unique Username in Seconds
Yoshi and the Mysterious Book (2026) – Full Completion Guide, Rewards & Secret Ending


