Gaming
How to Make Signs in Minecraft
The players are able to leave messages for one another or the guidelines for an adventure map on signs and banners in Minecraft, which is the primary use of these elements. It is also possible to utilize banners and signs as ornamental things that can be used to beautify your home or alert gamers about harmful locations. These signs and banners can be used in both of these ways.
In Minecraft, signs allow you to put text directly into the sign, and once you’re done, the writing appears for everyone else to see as well. During this round of the crafting process, you will produce three signs simultaneously.
Read Also: How To Make A Spyglass in Minecraft
Required Materials for Sign
- 6 wooden planks
- 1 stick
In order to acquire wooden planks, you will need to collect logs or wood of any variety from the following trees: oak, birch, spruce, dark oak, acacia, and jungle. The process of acquiring a log in its most fundamental form is unchanged. You start by locating a suitable tree. Put on your axe, then use your left mouse button to click and hold on a section of the tree’s trunk.
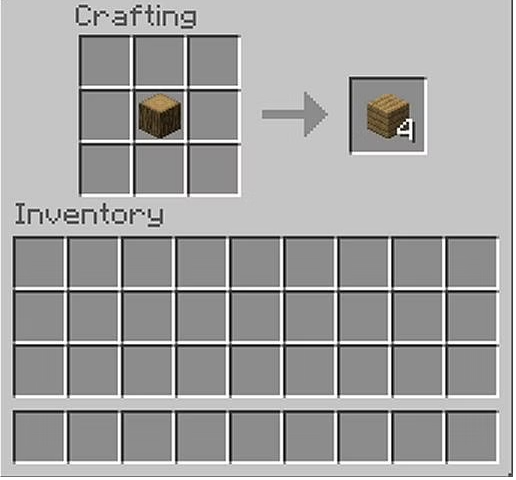
You can also do it by hand, albeit the speed at which you chop will be much slower with your hand. The log will break off in the form of a block. Grab hold of it. Proceed to the 3×3 grid that is located at the crafting table. Put the log in the middle of the circle. This will result in the production of four oak boards similar to those shown in the following picture:
Sticks:
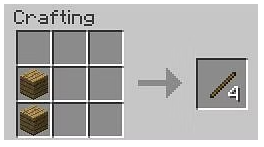
In Minecraft, a stick is a very important simple object that can be fashioned into a variety of different things throughout the game. Due to the fact that they cannot be placed in the environment or used independently, they are only utilized as a resource for crafting. The following is the crafting method that will result in the production of 4 sticks at a time:
How to Make Sign in Minecraft?
In a Nutshell:
In Minecraft, you will need to access the crafting table that is made up of a 3×3 grid in order to build a Sign. On the top two rows of the crafting table, arrange a total of six wood planks. After that, insert a stick into the opening in the bottom middle. Using this method will result in the creation of three different signs, each of which can be independently positioned and changed. After it has been crafted, you can easily add it to your inventory by clicking on it and dragging it there.
Step-by-Step Guide(with Pictures):
In order to successfully create signs in Minecraft, please refer to the following illustrated instructions in step-by-step format:
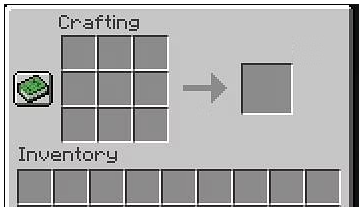
Open the crafting table:
To begin making the shears out of the materials you have gathered and are currently stockpiling in your inventory, open up your crafting table. When you first open your crafting table, you will see a 3×3 grid that looks very much like the one in the following picture:
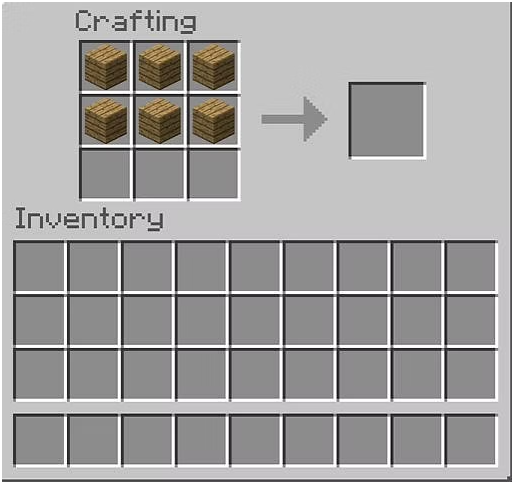
Place the planks:
Planks made of wood should be placed in the first two rows of the crafting grid.
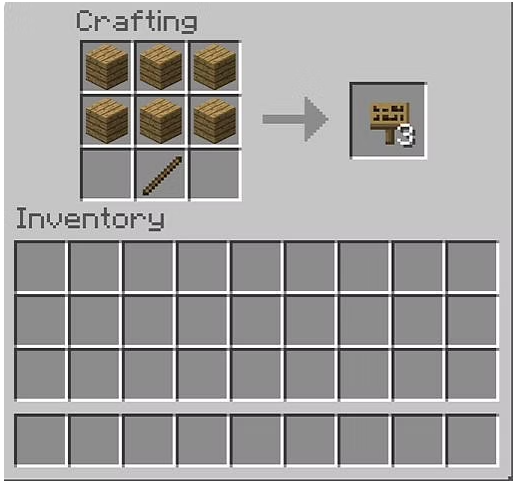
Place sticks:
After the boards have been arranged in the manner depicted in the image above, a stick should be added. It is recommended that the stick be placed in the second space of the third row. If the positioning isn’t done precisely how it’s illustrated here, the object won’t be built successfully.
Place it in your inventory:
To add it to your inventory, simply drag it there, and then position it around your base.

Video

Vampire Crawlers Coin Farming Guide

Forza Horizon 6 Performance: Why 60 FPS Is Still the Console Standard

Yoshi and the Mysterious Book (2026) – Full Completion Guide, Rewards & Secret Ending

How to Get Free Pets in Adopt Me: A Guide for Players

Roblox Username Generator – Create a Cool & Unique Username in Seconds
How to Get Free Pets in Adopt Me: A Guide for Players
Yoshi and the Mysterious Book (2026) – Full Completion Guide, Rewards & Secret Ending
Forza Horizon 6 Performance: Why 60 FPS Is Still the Console Standard


